What is Brave Browser?
Brave Browser is a privacy-focused web browser that blocks ads, trackers, and fingerprinting attempts by default. With its Shields feature, Brave provides a secure browsing experience while allowing users to customize their privacy settings. By combining Brave Browser with Toolip, you gain an extra layer of anonymity, unrestricted access to geo-blocked content, and improved security. This setup ensures a private, ad-free, and seamless browsing experience. Prefer an enterprise-grade guide? Learn more about Oculus Proxies Brave Browser Integration Guide.How to Integrate Toolip with Brave Browser
1
Install Brave Browser
1. Download and install Brave Browser on your device.2. Launch Brave once the installation is complete.
2
Access Browser Settings
1. Open Brave.2. Click the three-dot menu in the top-right corner.3. Select Settings.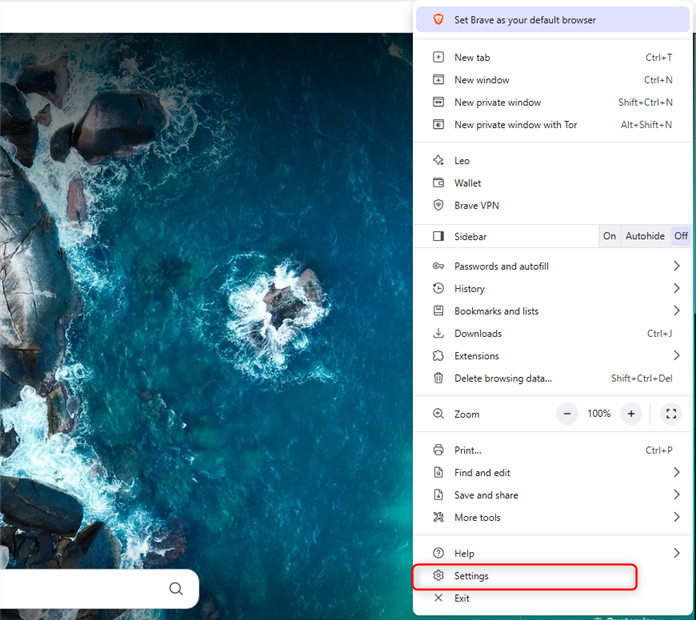
3
Navigate to System Settings
1. In the left sidebar, click System.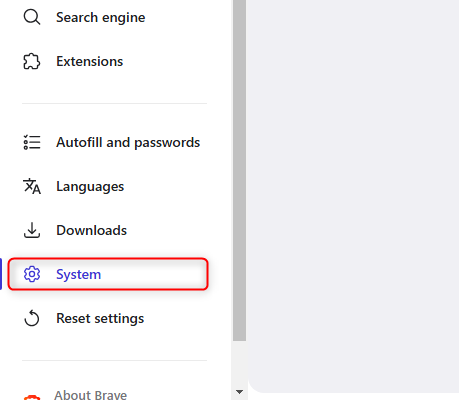
4
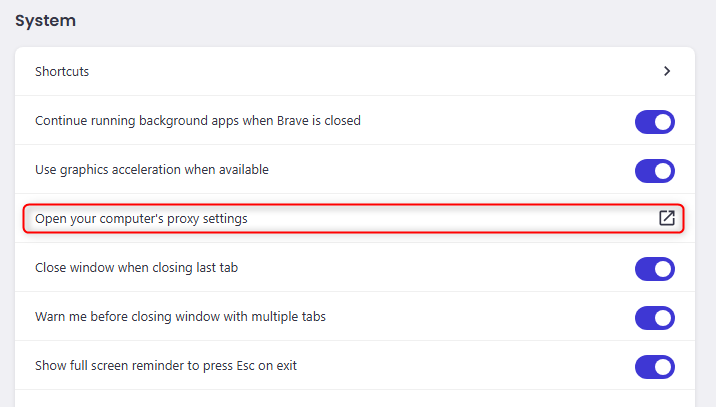
Set Up Proxies in Your Operating System
Brave uses your system-wide proxy settings, so you’ll need to configure your proxies at the OS level. Follow the detailed setup guide based on your operating system:
- Windows
- macOS
Follow the complete Windows proxy setup guide to configure Toolip proxies on your system.
5
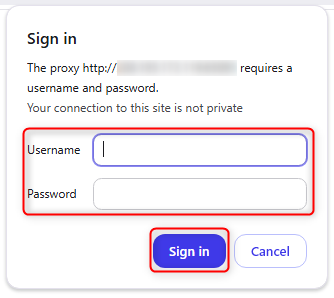
Authenticate the Proxy in Brave
1. Open Brave and visit any website.2. A pop-up will appear requesting authentication.3. Enter your Toolip Username and Password.4. Click Sign in.