
Setting Up Toolip on macOS
1
Open Network Preferences
1. Click the Apple menu in the top-left corner.2. Select System Settings (or System Preferences on older macOS versions).3. Choose Network and select the connection you want to configure (e.g., Wi-Fi or Ethernet).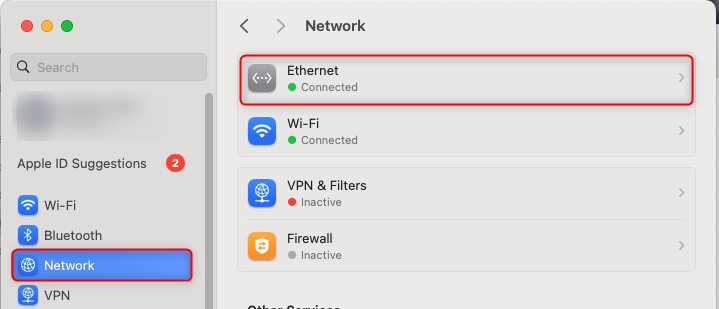
2
Access Advanced Proxy Settings
1. Click the “Details…” button in the top-right corner of the Network pane.2. In the new window, select the Proxies tab.
3
Select Proxy Type
Check the box next to the proxy protocol you need to configure: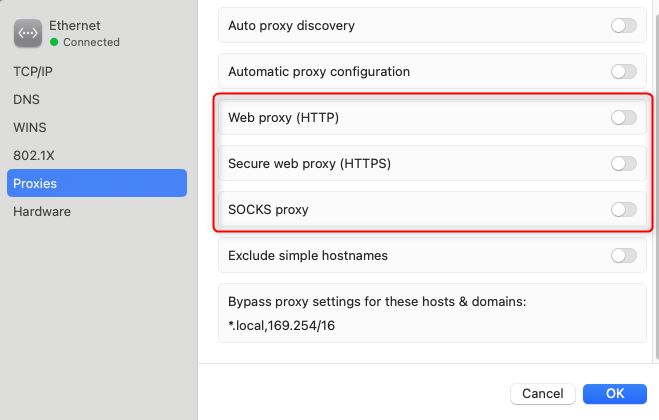
- HTTP or HTTPS → Select Web Proxy (HTTP) or Secure Web Proxy (HTTPS).
- SOCKS5 → Select SOCKS Proxy.
If you’re not sure - choose HTTP
4
Enter Your Toolip Proxy Details
1. Server: Enter 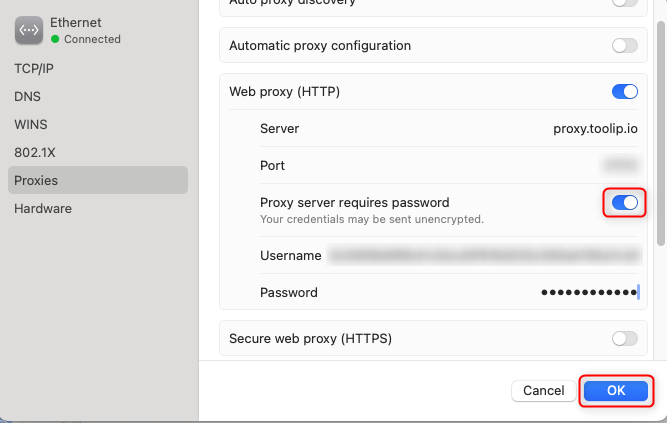
proxy.toolip.io.2. Port: Input the port number from your Toolip dashboard.3. Enable Authentication: Check Proxy server requires password.4. Username and Password: Input your Toolip credentials.5. Click OK to save the settings.For geo-targeted proxies, modify your username as
your-username-country-XX (e.g., your-username-country-US).5
Test Your Proxy Connection
1. Open a browser like Safari or Chrome.2. Visit httpbin.org/ip to check your IP.3. If the displayed IP matches your Toolip proxy, your macOS traffic is now routed securely through Toolip.