What is Lalicat?
Lalicat is a privacy-focused anti-detection browser designed for managing multiple online accounts securely. By creating isolated browser profiles with unique digital fingerprints—including IP addresses, device configurations, and cookies—Lalicat helps prevent tracking and account bans. It’s the perfect tool for marketers, e-commerce sellers, social media managers, and web scrapers who need to operate multiple accounts without detection. Prefer an enterprise-grade guide? Learn more about Oculus Proxies Lalicat Integration Guide.How to Integrate Toolip With Lalicat
Download and Install Lalicat
1. Visit the Lalicat website and download the application.
2. Install Lalicat and log in with your account credentials.
Create a New Browser Profile
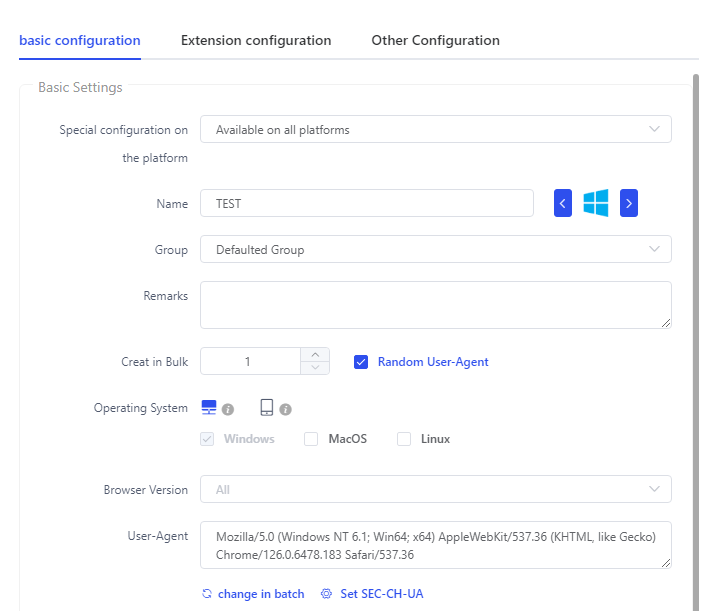
1. On the Lalicat home screen, click +Add Browser to create a new profile.


- Entering a Profile Name for easy identification.
- Selecting the Operating System (Windows or macOS).
- Adjusting any additional settings based on your needs.

Configure Your Toolip Proxy
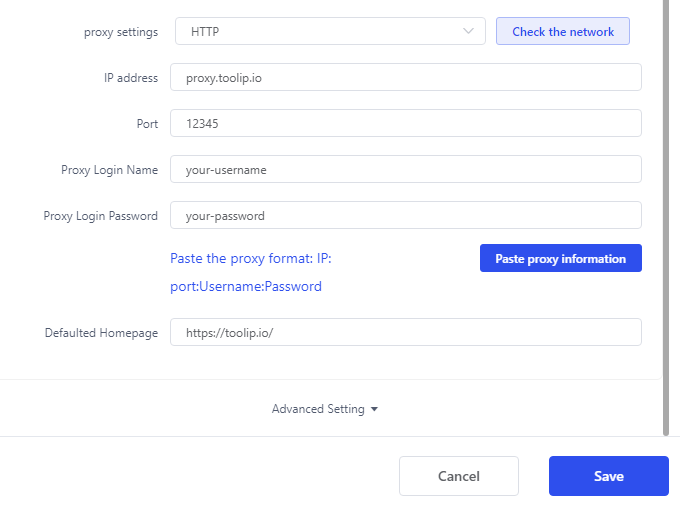
1. Scroll down to the Proxy Settings section.
2. Enter your Toolip proxy details:
-
Proxy Settings: Select
HTTP,HTTPS, orSOCKS5depending on your proxy type. -
IP Address:
proxy.toolip.io - Port: Retrieve the correct port number from your Toolip dashboard.
- Username: Enter your Toolip proxy username.
- Password: Enter your Toolip proxy password.

For geo-targeted proxies, modify your username format to
your-username-country-XX (e.g., your-username-country-US) to route traffic through a specific region.