 Prefer an enterprise-grade guide? Learn more about Oculus Proxies Chrome Proxy Setup.
Targeting search engines like Google, Bing, or Yandex requires a specialized proxy to ensure stable access and avoid blocks. Toolip’s Search Engine ISP Proxies are designed specifically for this, providing reliable performance where standard proxies may fail. If your proxy test isn’t working on search engines, switching to Search Engine ISP Proxies can resolve the issue.
How to Change Proxy Settings in Chrome
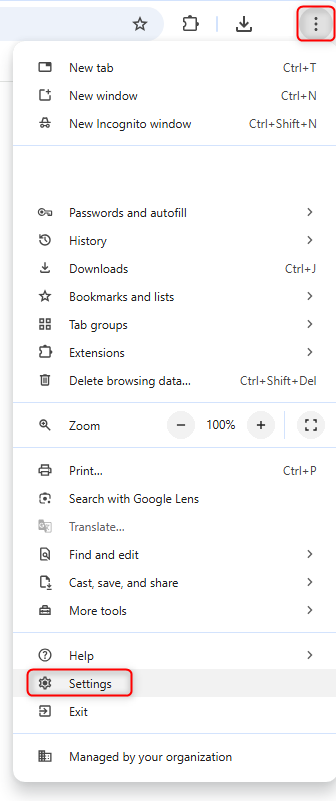
Open Chrome Settings
1. Launch Google Chrome.2. Click the three-dot menu in the top-right corner.3. Select Settings from the dropdown. Navigate to System Proxy Settings
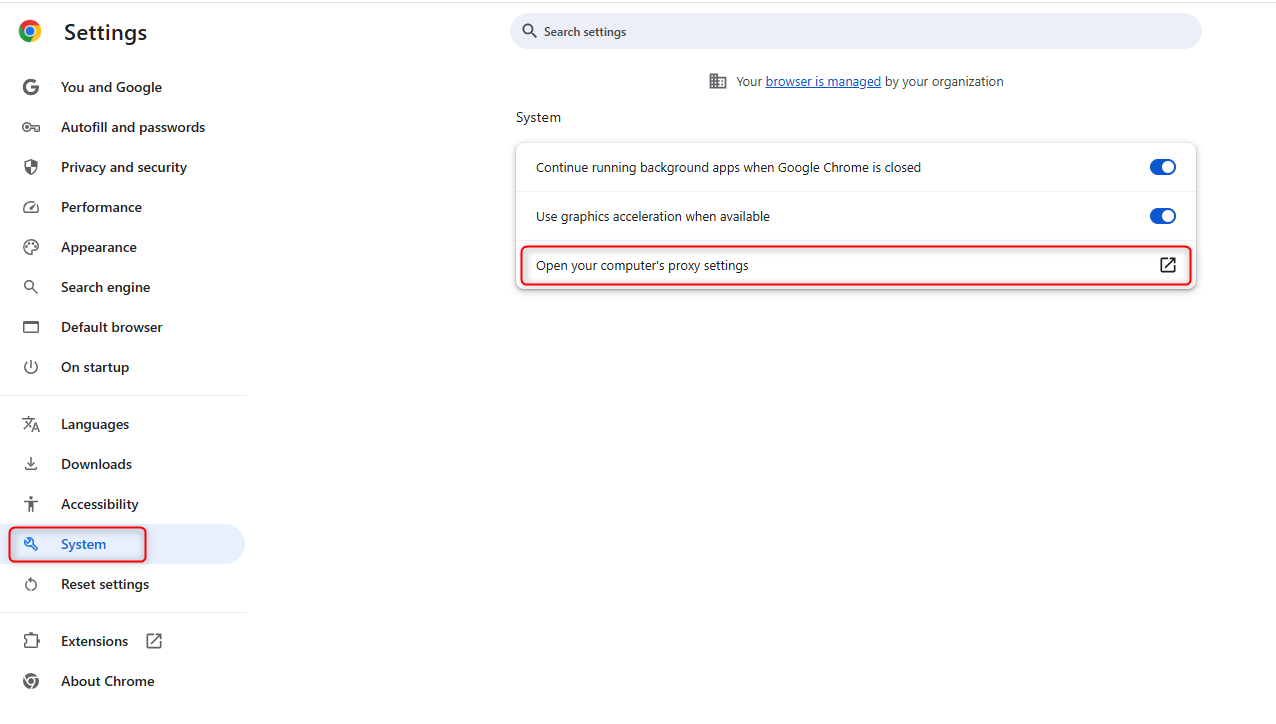
1. Scroll down and click System in the left-hand menu.2. Click Open your computer’s proxy settings. Configure Proxies in Your Operating System
Since Chrome relies on your operating system’s proxy settings, follow the respective guide to complete the setup:Follow the step-by-step guide for Windows proxy configuration here. Follow the step-by-step guide for macOS proxy configuration here. 


