What is MuLogin?
MuLogin is a multi-profile browser management tool that helps you run multiple online accounts without them interfering with each other. It’s designed to protect your privacy, prevent detection, and streamline your digital operations. With MuLogin, you can handle multiple sessions seamlessly—perfect for managing e-commerce stores, social media profiles, and other online projects. Prefer an enterprise-grade guide? Learn more about Oculus Proxies Mulogin Integration Guide.How to Integrate Toolip with MuLogin
1
Access the MuLogin Dashboard
1. Visit MuLogin and sign in to your account.2. Once logged in, you’ll see your dashboard with existing browser profiles (if any).
2
Create or Edit a Browser Profile
1. If you need a new profile, click Quick create.2. If you want to modify an existing profile, select it from the list and click Edit, Settings, or the gear icon—the exact naming may vary based on MuLogin’s current UI.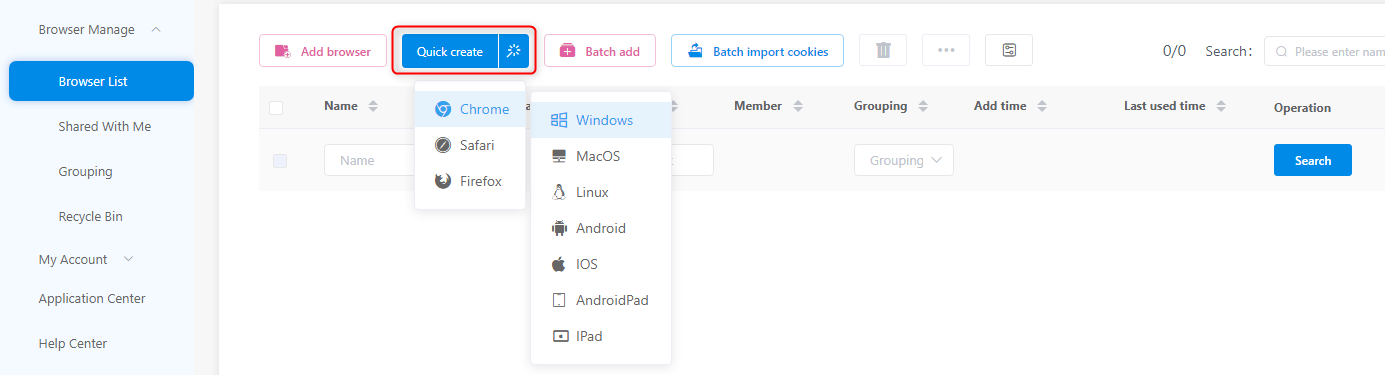
3
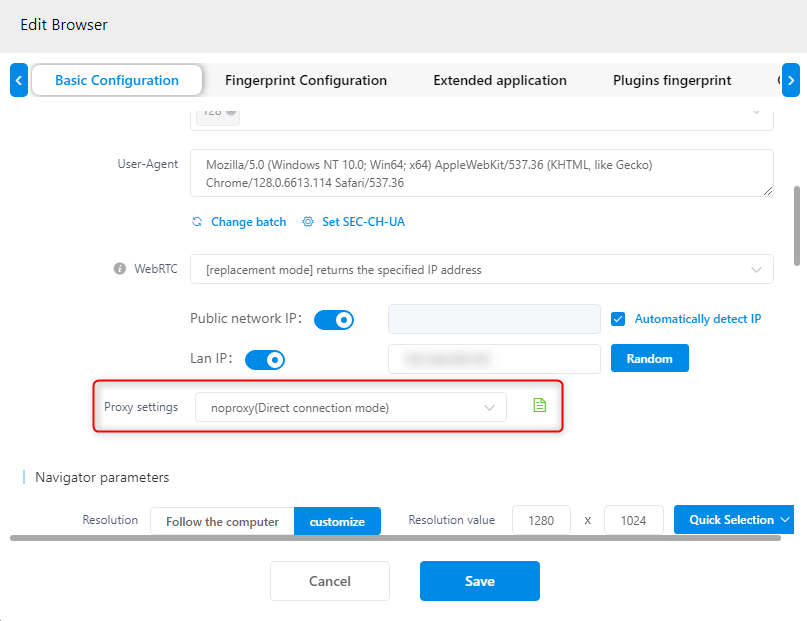
Assign a Display Name and Access Proxy Settings
1. On the profile configuration page, under Basic Configuration, find the Display Name field and enter a clear, recognizable name.2. Scroll down to locate the Proxy Settings option and click to open the proxy configuration window.
4
Input Your Toolip Proxy Details
1. Choose the correct Protocol/Type (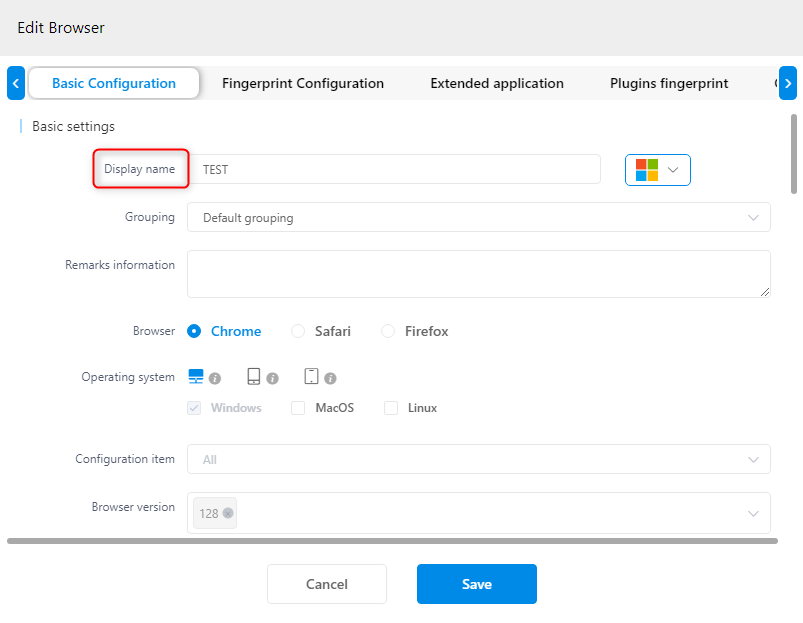
HTTP, HTTPS, or SOCKS5).2. Host: Enter proxy.toolip.io.3. Port: Use the port number from your Toolip dashboard.4. Username & Password: Input your Toolip credentials. If you need a specific region, format your username as your-username-country-US.5. Click Check the network or Test Proxy to verify the connection.6. If the test is successful, click Save to confirm the setup.5
Launch the Browser Profile and Verify
1. After saving, launch the profile from your MuLogin dashboard.2. Inside the browser, navigate to httpbin.org/ip to verify that the displayed IP matches your Toolip proxy.3. If the IP matches, your MuLogin profile is successfully using Toolip proxies.