How to Change Proxy Settings in Firefox

Take control of your Firefox browsing experience! Setting up proxies is easy—just follow these clear steps to get started:

Step 1. Access Firefox Settings

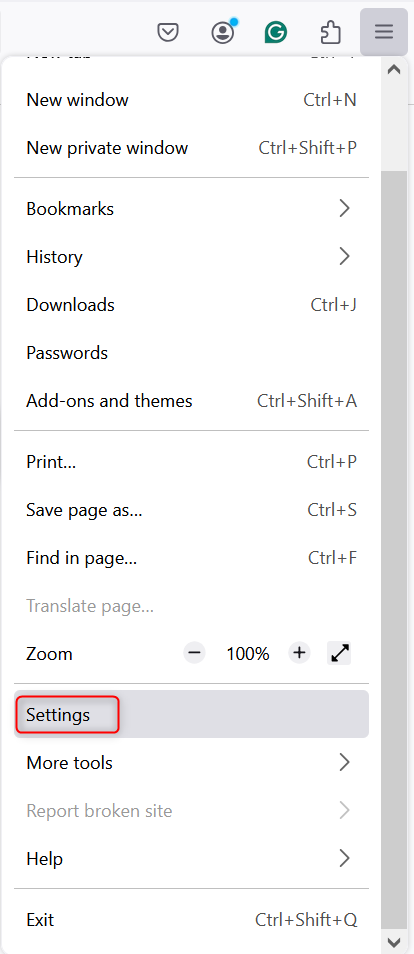
1. Open Firefox and click the menu icon (three horizontal lines) in the top-right corner.

2. From the dropdown, select Settings to open the browser configuration menu.

Step 2. Open Network Settings

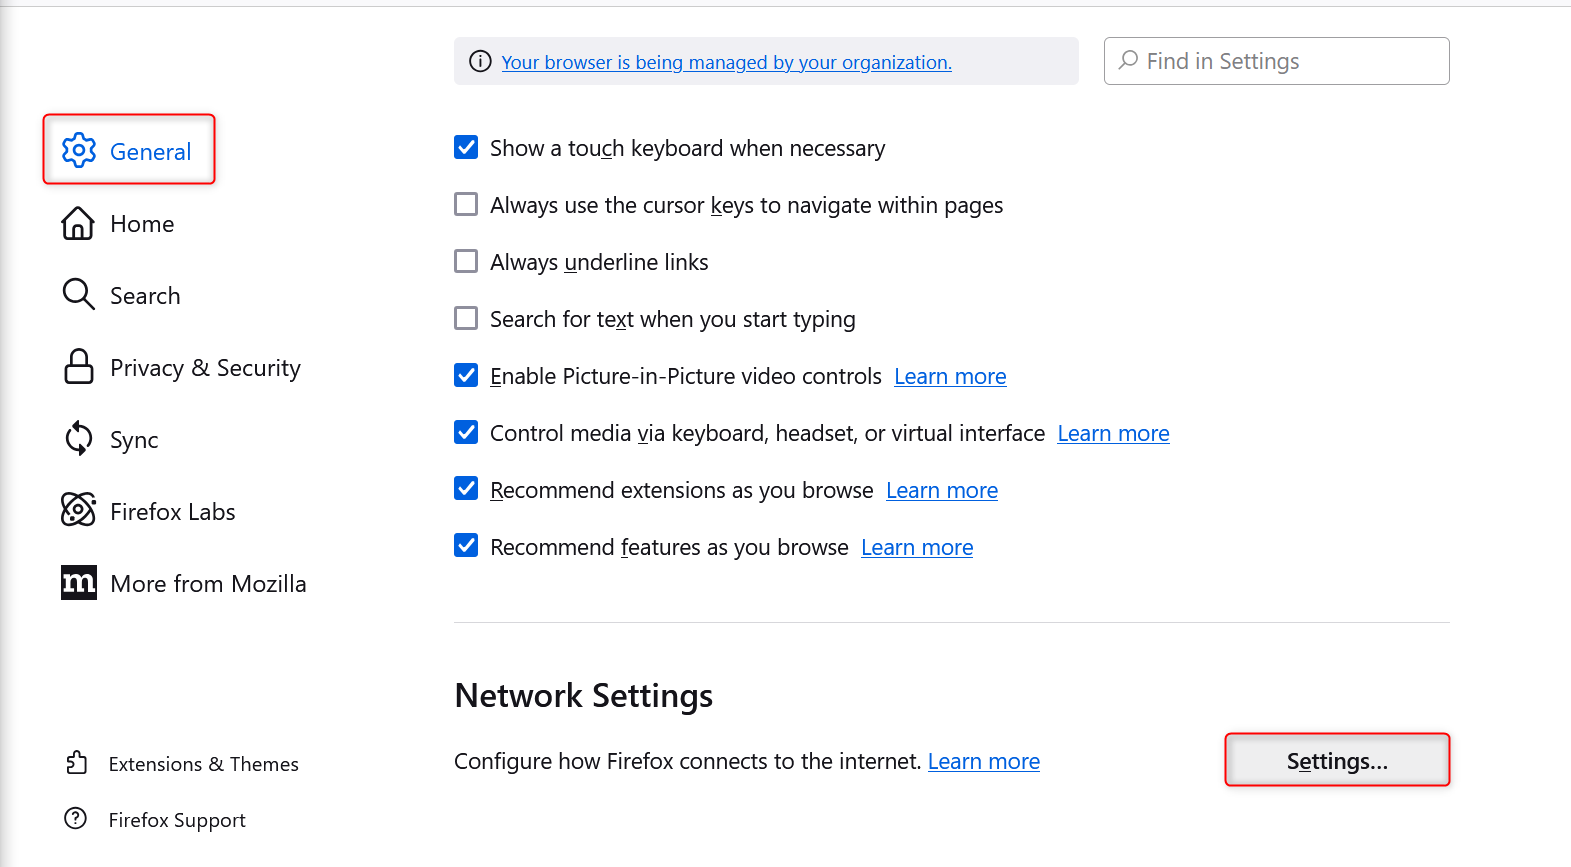
1. Scroll down within the Settings page until you find the Network Settings section.

2. Click on Settings to open the proxy configuration panel.
Step 3. Configure Proxy Details

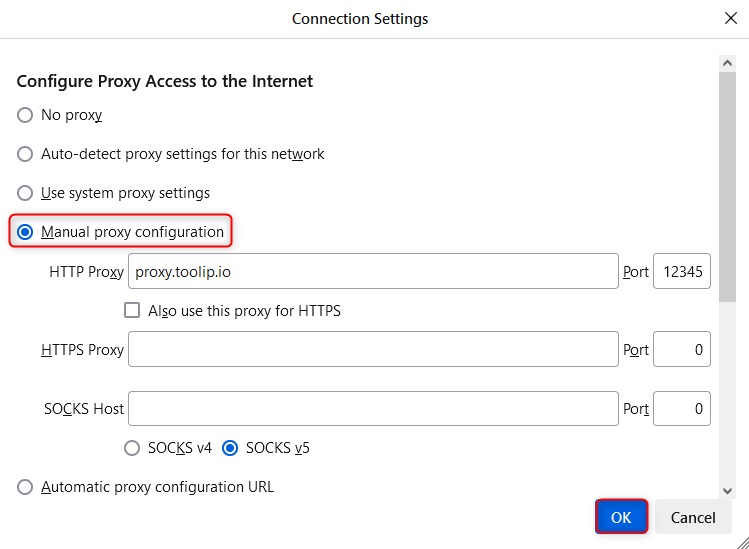
1. In the Network Settings window, select Manual proxy configuration to enable custom proxy settings.

2. Fill in your Toolip proxy details:

  • HTTP Proxy: Enter proxy.toolip.io.

  • Port: Use the port number provided in your Toolip dashboard.

3. (Optional) Check Use this proxy server for all protocols to apply the same settings across all connection types.

4. If using SOCKS proxies, select SOCKS v5 and input the corresponding server details.

Step 4. Save and Authenticate

1. Click OK to save your changes.

2. When prompted during browsing, enter your Toolip username and password to authenticate the proxy connection.

And that’s it! Your Firefox browser is now configured with Toolip, opening the door to a secure and private browsing experience. Whether you’re managing accounts, running essential tasks, or simply enjoying unrestricted access to the web, you’re all set for a faster, safer, and more reliable online journey.