What is Nstbrowser?
Nstbrowser is a privacy-focused, multi-account browser that allows users to create and manage multiple isolated profiles while maintaining complete anonymity. Designed for professionals in digital marketing, e-commerce, web scraping, and automation, Nstbrowser prevents tracking, bypasses restrictions, and optimizes account management. By integrating Toolip proxies, you can add an extra layer of security, access geo-restricted content, and ensure a stable and undetectable browsing experience. Prefer an enterprise-grade guide? Learn more about Oculus Proxies Nstbrowser Integration Guide.How to Set Up Toolip With Nstbrowser
1
Download and Install Nstbrowser
1. Visit the official Nstbrowser website.2. Download the installation file suitable for your operating system.3. Follow the on-screen instructions to complete the installation process.
2
Create a New Browser Profile
1. Launch Nstbrowser and navigate to the dashboard.2. Click Create Profile to set up a new browsing session.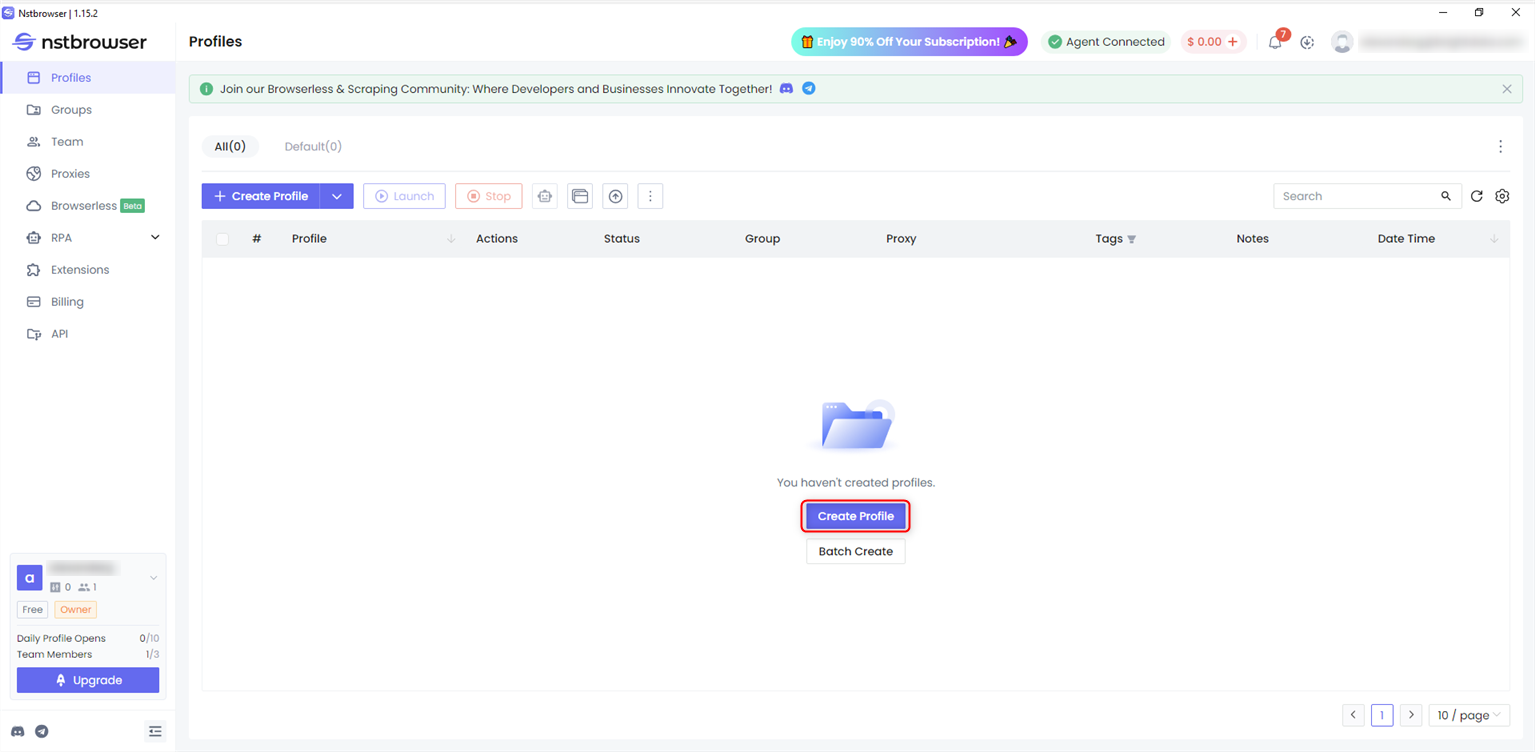
3
Access Proxy Settings
1. In the profile setup menu, locate the Proxy section.2. Select Custom as the proxy type to manually enter Toolip proxy details.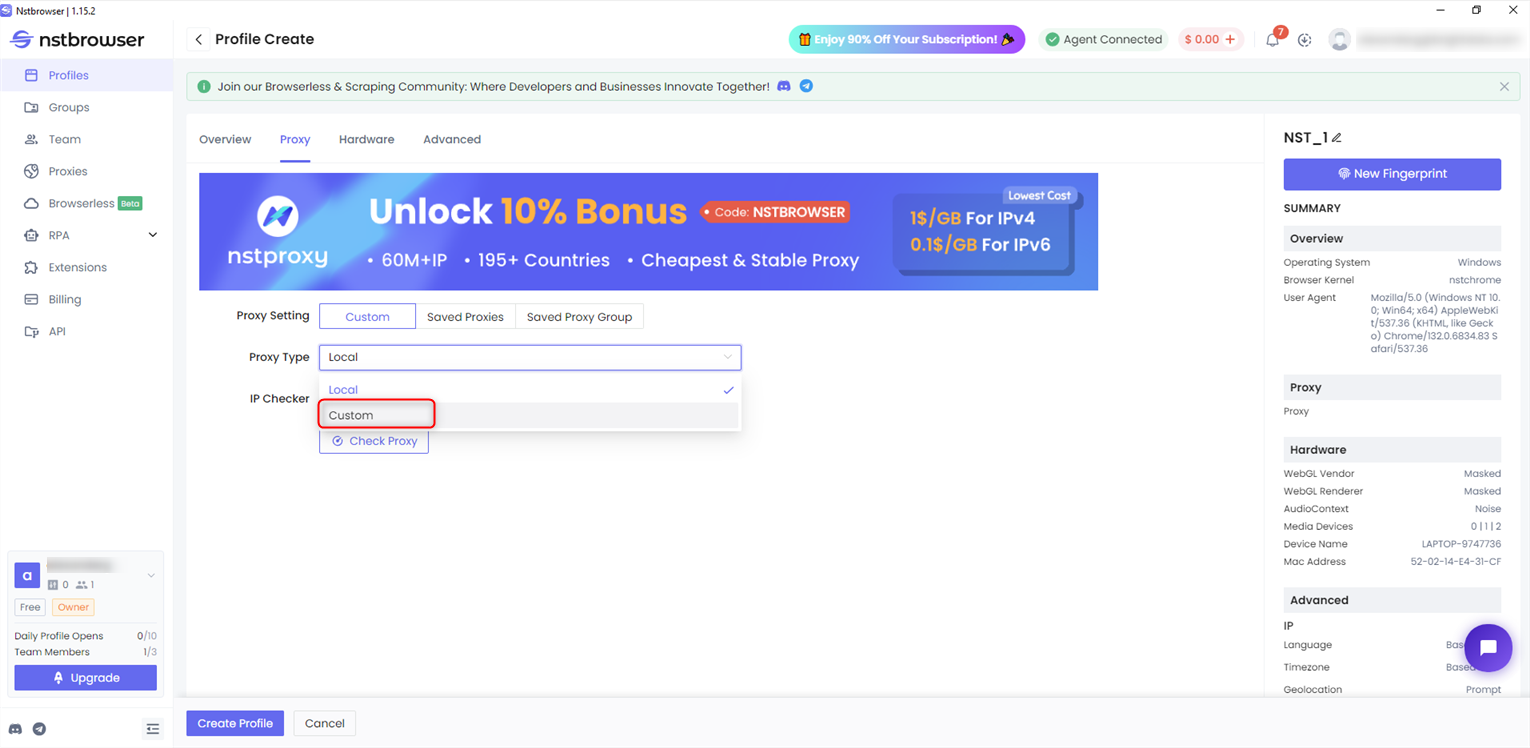
4
Enter Toolip Proxy Credentials
1. Fill in the required fields as follows: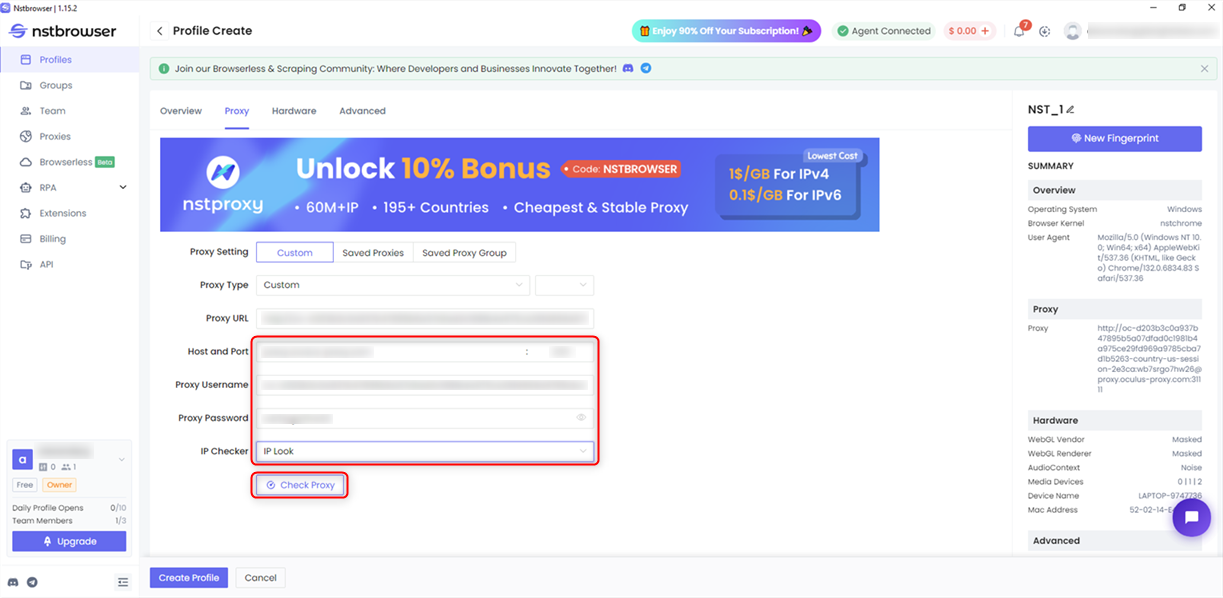
-
Host:
proxy.toolip.io - Port: Obtain this from your Toolip dashboard
- Username: Your Toolip account username
- Password: Your Toolip account password
5
Confirm Proxy Connection
1. If the proxy test is successful, a green confirmation message will appear.2. Click Create Profile to save your configuration.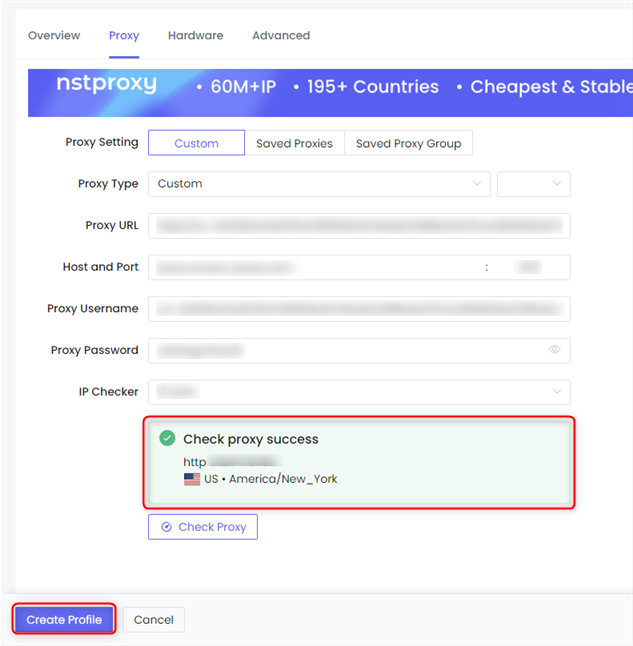
6
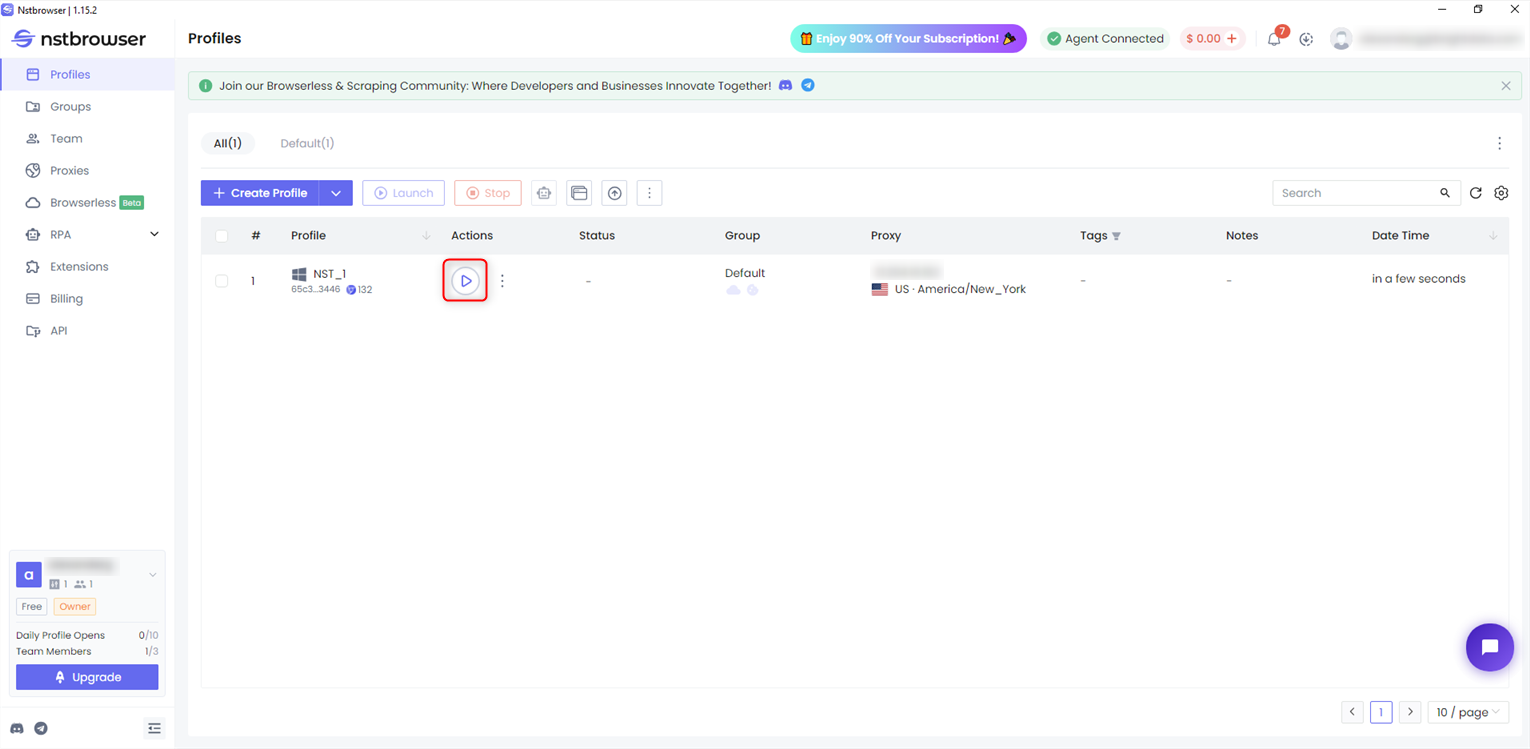
Start Using the Profile
1. Navigate back to the Profiles section in the dashboard.2. Locate the newly created profile and click the Play icon to launch it with Toolip proxy settings enabled.