
What is XLogin?
XLogin is a browser profile management tool designed to help you run multiple online accounts without them interfering with each other. Each profile acts like a separate, isolated browser environment, making it easier to handle tasks like scaling e-commerce operations, managing social media campaigns, and conducting detailed research. By integrating Toolip proxies, you add an extra layer of privacy and reliability to every profile. Prefer an enterprise-grade guide? Learn more about Oculus Proxies Xlogin Integration Guide.How to Set Up Toolip With XLogin
1
Log In to XLogin
1. Visit XLogin and enter your XLogin credentials.2. Once inside the dashboard, you’ll see a list of browser profiles if you’ve created any before.
2
Create or Select a Browser Profile
1. If you’re new to XLogin, click New browser profile to set up a fresh browser profile.2. If you already have profiles, choose one that you’d like to configure with Toolip proxies, then select Edit or Settings to access its configuration.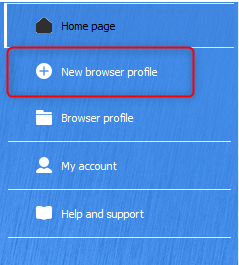
3
Configure Your Browser Profile
1. Provide a Display Name for your browser profile.2. Click Setting proxy server to open the proxy configuration panel.
4
Enter Your Toolip Proxy Details
1. Select the correct protocol (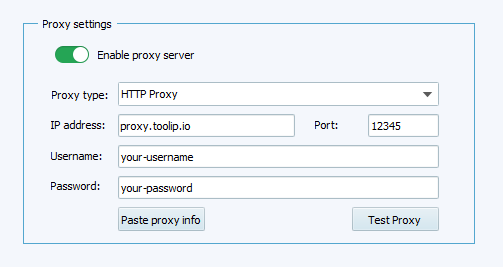
HTTP, HTTPS, or SOCKS5) based on your Toolip proxy type.2. Fill in the required fields:-
IP address:
proxy.toolip.io - Port: The port number from your Toolip dashboard.
-
Username: Your Toolip proxy
username. -
Password: Your Toolip proxy
password.
For geo-targeted proxies, format your username as
your-username-country-US to select a US exit node.5
Save and Test Your Proxy
1. Click Test Proxy to verify that the connection is working.2. If the test is successful, select Save to apply your proxy settings.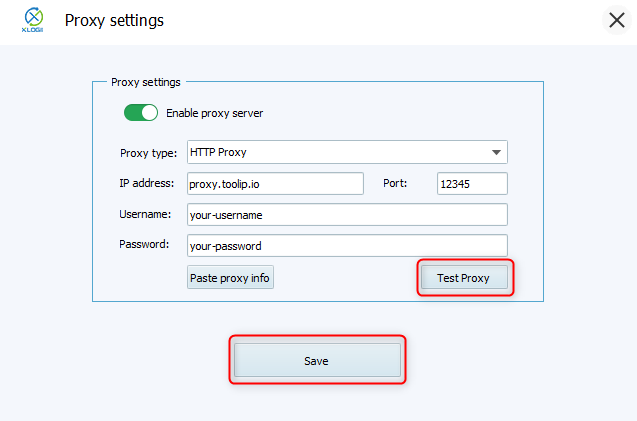
6
Verify the Proxy Connection
1. Launch the updated browser profile.2. Navigate to http://httpbin.org/ip.3. Ensure that the displayed IP matches the Toolip proxy’s IP, confirming the setup is correct.