What is Dolphin Anty?
Dolphin Anty is an anti-detection browser designed for professionals who need to manage multiple accounts securely. It creates unique digital fingerprints for each profile—covering IP addresses, device types, and more—so platforms can’t link accounts to the same user. Perfect for marketers, social media managers, and e-commerce specialists, Dolphin Anty ensures safe and efficient workflows without the risk of account bans. Prefer an enterprise-grade guide? Learn more about Oculus Proxies Dolphin Anty Integration Guide.How to Integrate Toolip With Dolphin Anty
Download and Install Dolphin Anty
1. Visit the Dolphin Anty website and download the application.2. Install Dolphin Anty and launch it on your device.3. Sign up for a new account or log in if you already have one.
Create a New Profile
1. Navigate to All Profiles and click + CREATE PROFILE to set up a new browser environment.


Add a New Proxy
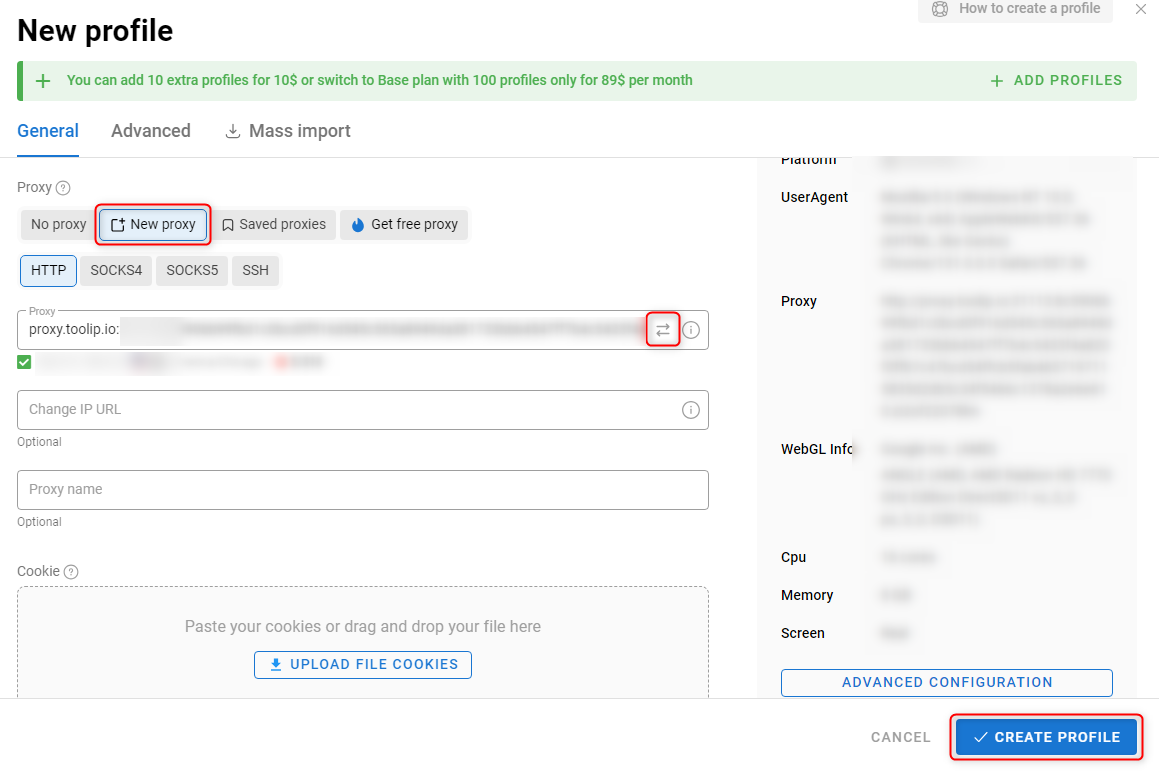
1. Scroll down to the New Proxy section in the profile setup window.2. Open your Toolip dashboard.3. Click Show Configured List and copy the proxy details under the Generic tab.4. Paste the copied proxy code into the Proxy field in Dolphin Anty.5. Click ⮂ Test Connection to verify that the proxy is working.6. Once the test is successful, click CREATE PROFILE to save your settings and finalize the proxy configuration.

For country-specific proxies, format your username as
your-username-country-US to route traffic through a specific location.Test the Proxy Connection
1. Launch the browser profile by clicking Start.2. Once the browser opens, visit http://httpbin.org/ip.3. Confirm that the displayed IP matches your Toolip proxy, verifying that the integration is working correctly.
