What is Kameleo?
Kameleo is an advanced anti-detection browser designed for managing multiple online profiles securely. Whether you’re handling social media accounts, e-commerce stores, or web scraping projects, Kameleo helps prevent tracking and account linking by offering customizable browser fingerprints and seamless proxy integration. With Kameleo, each profile operates as an independent browsing session, featuring unique IP addresses, device settings, and user agents. By integrating Toolip, you can enhance your anonymity, bypass geo-restrictions, and optimize your workflow. Prefer an enterprise-grade guide? Learn more about Oculus Proxies Kameleo Integration Guide.How to Integrate Toolip With Kameleo
Download and Launch Kameleo
1. Visit the Kameleo website and download the application.2. Install Kameleo and log in using your account credentials.
Create a New Profile
1. Open Kameleo and navigate to the New Profile section.2. Choose your desired device type, operating system, browser, and language settings.
Configure Your Proxy Settings
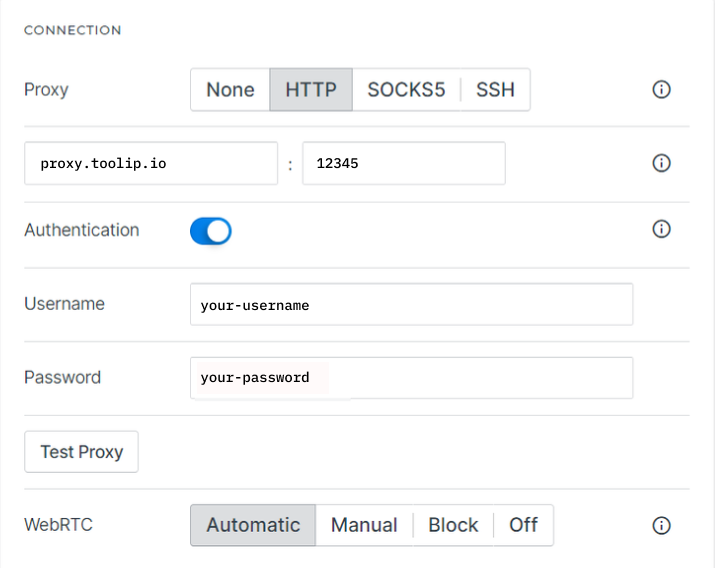
1. Go to the Connection section in the profile settings.2. Enter the following Toolip proxy details:
- Proxy Type: Select HTTP, HTTPS, or SOCKS5.
-
Proxy Host:
proxy.toolip.io - Proxy Port: Use the port from your Toolip dashboard.

For geo-targeted browsing, format your username as
your-username-country-XX (e.g., your-username-country-US) to access a specific region.