Setting Up Toolip Proxies on Windows
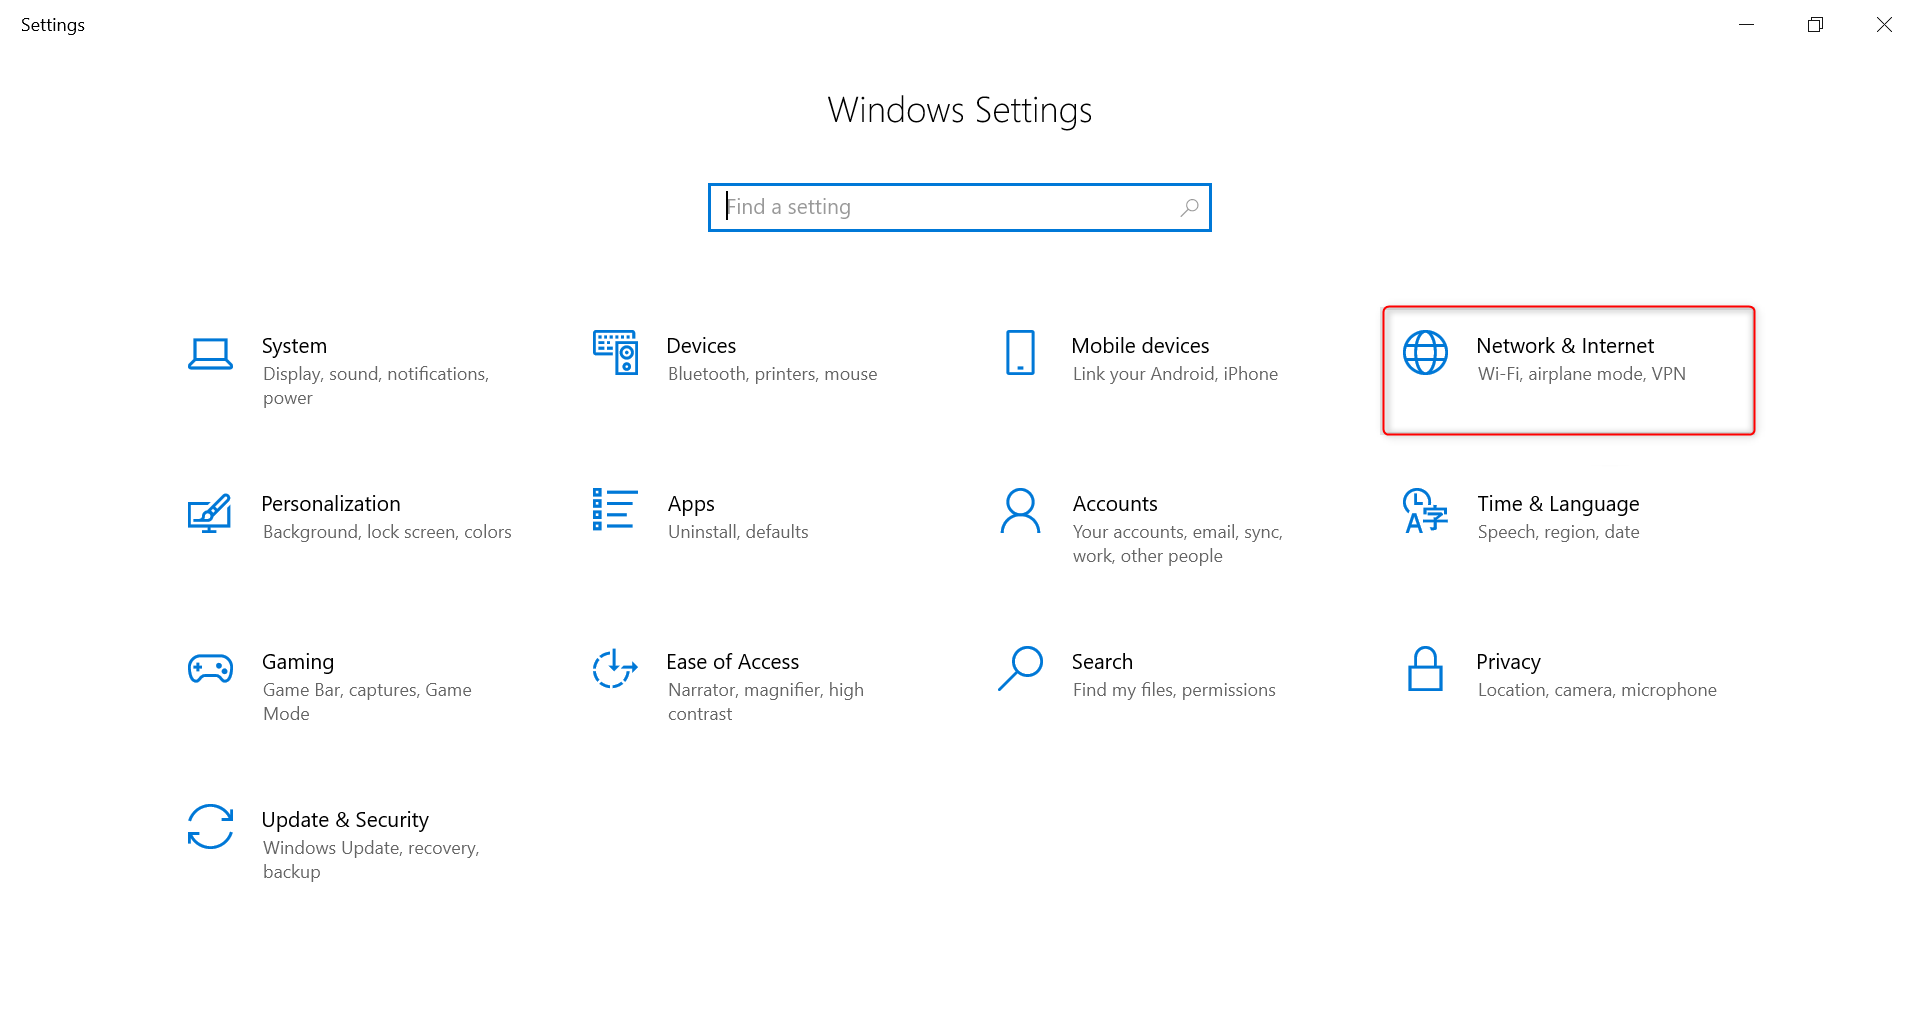
Configuring Toolip proxies on Windows is quick and straightforward. Whether you’re using Windows 10 or 11, the process is identical. Follow these steps to get started:Open Network & Internet Settings
1. Press Windows + I to open Settings.2. Navigate to Network & Internet.

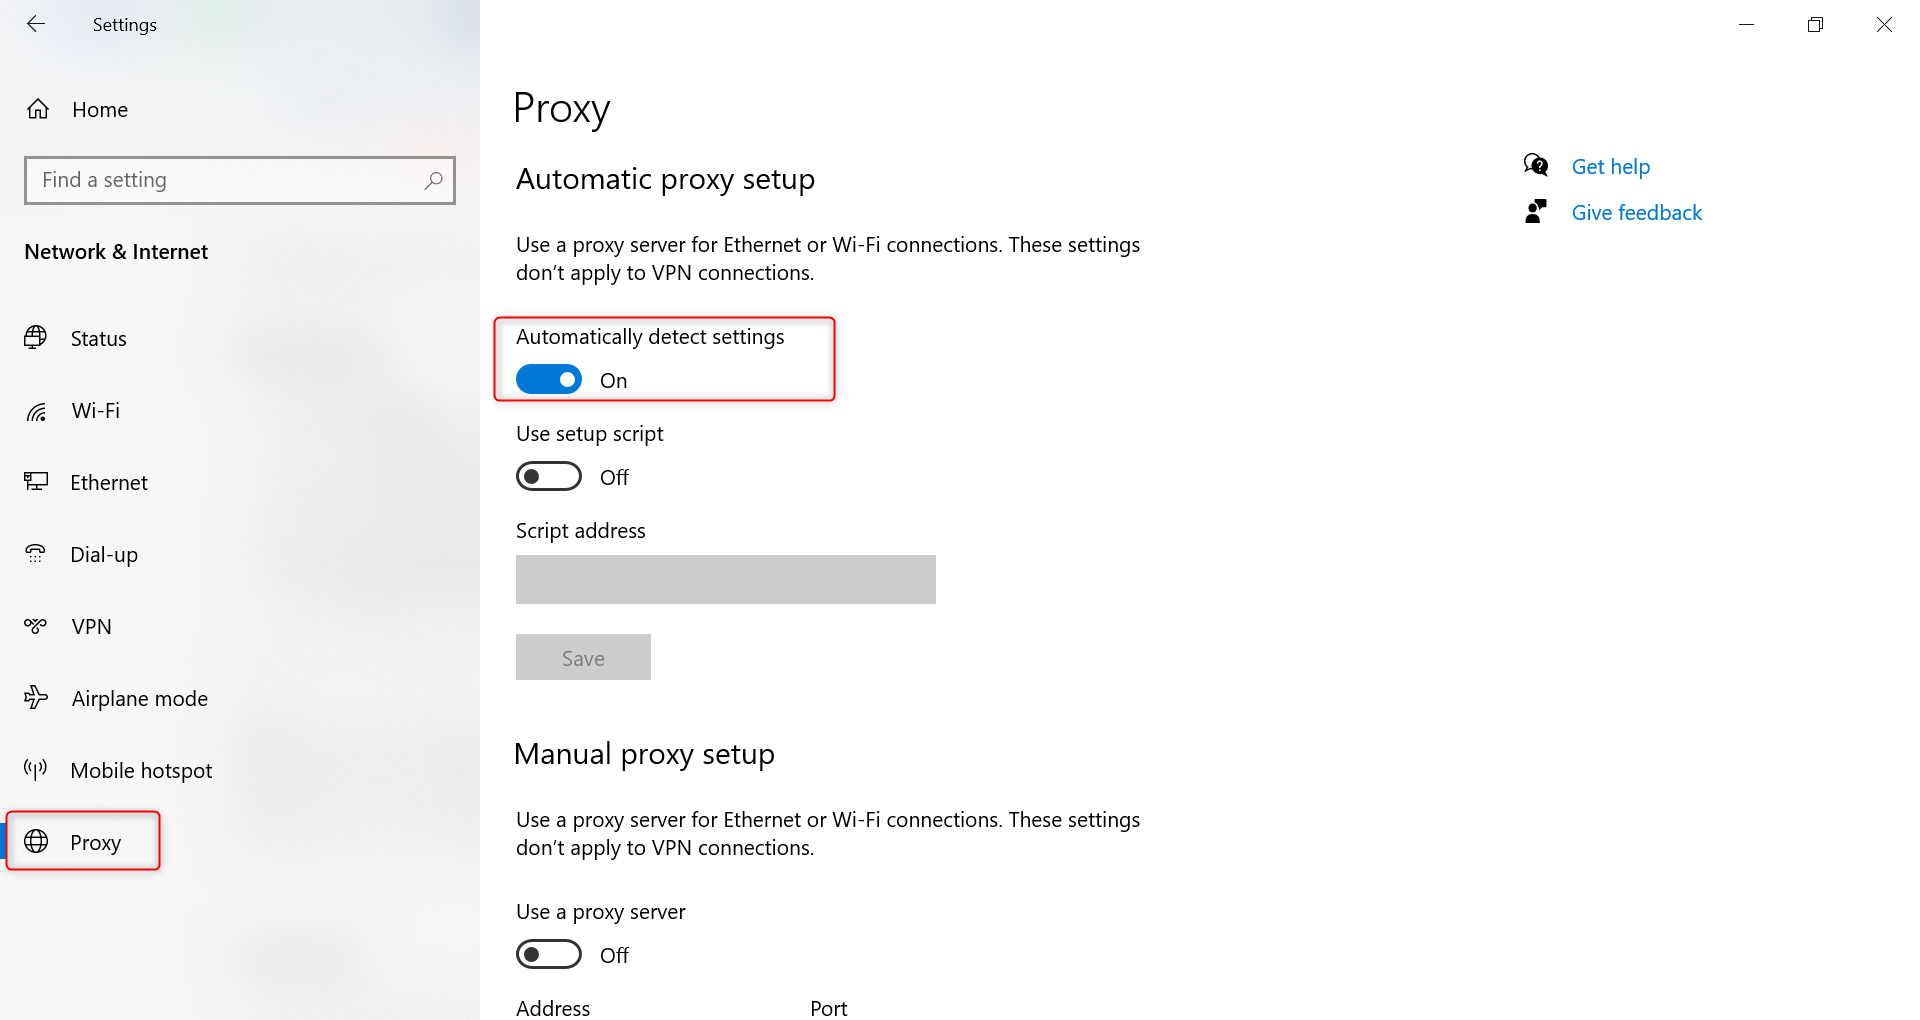
Enable Automatic Detection
1. Click on Proxy in the sidebar menu.2. Under Automatic proxy setup, toggle Automatically detect settings to On.

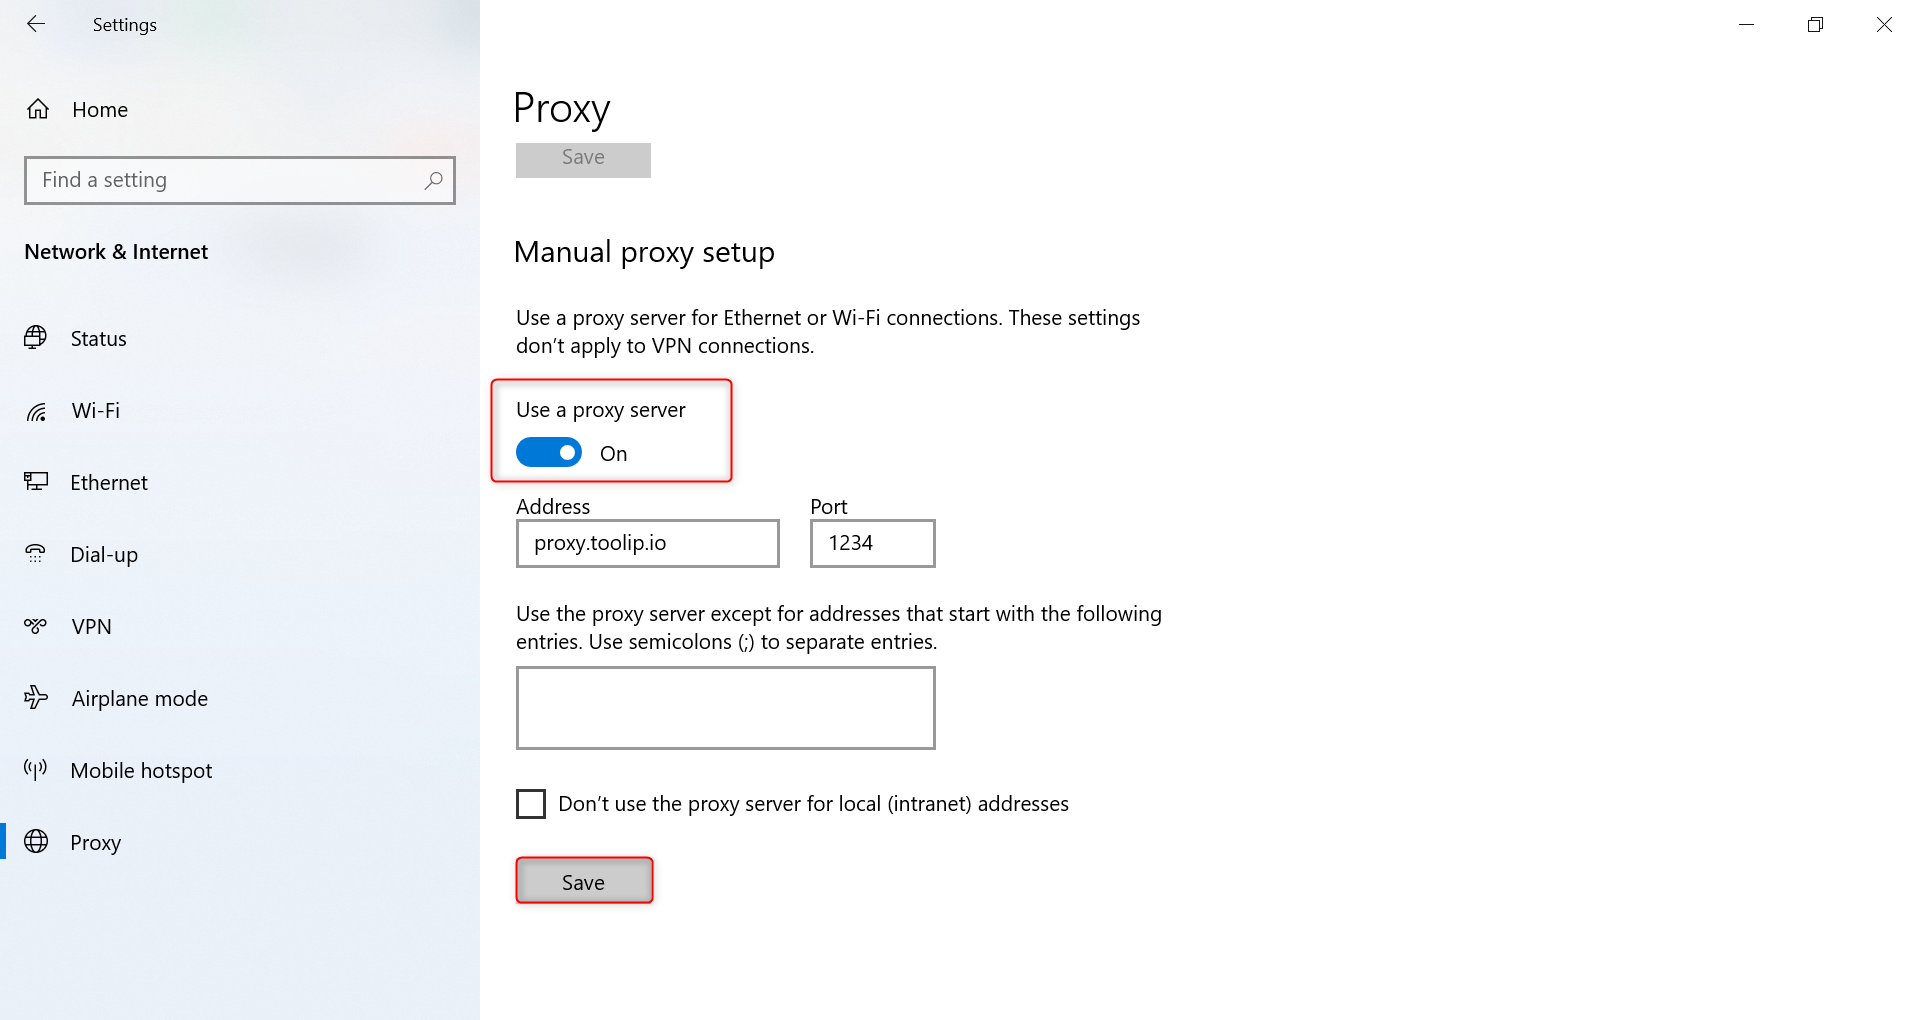
Set Up Manual Proxy Settings
1. Scroll to Manual proxy setup and toggle Use a proxy server to On.2. Fill in the fields with your Toolip proxy details:
-
Address:
proxy.toolip.io - Port: Enter the port number from your Toolip dashboard.

Authenticate When Prompted
Windows does not store your proxy username and password directly. When prompted by an app or browser:1. Enter your Toolip Username and Password to authenticate.2. If a browser pop-up requests credentials, simply input your details to continue securely.
If you need country-specific proxies, format your username as
your-username-country-XX (e.g., your-username-country-US) to route traffic through a specific country.