What is FoxyProxy?
FoxyProxy is a versatile browser extension available for Chrome and Firefox, designed to simplify proxy management. With just a few clicks, it lets you switch between multiple proxy servers while leveraging the browser’s built-in proxy API. Whether you’re scraping data, testing applications, or enhancing your online privacy, FoxyProxy offers an intuitive and efficient solution to handle proxies with ease. Prefer an enterprise-grade guide? Learn more about Oculus Proxies Foxyproxy Integration Guide.1
Install FoxyProxy Extension
1. For Chrome: Visit the Chrome Web Store and click Add to Chrome.2. For Firefox: Go to the Mozilla Add-ons page and select Add to Firefox.3. Once installed, you’ll see the FoxyProxy icon in your browser’s toolbar.
2
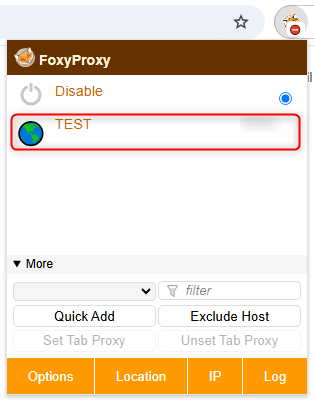
Open FoxyProxy Settings
1. Click the FoxyProxy icon in the browser toolbar.2. Choose Options from the dropdown menu to open the FoxyProxy settings page.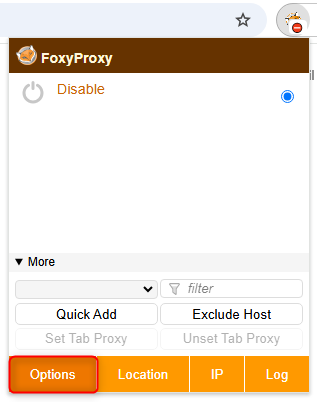
3
Add a New Proxy Configuration
1. Navigate to the Proxies tab in the FoxyProxy settings menu.2. Click Add to open the proxy configuration window.
4
Input Toolip Proxy Details
1. In the proxy setup form, enter your Toolip proxy credentials: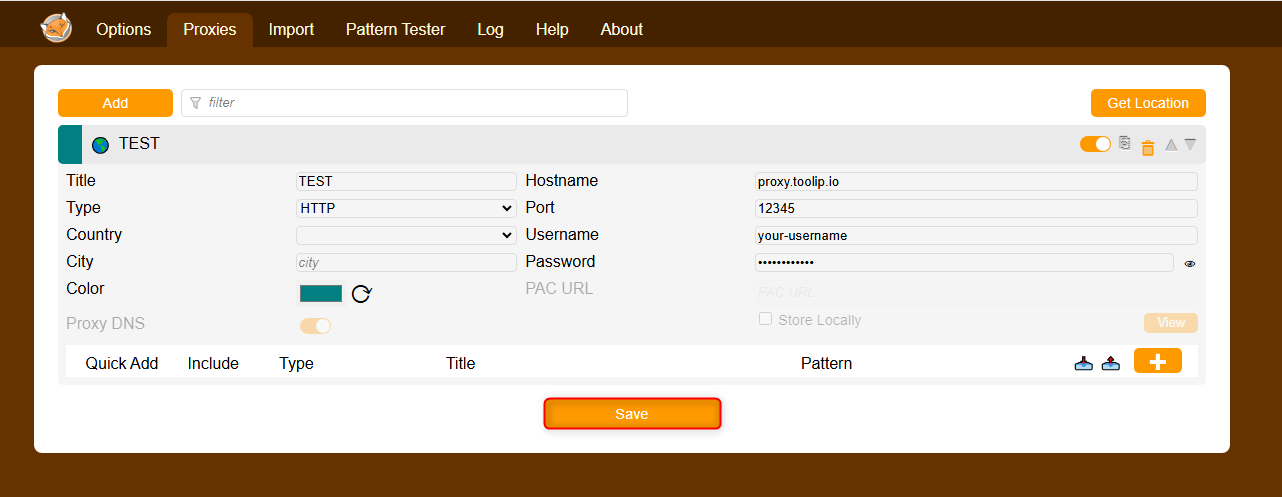
-
Type: Select
HTTP,HTTPS, orSOCKS5depending on your proxy type. -
Hostname: Enter
proxy.toolip.io. - Port: Use the port number from your Toolip dashboard.
- Username: Enter your Toolip username.
- Password: Enter your Toolip password.
To use a proxy from a specific location, add the country code to your username (e.g.,
your-username-country-US for a US-based proxy).5
Activate and Test Your Proxy
1. Click the FoxyProxy icon in your toolbar.2. Select the proxy configuration you just created.3. Visit httpbin.org/ip to verify the connection. The displayed IP should match your Toolip proxy.