What is Screaming Frog?
Screaming Frog SEO Spider is a powerful tool for SEO professionals and website managers. It helps audit websites, detect technical issues, and optimize performance by providing deep insights into site structure and SEO health. By integrating Toolip proxies, you can conduct secure, unrestricted, and geo-targeted crawls, ensuring seamless SEO analysis. Prefer an enterprise-grade guide? Learn more about Oculus Proxies Screaming Frog Integration Guide.How to Set Up Toolip With Screaming Frog
Download and Install Screaming Frog
1. Visit the official Screaming Frog website.2. Download and install the SEO Spider tool for your operating system.3. Launch the application after installation is complete.
Access Proxy Settings
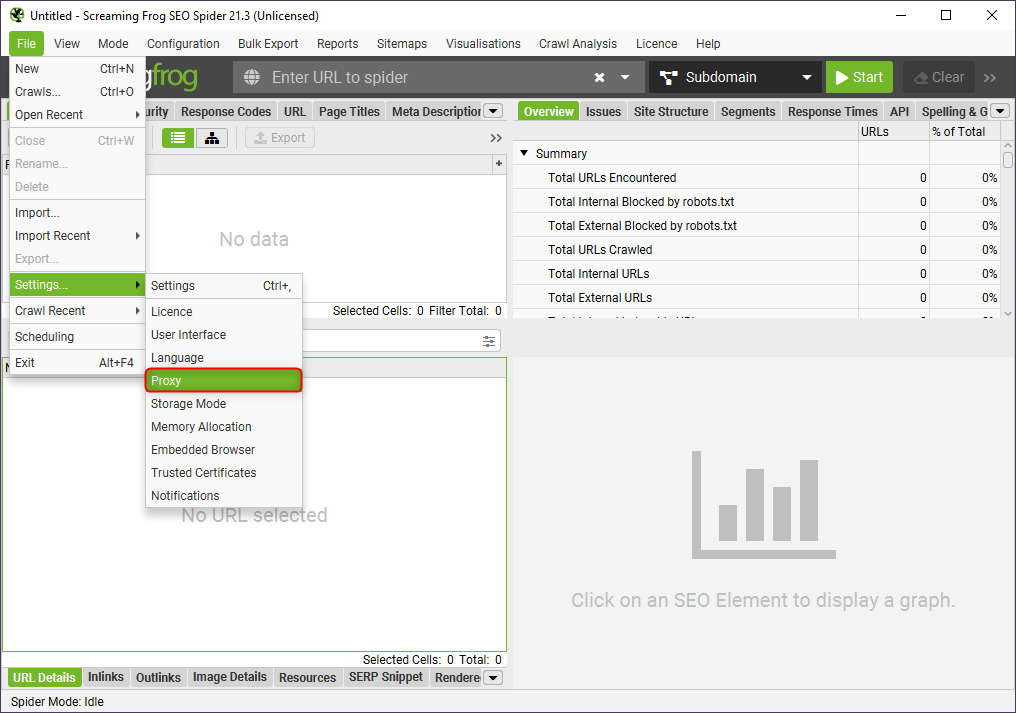
1. Open Screaming Frog.2. Click File in the top menu.3. Select Settings > Proxy to open the proxy configuration panel.

Configure Your Toolip Proxy
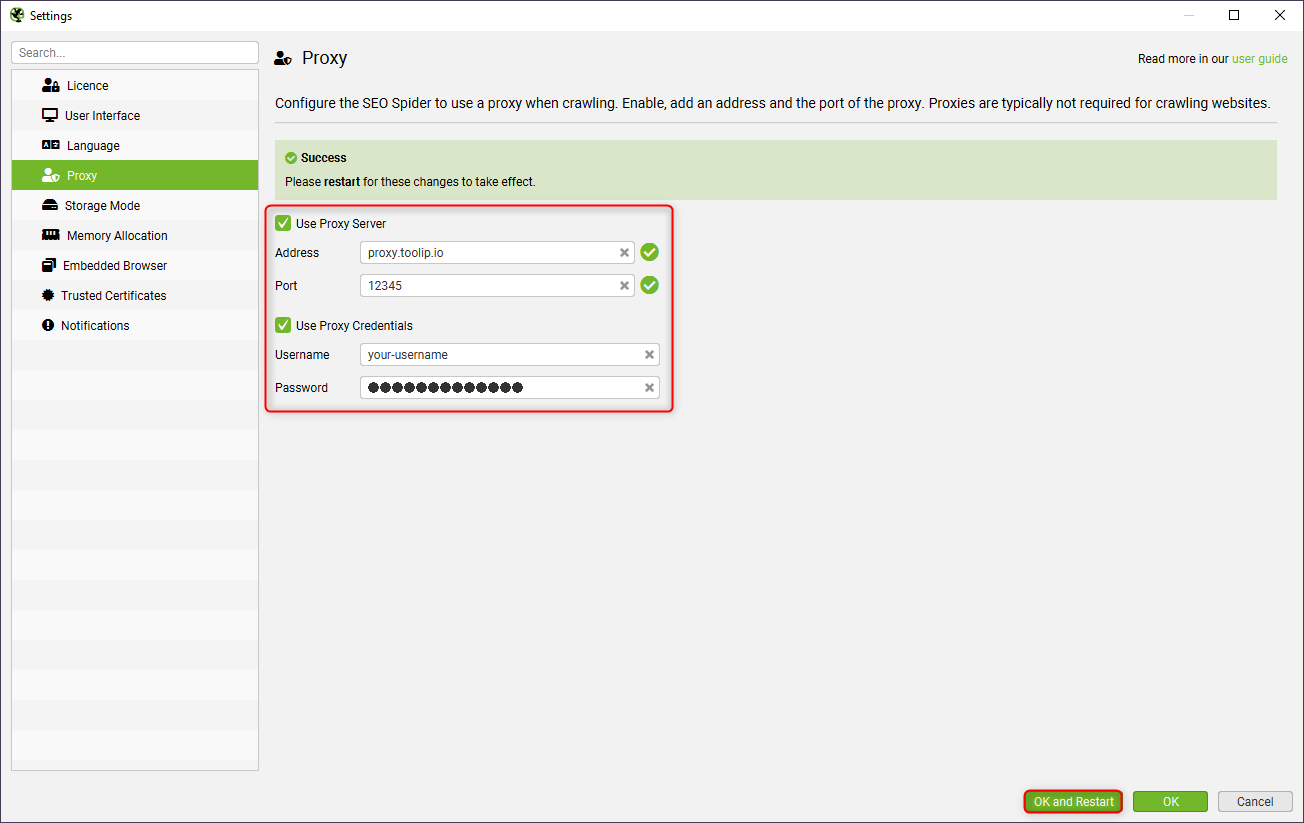
1. In the Proxy Settings window, check Use Proxy Server to enable proxy usage.2. If authentication is required, check Use Proxy Credentials and provide your Toolip login details.3. Enter the following details:
-
Address:
proxy.toolip.io - Port: The port number from your Toolip dashboard.
- Username: Your Toolip username.
- Password: Your Toolip password.

For geo-targeted proxies, append the country code to your username (e.g.,
your-username-country-US) to route through a specific region.Verify the Proxy Connection
1. Run a test crawl on a website.2. Check if the IP address corresponds to your Toolip proxy by visiting httpbin.org/ip.3. If the displayed IP matches your proxy’s IP, the configuration is successful.