What is Norconex?
Norconex is a Java-based, open-source web crawler focused on flexibility and customization. It supports various file types, integrates with third-party tools, and uses XML for configuration. Key features include data collection, parsing, and committing, OCR, JavaScript crawling, and robots.txt compliance—ideal for indexing, content gathering, and website optimization. Together with Toolip you will bypass geo-restrictions, avoid IP bans, and ensure more reliable, region-specific data collection during large-scale web crawling. Prefer an enterprise-grade guide? Learn more about Oculus Proxies Norconex Integration Guide.How to Set Up Toolip With Norconex
1
Install Java
Download and install the appropriate version of Java(JDK) for your operating system.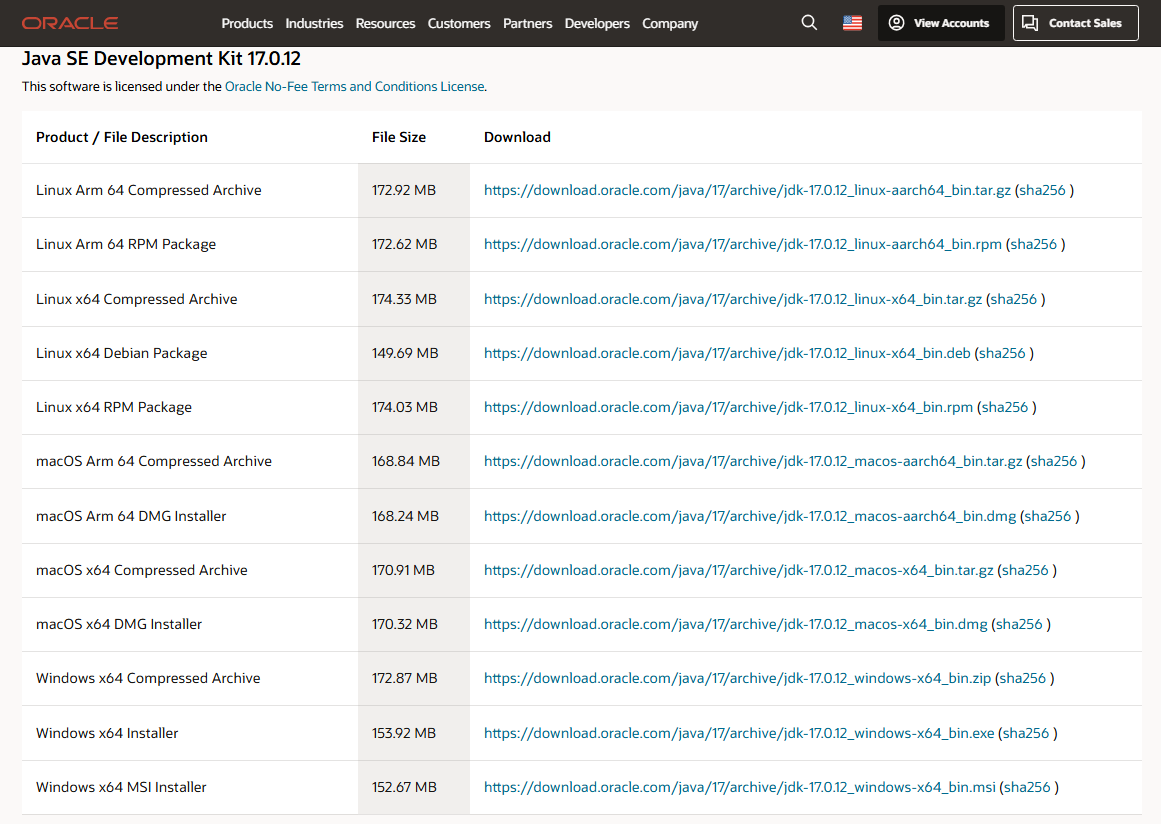
2
Environment Settings
Search for Environment Variables in the Windows search bar and select Edit the system environment variables. Under User variables for [USERNAME].
Click New.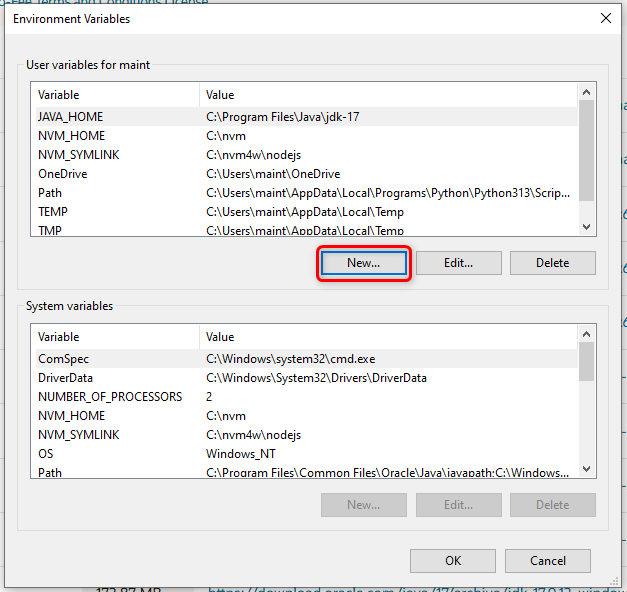
3
Set JAVA_HOME
In the Variable name field, enter 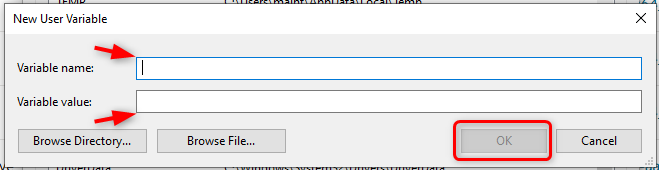
JAVA_HOME.
In the Variable value field, paste the path to your JDK installation directory.
Then click OK.4
Install Norconex
Download and install the latest version of Norconex from the official website.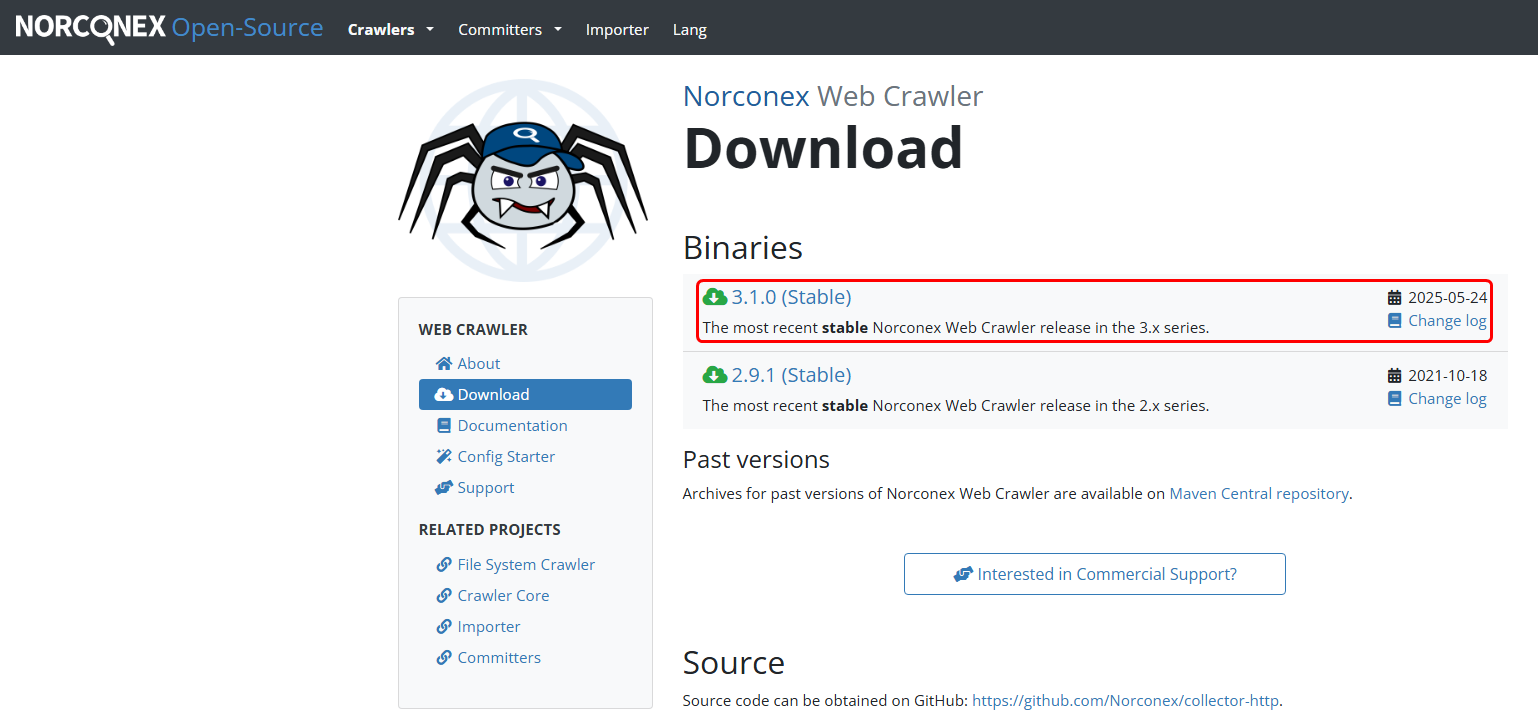
5
Extract and Configure
Create a folder for Norconex (e.g., C:\Norconex).
Right-click the downloaded .zip file and extract its contents into this folder.Then, navigate to:
Norconex → Examples → collector-http-config-reference.xml
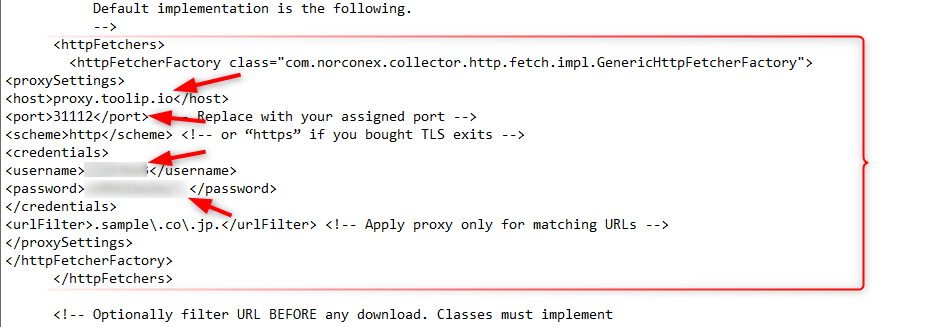
Right-click the file and open it in a code editor (e.g., Notepad).Inside the file, locate the <httpFetchers> and </httpFetchers> tags.
Insert the required configuration code between these tags.6
Verify Configuration
Ensure the XML structure reflects your changes correctly.
It should look like this: