> ## Documentation Index
> Fetch the complete documentation index at: https://docs.toolip.io/llms.txt
> Use this file to discover all available pages before exploring further.
# How to Set Up Toolip With WinGate
> Enhance your network security and access control by integrating Toolip with WinGate Proxy Server. This guide will walk you through the process of configuring proxies in WinGate to boost security, manage network traffic efficiently, and improve online privacy.
 ## What is WinGate?
**WinGate** is a robust proxy server and internet gateway designed for businesses and enterprises. It supports HTTP, SOCKS, and integrated communication services, offering a comprehensive solution for managing network access, enforcing security policies, and optimizing bandwidth usage. By integrating **Toolip with WinGate Proxy Server**, you can enhance network security, control internet access, and improve privacy, ensuring a seamless and efficient browsing experience.
Prefer an enterprise-grade guide? Learn more about Oculus Proxies Wingate Integration Guide.
Targeting search engines like Google, Bing, or Yandex requires a specialized proxy to ensure stable access and avoid blocks. **Toolip’s Search Engine ISP Proxies** are designed specifically for this, providing reliable performance where standard proxies may fail. If your proxy test isn't working on search engines, switching to **Search Engine ISP Proxies** can resolve the issue.
## How to Set Up Toolip With WinGate
Set up a license, [install WinGate](https://www.wingate.com/download/wingate/download.php), and launch the software.
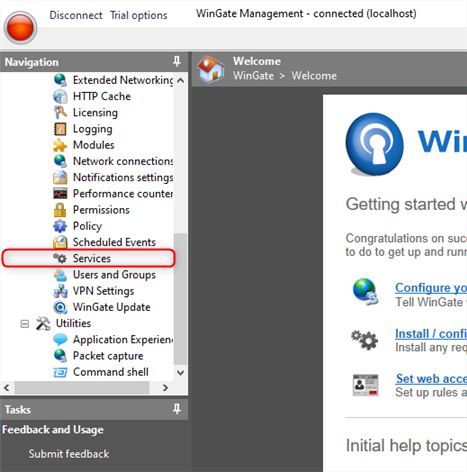
After creating an account, navigate to the **Services** section in the left-hand menu.
## What is WinGate?
**WinGate** is a robust proxy server and internet gateway designed for businesses and enterprises. It supports HTTP, SOCKS, and integrated communication services, offering a comprehensive solution for managing network access, enforcing security policies, and optimizing bandwidth usage. By integrating **Toolip with WinGate Proxy Server**, you can enhance network security, control internet access, and improve privacy, ensuring a seamless and efficient browsing experience.
Prefer an enterprise-grade guide? Learn more about Oculus Proxies Wingate Integration Guide.
Targeting search engines like Google, Bing, or Yandex requires a specialized proxy to ensure stable access and avoid blocks. **Toolip’s Search Engine ISP Proxies** are designed specifically for this, providing reliable performance where standard proxies may fail. If your proxy test isn't working on search engines, switching to **Search Engine ISP Proxies** can resolve the issue.
## How to Set Up Toolip With WinGate
Set up a license, [install WinGate](https://www.wingate.com/download/wingate/download.php), and launch the software.
After creating an account, navigate to the **Services** section in the left-hand menu.
 Right-click in the main window and select **Install Service**.
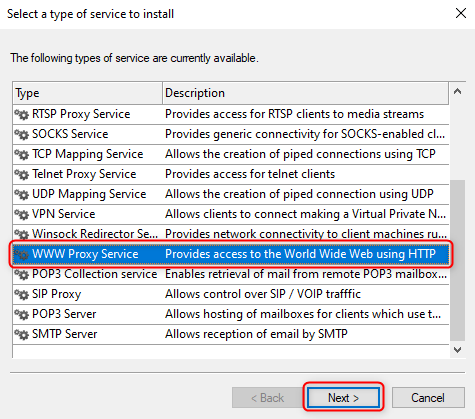
 In the setup window, choose **WWW Proxy Service** and click **Next**.
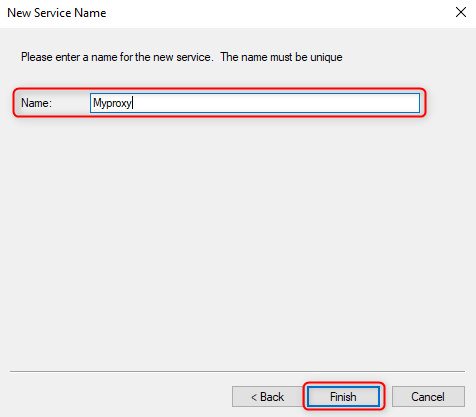
 Assign a name to the service and click **Finish**.
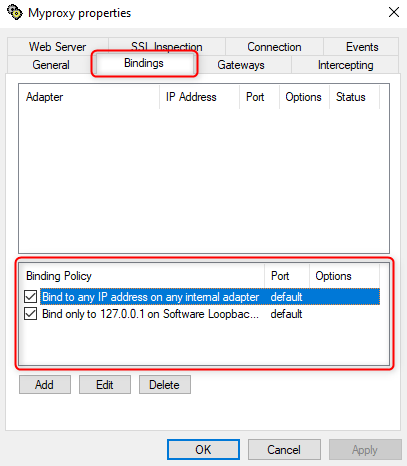
 Once the new window opens, go to the **Bindings** tab and delete all existing **Binding Policies**.
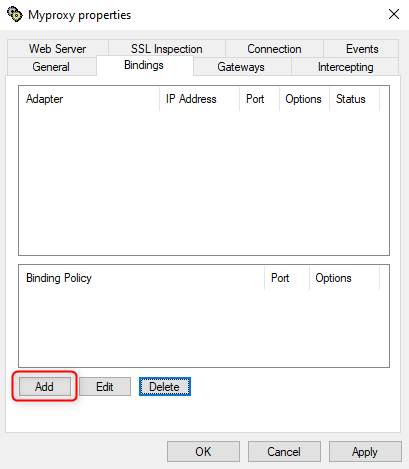
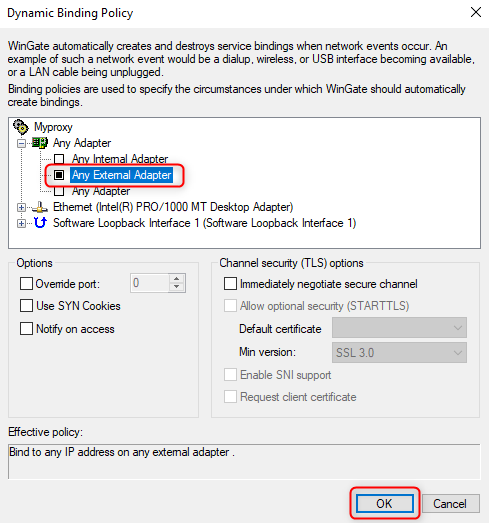
 Click **Add**, choose **Any External Adapter** and then click **OK**.
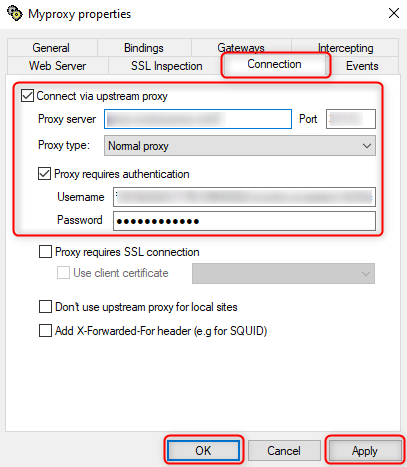
 * Go to the **Connection** tab.
* Check **Connect via upstream proxy** and enter the Proxy details:
* `Host` - Proxy Server.
* `Port`.
* Check **Proxy requires authentication** and provide the login credentials:
* `Username`.
* `Password`.
* Click **Apply** and **OK** to save the settings.
* Go to the **Connection** tab.
* Check **Connect via upstream proxy** and enter the Proxy details:
* `Host` - Proxy Server.
* `Port`.
* Check **Proxy requires authentication** and provide the login credentials:
* `Username`.
* `Password`.
* Click **Apply** and **OK** to save the settings.
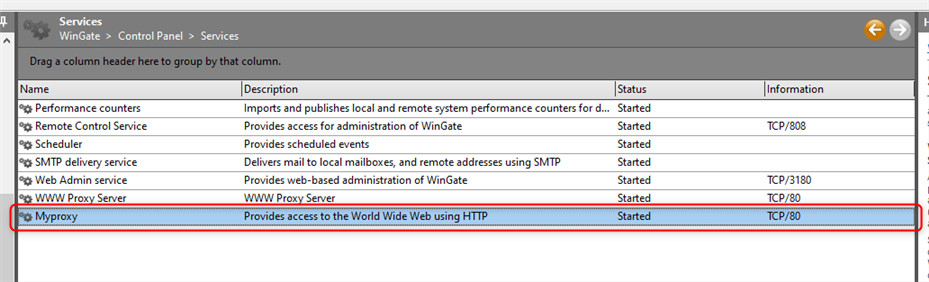
 The newly added Proxy Service will now be visible in the **Services** window and is ready to use.