> ## Documentation Index
> Fetch the complete documentation index at: https://docs.toolip.io/llms.txt
> Use this file to discover all available pages before exploring further.
# How to Set Up Toolip With Vivaldi Browser
> Enhance your privacy and security with Vivaldi by integrating Toolip. This guide will help you set up proxies to sync browsing data across devices, manage search engines, and block trackers and ads, while leveraging Vivaldi’s customizable interface and advanced features.
## What is Vivaldi Browser?
**Vivaldi** is a highly customizable browser designed for power users who need flexibility and control. With workspaces, tab stacks, and tab tiling, you can efficiently organize tabs, while built-in mail, calendar, and feed reader keep you productive. End-to-end encrypted sync ensures your data stays secure across devices. By integrating **Toolip**, you can enhance privacy, block trackers and ads, and access region-locked content seamlessly.
Prefer an enterprise-grade guide? Learn more about Oculus Proxies Vivaldi Integration Guide.
Targeting search engines like Google, Bing, or Yandex requires a specialized proxy to ensure stable access and avoid blocks. **Toolip’s Search Engine ISP Proxies** are designed specifically for this, providing reliable performance where standard proxies may fail. If your proxy test isn't working on search engines, switching to **Search Engine ISP Proxies** can resolve the issue.
## How to Integrate Toolip With Vivaldi Browser
Visit the Vivaldi website and [download the browser](https://vivaldi.com/download/).
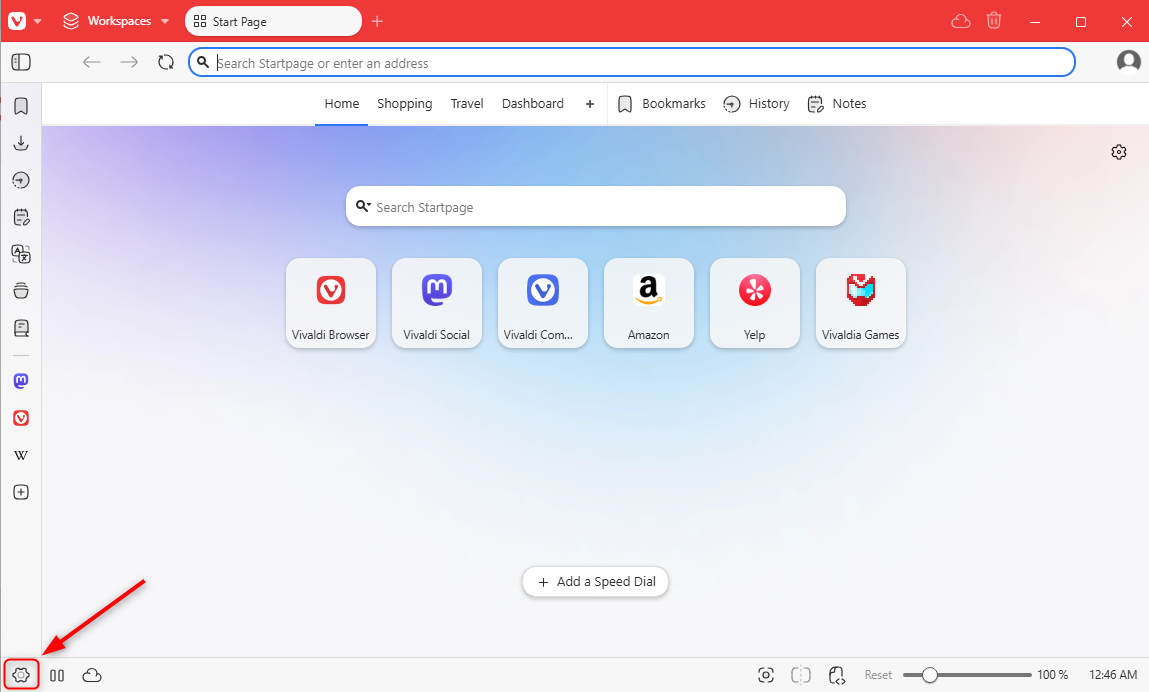
Open **Settings** from the bottom of the left sidebar.
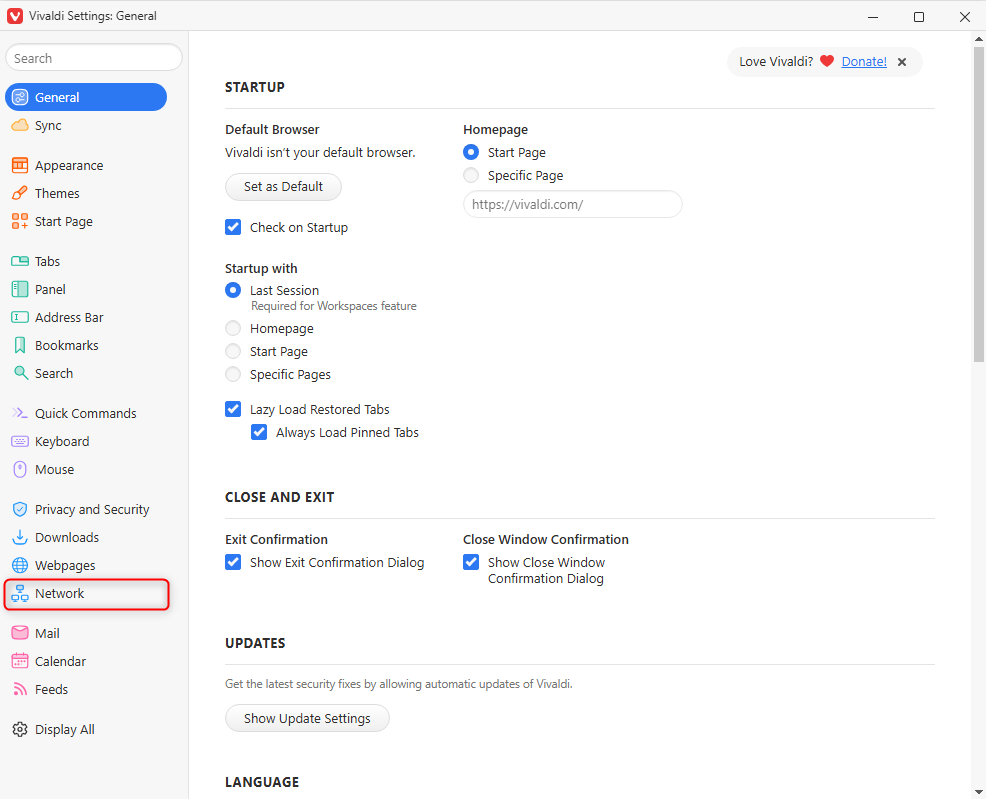
 Go to the **Network settings** section.
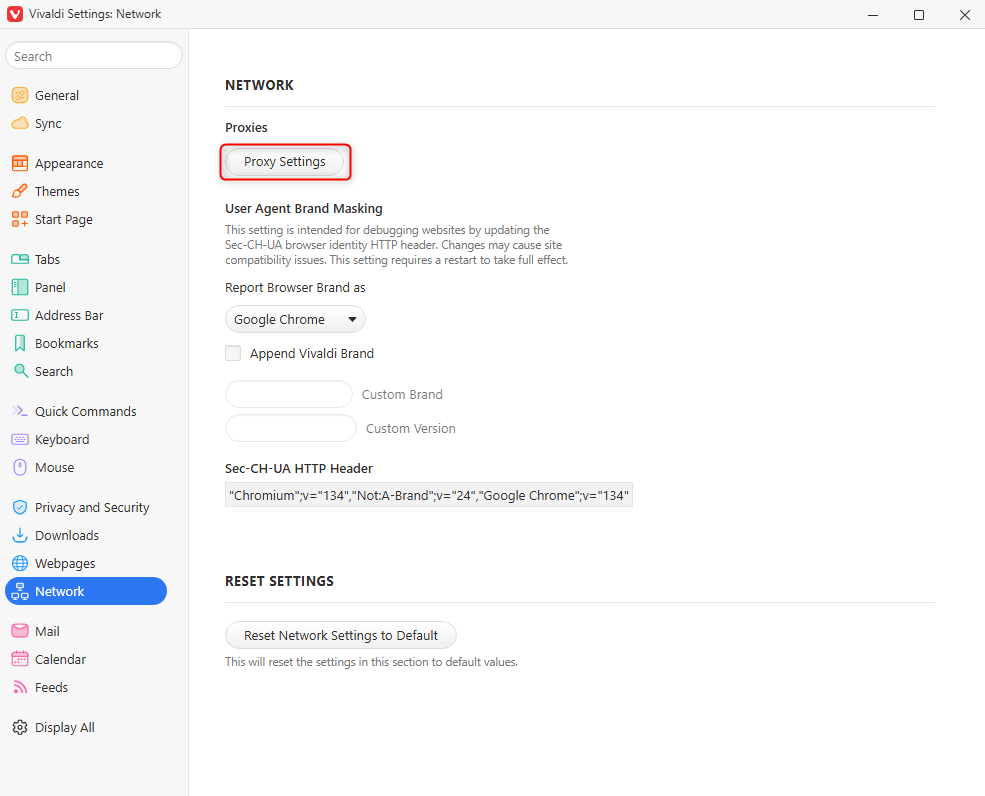
 Select **Proxy settings** to configure your connection.
 Vivaldi uses your system-wide proxy settings, so you'll need to configure your proxies at the OS level. Follow the detailed setup guide based on your operating system:
Follow the complete [Windows proxy setup guide](https://docs.toolip.io/integration-guides/windows) to configure Toolip proxies on your system.
Follow the detailed [macOS proxy setup guide](https://docs.toolip.io/integration-guides/macos) to apply Toolip proxies to your network settings.
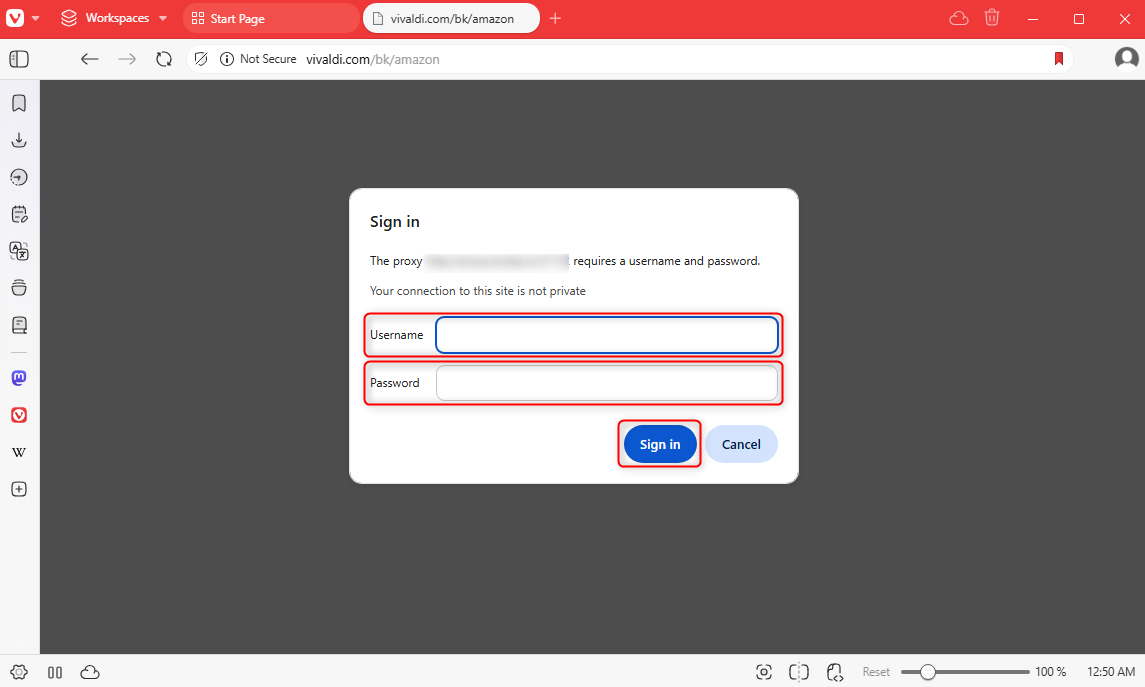
Input your `username` and `password`, then click **Sign in** to apply the settings.
Vivaldi uses your system-wide proxy settings, so you'll need to configure your proxies at the OS level. Follow the detailed setup guide based on your operating system:
Follow the complete [Windows proxy setup guide](https://docs.toolip.io/integration-guides/windows) to configure Toolip proxies on your system.
Follow the detailed [macOS proxy setup guide](https://docs.toolip.io/integration-guides/macos) to apply Toolip proxies to your network settings.
Input your `username` and `password`, then click **Sign in** to apply the settings.