> ## Documentation Index
> Fetch the complete documentation index at: https://docs.toolip.io/llms.txt
> Use this file to discover all available pages before exploring further.
# How to Set Up Toolip With Vision Browser
> This guide will walk you through configuring Toolip to enhance your online privacy, prevent tracking, and access restricted content, all while utilizing Vision Browser’s advanced security features and customizable settings.
## What is Vision Browser?
**Vision** is a privacy-focused web browser designed to provide security, anonymity, and an ad-free browsing experience while blocking trackers. With built-in encryption, advanced blocking tools, and a VPN, it safeguards against data leaks and cyber threats. It supports extensions, customizable privacy settings, and proxy integration. By using **Toolip**, you can hide your IP, bypass geo-restrictions, and improve security without compromising speed.
Prefer an enterprise-grade guide? Learn more about Oculus Proxies Vision Browser Integration Guide.
Targeting search engines like Google, Bing, or Yandex requires a specialized proxy to ensure stable access and avoid blocks. **Toolip’s Search Engine ISP Proxies** are designed specifically for this, providing reliable performance where standard proxies may fail. If your proxy test isn't working on search engines, switching to **Search Engine ISP Proxies** can resolve the issue.
## How to Integrate Toolip With Vision Browser
Download and install [Vision Browser](https://browser.vision/en) on your device.
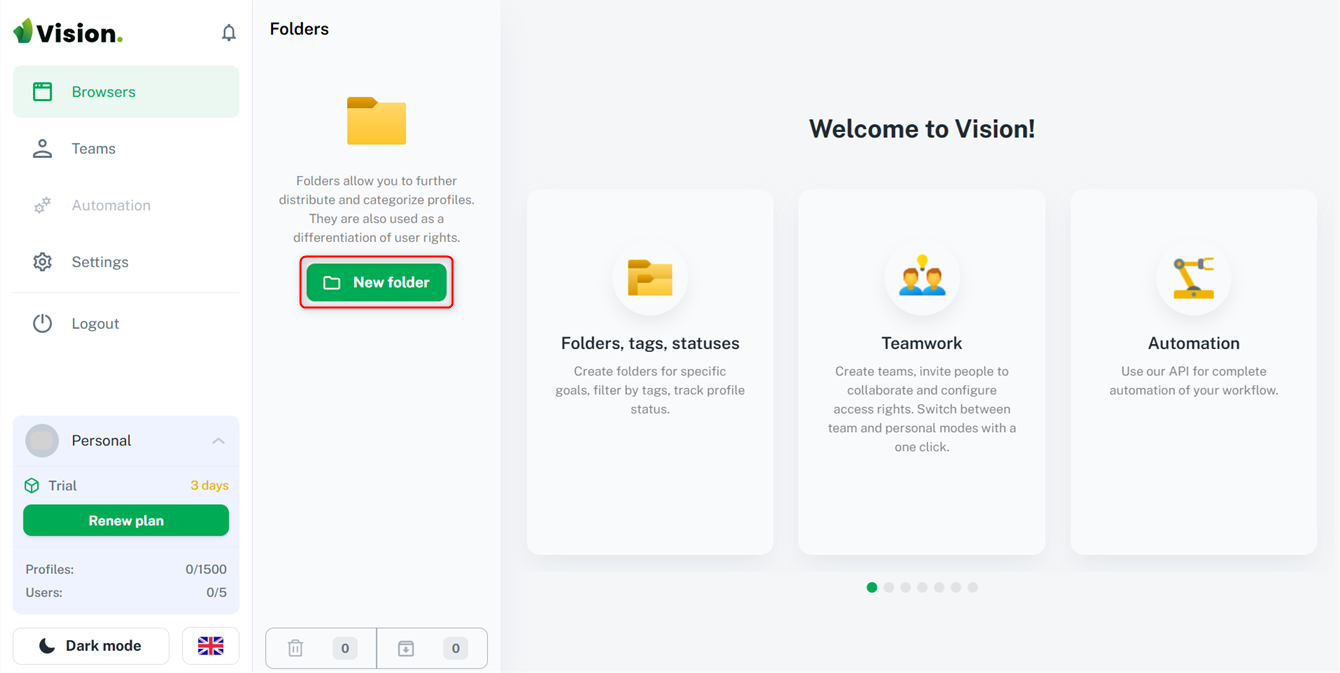
Open the browser and click **New Folder**.
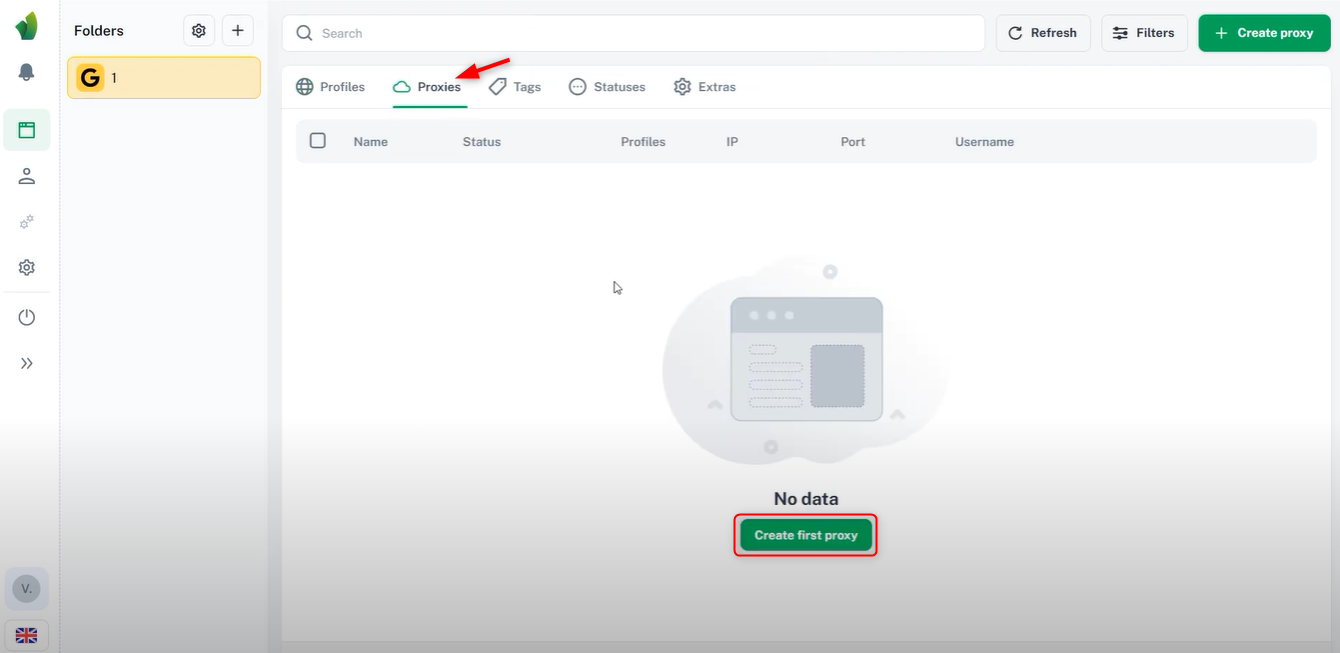
 Navigate to the **Proxies tab** and click **Create First Proxy**.
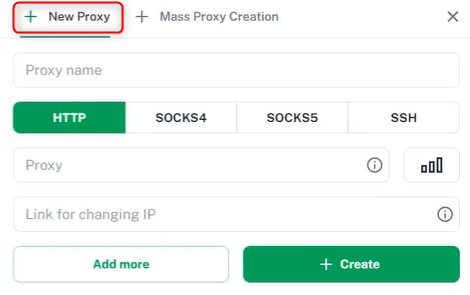
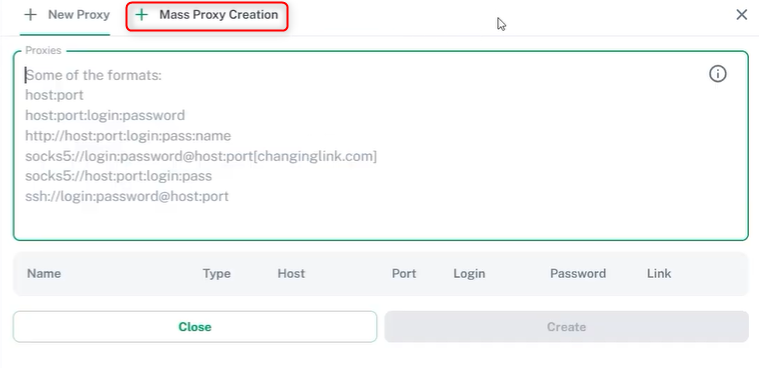
 * Select **single proxy** or **multiple proxies** at once.
* Give a **name**, select a **protocol**, and enter the proxy details in this format: `Host:IP:Username:Password`.
* Press **+Create** to save the proxy.
* Select **single proxy** or **multiple proxies** at once.
* Give a **name**, select a **protocol**, and enter the proxy details in this format: `Host:IP:Username:Password`.
* Press **+Create** to save the proxy.
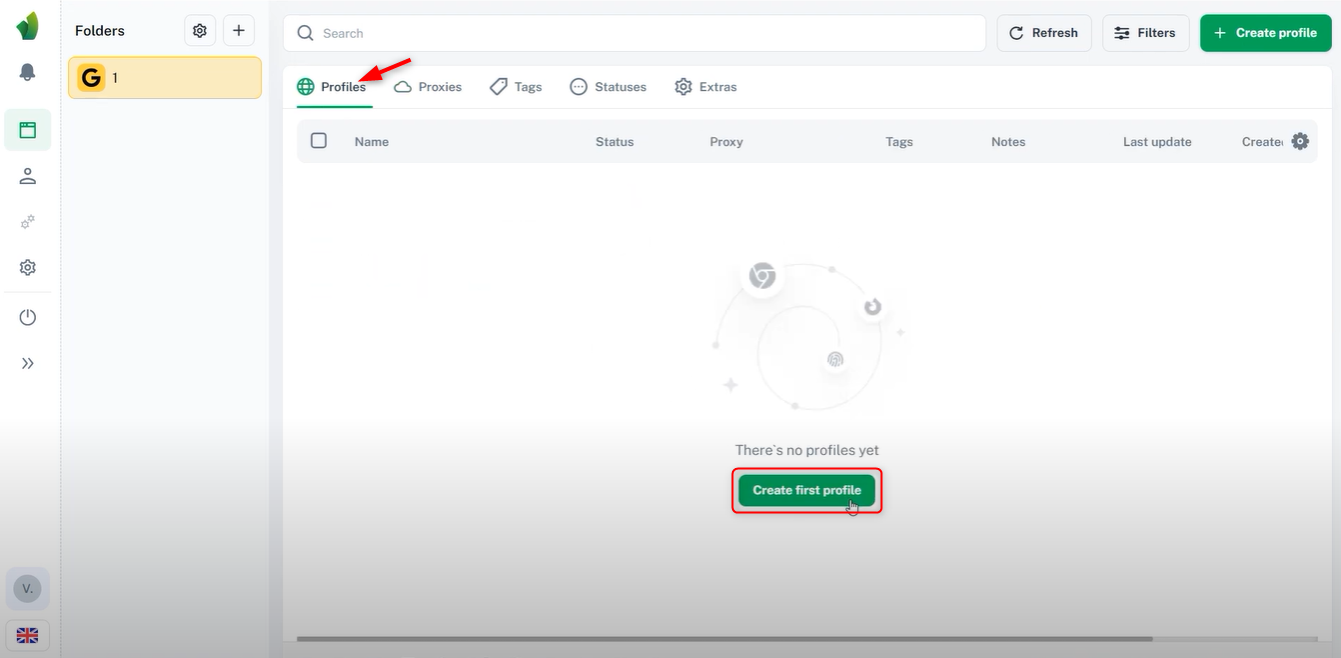
 Go to the **Profiles tab** and click **Create First Profile**.
 Give a **profile name**, select an **OS**, and choose the newly created **proxy** from the list. Your Vision Browser is now configured with a proxy, ensuring secure and private browsing!
