> ## Documentation Index
> Fetch the complete documentation index at: https://docs.toolip.io/llms.txt
> Use this file to discover all available pages before exploring further.
# How to Configure Toolip With Proxifier
> Streamline your network management with Proxifier! By integrating Toolip, you can securely route traffic from applications that lack native proxy support. With Proxifier's flexible rule-based system, you can customize traffic routing and enjoy seamless, anonymous browsing.
 ## What is Proxifier?
**Proxifier** is a powerful desktop application that allows programs without native proxy support to connect through HTTPS, HTTP, or SOCKS5 proxies. It’s ideal for routing traffic securely, managing application-specific connections, and providing an alternative to VPNs. Its rule-based setup lets you assign proxies to specific applications, giving you precise control over your internet usage.
Prefer an enterprise-grade guide? Learn more about Oculus Proxies Proxifier Integration Guide.
Targeting search engines like Google, Bing, or Yandex requires a specialized proxy to ensure stable access and avoid blocks. **Toolip’s Search Engine ISP Proxies** are designed specifically for this, providing reliable performance where standard proxies may fail. If your proxy test isn't working on search engines, switching to **Search Engine ISP Proxies** can resolve the issue.
## How to Integrate Toolip With Proxifier
1\. Visit the [Proxifier website](https://www.proxifier.com/download/) and download the application.
2\. Follow the installation instructions and launch Proxifier on your system.
1\. In Proxifier, go to the **Profile** menu.
2\. Select **Proxy Servers** to access proxy configurations.
## What is Proxifier?
**Proxifier** is a powerful desktop application that allows programs without native proxy support to connect through HTTPS, HTTP, or SOCKS5 proxies. It’s ideal for routing traffic securely, managing application-specific connections, and providing an alternative to VPNs. Its rule-based setup lets you assign proxies to specific applications, giving you precise control over your internet usage.
Prefer an enterprise-grade guide? Learn more about Oculus Proxies Proxifier Integration Guide.
Targeting search engines like Google, Bing, or Yandex requires a specialized proxy to ensure stable access and avoid blocks. **Toolip’s Search Engine ISP Proxies** are designed specifically for this, providing reliable performance where standard proxies may fail. If your proxy test isn't working on search engines, switching to **Search Engine ISP Proxies** can resolve the issue.
## How to Integrate Toolip With Proxifier
1\. Visit the [Proxifier website](https://www.proxifier.com/download/) and download the application.
2\. Follow the installation instructions and launch Proxifier on your system.
1\. In Proxifier, go to the **Profile** menu.
2\. Select **Proxy Servers** to access proxy configurations.
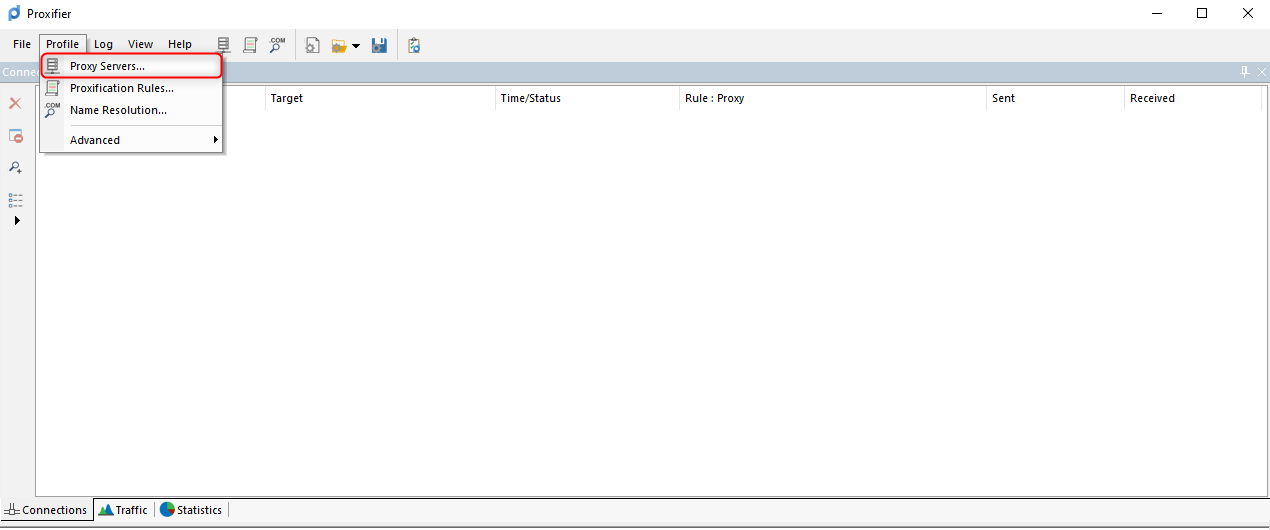 1\. Click the **Add** button to configure a new proxy.
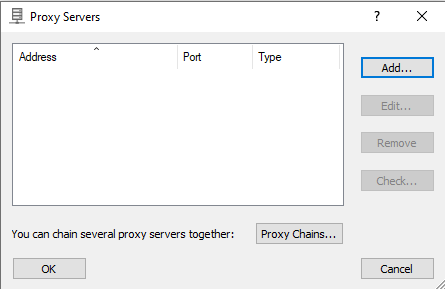 2\. Enter your Toolip proxy details:
* **Type**: Select HTTP, HTTPS, or SOCKS5.
* **Address**: `proxy.toolip.io`
* **Port**: Get from your [Toolip dashboard](https://toolip.io/dashboard/page/plans).
* **Username & Password**: Enter your Toolip credentials.
3\. Click **OK** to save the proxy settings.
**For geo-targeted proxies**, format your username like `your-username-country-US` to use a specific region.
2\. Enter your Toolip proxy details:
* **Type**: Select HTTP, HTTPS, or SOCKS5.
* **Address**: `proxy.toolip.io`
* **Port**: Get from your [Toolip dashboard](https://toolip.io/dashboard/page/plans).
* **Username & Password**: Enter your Toolip credentials.
3\. Click **OK** to save the proxy settings.
**For geo-targeted proxies**, format your username like `your-username-country-US` to use a specific region.
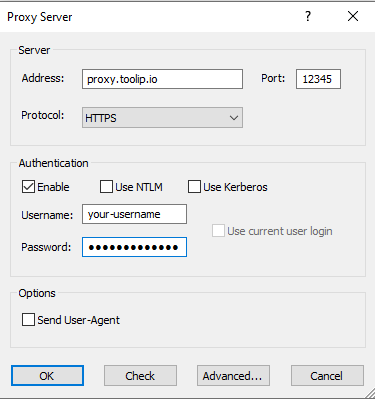 1\. In the **Proxy Servers** section, select the proxy you added.
2\. Click **Check** and then **Start Testing**.
1\. In the **Proxy Servers** section, select the proxy you added.
2\. Click **Check** and then **Start Testing**.
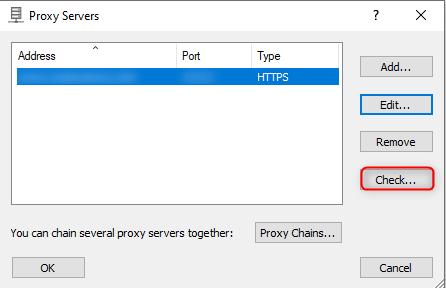 3\. Ensure the test is successful before proceeding.
1\. Go to **Profile** > **Proxification Rules**.
3\. Ensure the test is successful before proceeding.
1\. Go to **Profile** > **Proxification Rules**.
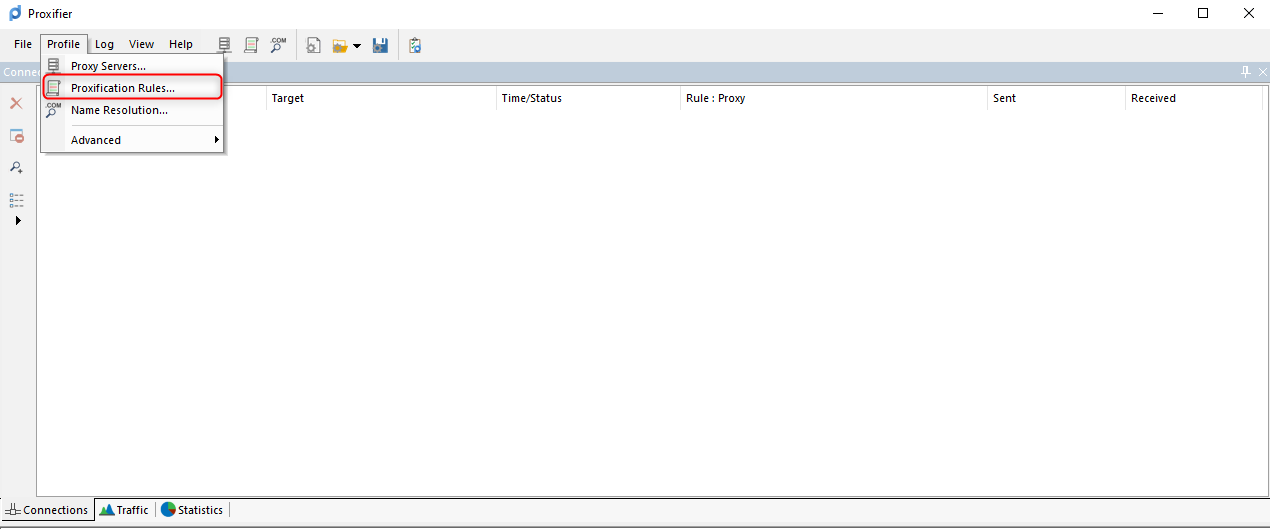 2\. Click **Add** to create a new rule.
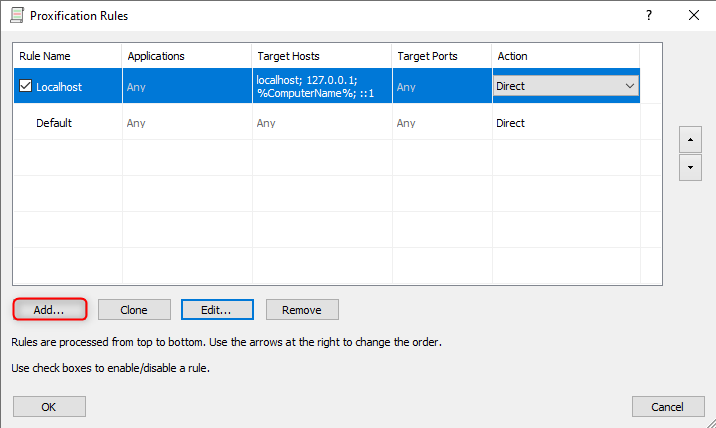 3\. **Name** the rule for easy identification.
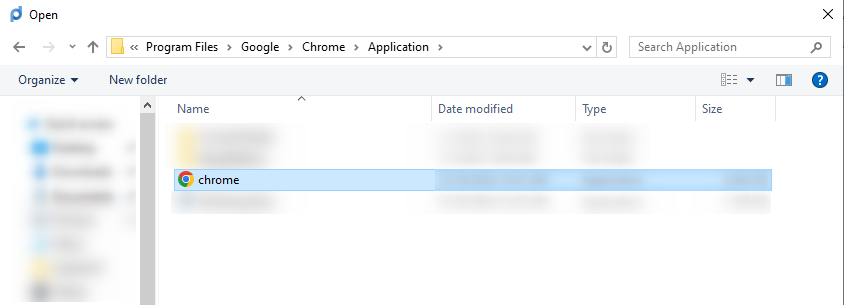
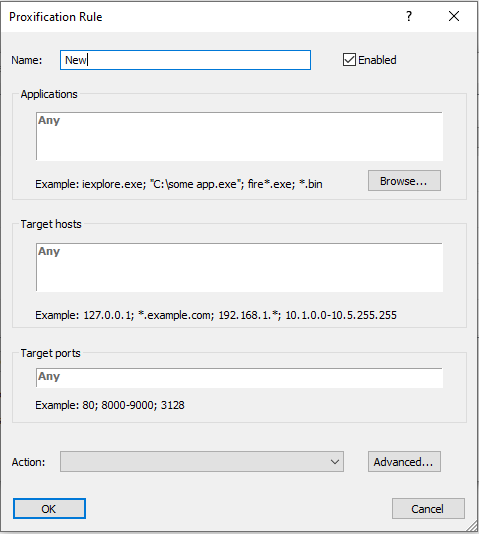 4\. Click **Browse** and select the application you want to route through the proxy (e.g., Chrome, Firefox).
 5\. Choose the **Action** for traffic route:
* **Proxy** (recommended for private browsing).
* **Direct** (if you want to exclude certain apps).
* **Block** (to restrict internet access).
5\. Choose the **Action** for traffic route:
* **Proxy** (recommended for private browsing).
* **Direct** (if you want to exclude certain apps).
* **Block** (to restrict internet access).
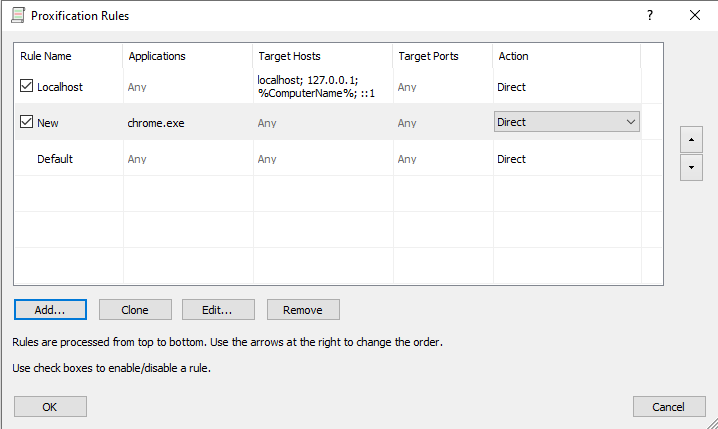
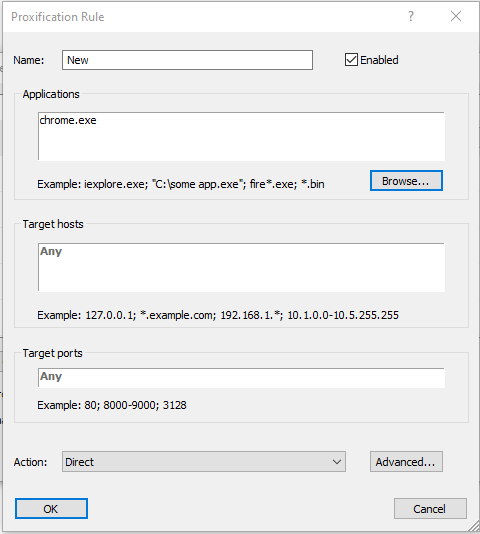 6\. Save the rule and move it to the top of the list for priority processing.
 1\. Open the application you assigned to the proxy.
2\. Visit an IP-checking website like [httpbin.org/ip](http://httpbin.org/ip).
3\. Ensure the displayed IP matches your Toolip proxy to confirm the setup.
By integrating **Toolip** with **Proxifier**, you gain full control over how applications connect to the internet. This setup ensures secure browsing, application-specific proxy routing, and complete anonymity for sensitive operations.
1\. Open the application you assigned to the proxy.
2\. Visit an IP-checking website like [httpbin.org/ip](http://httpbin.org/ip).
3\. Ensure the displayed IP matches your Toolip proxy to confirm the setup.
By integrating **Toolip** with **Proxifier**, you gain full control over how applications connect to the internet. This setup ensures secure browsing, application-specific proxy routing, and complete anonymity for sensitive operations.