> ## Documentation Index
> Fetch the complete documentation index at: https://docs.toolip.io/llms.txt
> Use this file to discover all available pages before exploring further.
# How to Set Up Toolip With Logii Browser
> Make the best of commercial operations management and multiple online accounts with Logii Browser together with Toolip! Follow this step-by-step guide to set it up flawlessly.
## What is Logii Browser?
**Logii Browser** is a secure anti-detect browser built for online professionals such as affiliate marketers, e-commerce sellers, and social media managers. It enables users to stay anonymous, safeguard their identity, and manage multiple accounts without detection. With secure browsing, automation tools, proxy support, and anti-fingerprinting technology, Logii provides a smooth and undetectable experience. By integrating **Toolip**, you can further strengthen privacy, bypass geo-restrictions, and ensure a stable browsing environment.
Prefer an enterprise-grade guide? Learn more about Oculus Proxies Logii Integration Guide.
If you're using **Toolip** for search engines like **Google, Bing, or Yandex**, you may need **Search Engine ISP Proxies** to avoid blocks and ensure stable access. Standard proxies might not work reliably for these platforms.
## How to Set Up Toolip in Logii Browser
Download and install [Logii](https://logii.in/freeversion#).
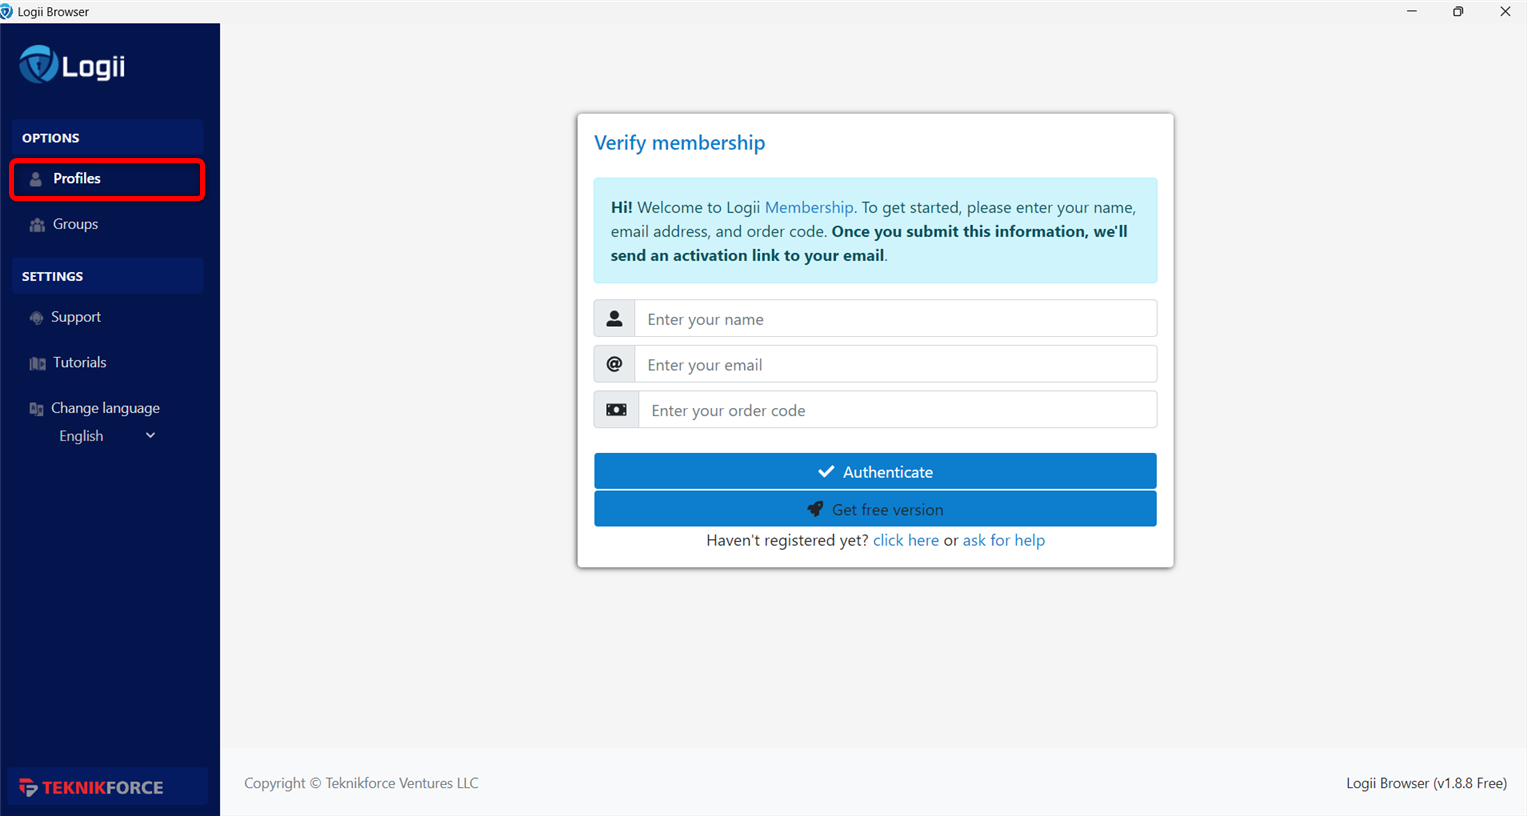
Open the browser and navigate to the **Profiles** section.
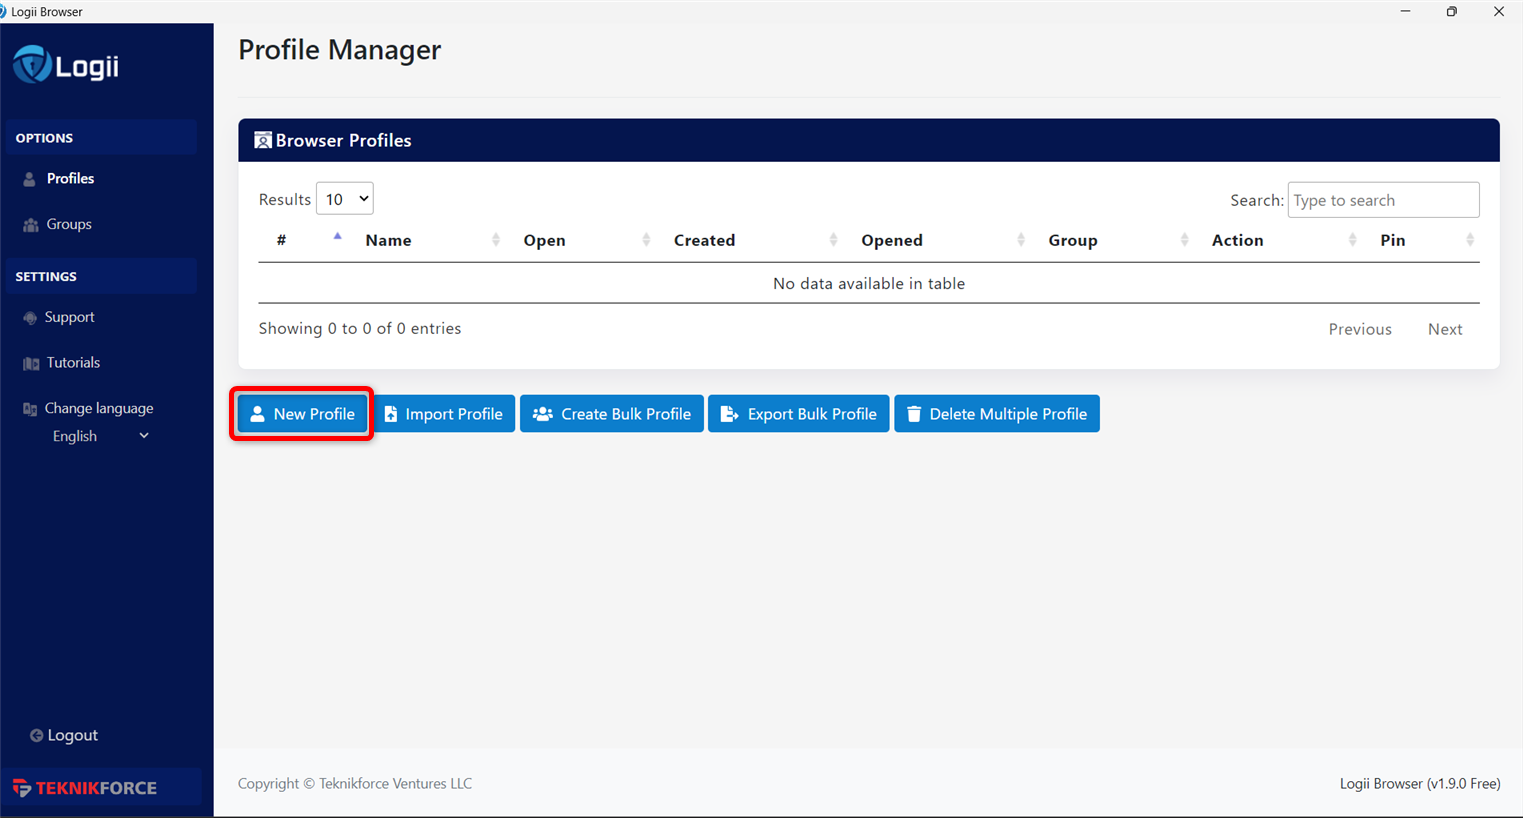
 Click **New Profile** to create a new browsing profile.
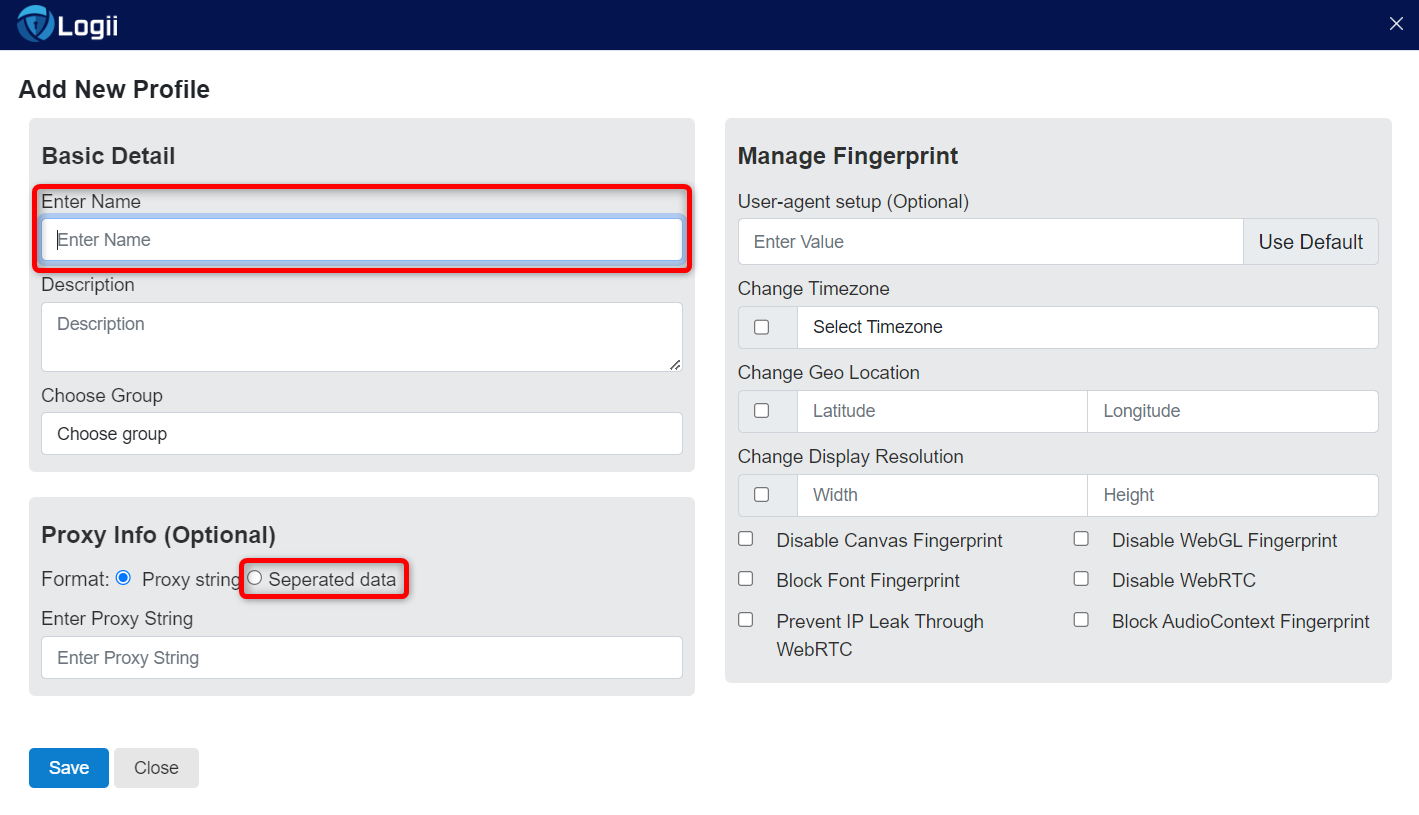
 Assign a **Name** to the profile and, under the Proxy Info tab, select **Separated data**.
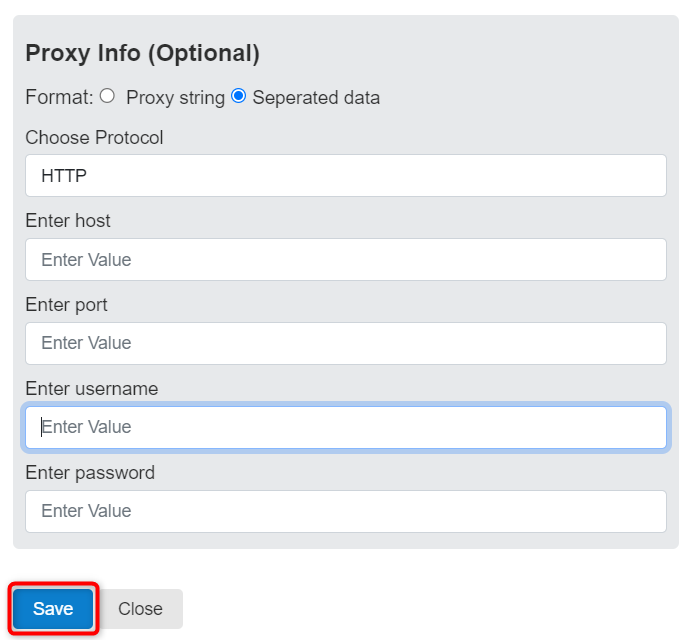
 Enter the required proxy details: `Protocol`, `Host`, `Port`, `Username`, and `Password`, then click **Save**.
 Return to the **Profile Manager** and start browsing with your configured proxy!