> ## Documentation Index
> Fetch the complete documentation index at: https://docs.toolip.io/llms.txt
> Use this file to discover all available pages before exploring further.
# How to Set Up Toolip With KeyAssort
> Enhance your SEO strategy and streamline keyword management with KeyAssort. This guide will walk you through using KeyAssort to efficiently collect, clean, cluster, and structure keyword data for improved search engine optimization.
 ## What is KeyAssort?
**KeyAssort** is an advanced keyword research and clustering tool that helps users collect, analyze, and organize large volumes of search queries. By automating semantic grouping, it ensures that keywords are structured effectively for search engine ranking strategies. When combined with **Toolip**, users can further enhance data processing, improve clustering accuracy, and optimize content strategies for better search engine visibility.
Prefer an enterprise-grade guide? Learn more about Oculus Proxies Keyassort Integration Guide.
If you're using **Toolip** for search engines like **Google, Bing, or Yandex**, you may need **Search Engine ISP Proxies** to avoid blocks and ensure stable access. Standard proxies might not work reliably for these platforms.
## How to Integrate Toolip With KeyAssort
[Download KeyAssort](https://keyassort.com/) and install it.
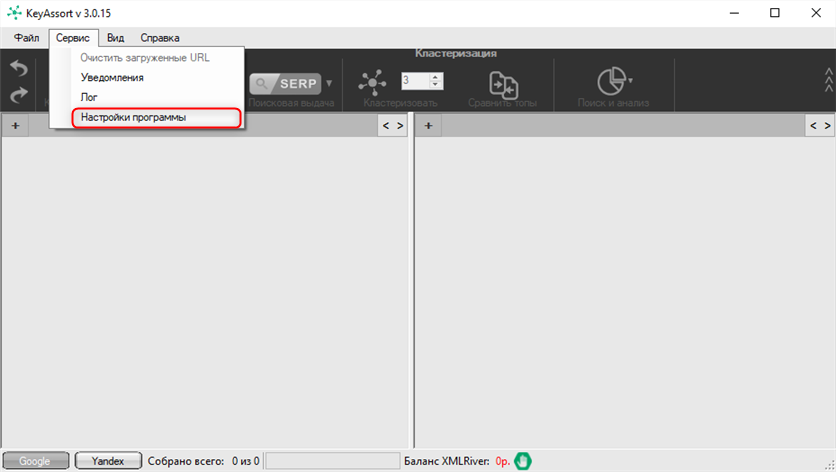
In the toolbar, click on the **Service** tab and select **Program Settings**.
## What is KeyAssort?
**KeyAssort** is an advanced keyword research and clustering tool that helps users collect, analyze, and organize large volumes of search queries. By automating semantic grouping, it ensures that keywords are structured effectively for search engine ranking strategies. When combined with **Toolip**, users can further enhance data processing, improve clustering accuracy, and optimize content strategies for better search engine visibility.
Prefer an enterprise-grade guide? Learn more about Oculus Proxies Keyassort Integration Guide.
If you're using **Toolip** for search engines like **Google, Bing, or Yandex**, you may need **Search Engine ISP Proxies** to avoid blocks and ensure stable access. Standard proxies might not work reliably for these platforms.
## How to Integrate Toolip With KeyAssort
[Download KeyAssort](https://keyassort.com/) and install it.
In the toolbar, click on the **Service** tab and select **Program Settings**.
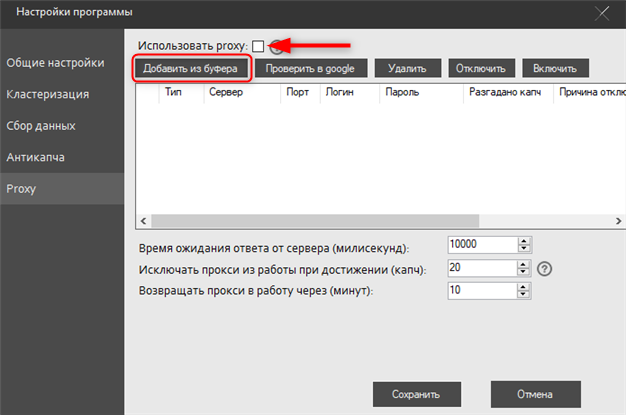
 In the settings window, navigate to the **Proxy** section, check the box **Use proxy**, and click **Add from clipboard**.
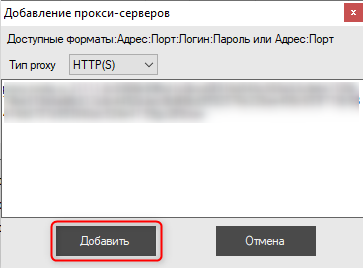
 Input the proxy information in the following format: `host:port:login:password`.
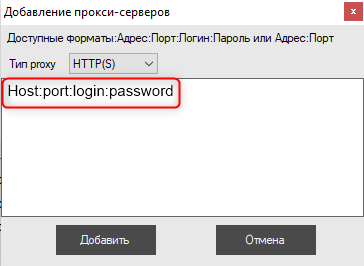 Once filled, click the **Add** button to save the proxy.
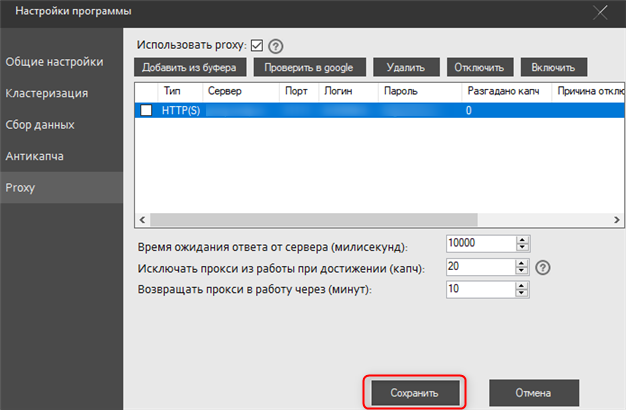
 You will be redirected to the Proxy section in the main window, where the newly added proxy will be displayed. If everything is correct, click **Save** at the bottom of the screen to finalize the setup.