> ## Documentation Index
> Fetch the complete documentation index at: https://docs.toolip.io/llms.txt
> Use this file to discover all available pages before exploring further.
# How to Set Up Toolip With Identory Browser
> Streamline your multi-profile browsing with Toolip and Identory Browser. This guide walks you through integrating Toolip proxies into Identory Browser to ensure secure, private, and efficient browsing across all your profiles.
## What is Identory Browser?
**Identory Browser** is a universal anti-detect browser designed for creating unique digital identities on the fly for any website. It provides real device fingerprints, maximum protection, and complete privacy, ensuring that each profile operates in an isolated environment. This allows users to manage multiple accounts securely while minimizing detection risks. By integrating **Toolip with Identory**, you can further enhance anonymity, security, and browsing efficiency, ensuring smooth and uninterrupted connections.
Prefer an enterprise-grade guide? Learn more about Oculus Proxies Identory Integration Guide.
Targeting search engines like Google, Bing, or Yandex requires a specialized proxy to ensure stable access and avoid blocks. **Toolip’s Search Engine ISP Proxies** are designed specifically for this, providing reliable performance where standard proxies may fail. If your proxy test isn't working on search engines, switching to **Search Engine ISP Proxies** can resolve the issue.
[Download](https://identory.com/en/download), install the browser on your device and launch it.
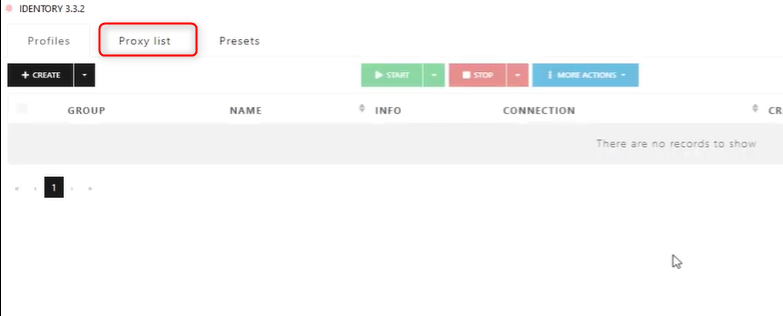
Once the browser is open, navigate to the **Proxy List** section.
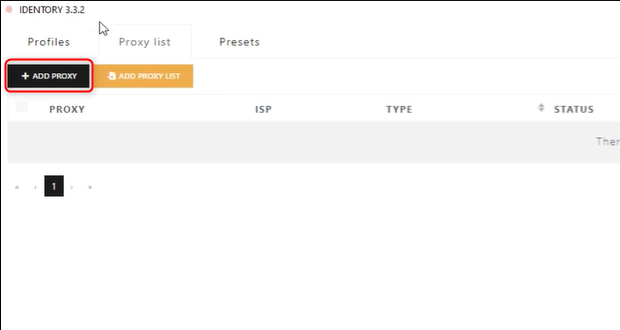
 Click on **ADD PROXY** to begin the setup.
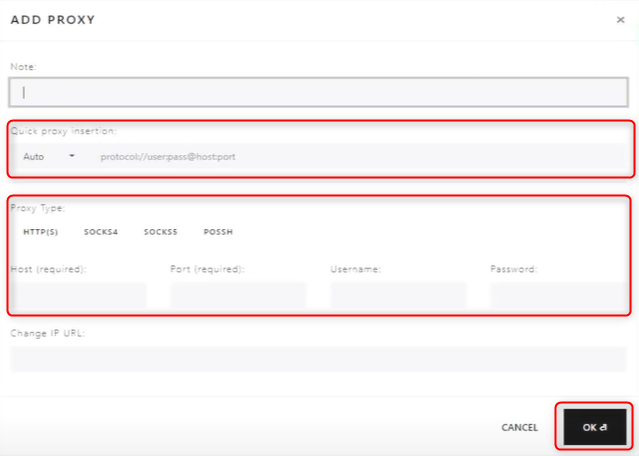
 You have two options for adding a proxy:
1. Quick connection using this format: `protocol`://`Username`:`Password`@`Host`:`Port`.
2. Fill your proxy's `Type`, `Host`, `Port`, `Username` and `Password`.
Press **OK** to save the settings.
You have two options for adding a proxy:
1. Quick connection using this format: `protocol`://`Username`:`Password`@`Host`:`Port`.
2. Fill your proxy's `Type`, `Host`, `Port`, `Username` and `Password`.
Press **OK** to save the settings.
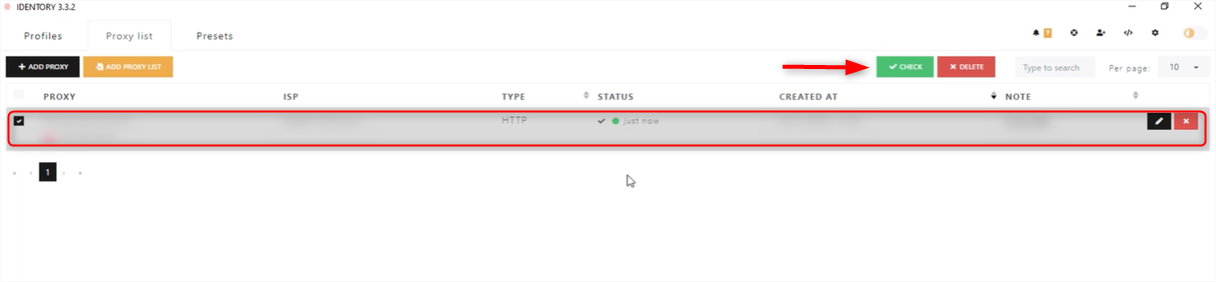
 The newly added proxy will appear in the list. To test its functionality, click the **green CHECK button**.