> ## Documentation Index
> Fetch the complete documentation index at: https://docs.toolip.io/llms.txt
> Use this file to discover all available pages before exploring further.
# How to Set Up Toolip With Fluxguard
> Want to monitor websites securely, privately and activly with Fluxguard? By integrating Toolip, you can track website changes while keeping your activities anonymous and undetectable.
## What is Fluxguard?
**Fluxguard** is a powerful solution for tracking, analyzing, and responding to critical changes in web-based data. With its advanced AI crawler, it monitors websites for relevant updates while minimizing false positives and reducing human error. Automated workflows and actionable insights help streamline operations and save valuable time. By integrating **Toolip**, you can monitor websites securely, bypass restrictions, and ensure your activities remain private and undetectable.
Prefer an enterprise-grade guide? Learn more about Oculus Proxies Fluxguard Integration Guide.
Targeting search engines like Google, Bing, or Yandex requires a specialized proxy to ensure stable access and avoid blocks. **Toolip’s Search Engine ISP Proxies** are designed specifically for this, providing reliable performance where standard proxies may fail. If your proxy test isn’t working on search engines, switching to **Search Engine ISP Proxies** can resolve the issue.
## How to Integrate Toolip With Fluxguard
Create an account and log in to the [Fluxguard dashboard](https://app.fluxguard.com/).
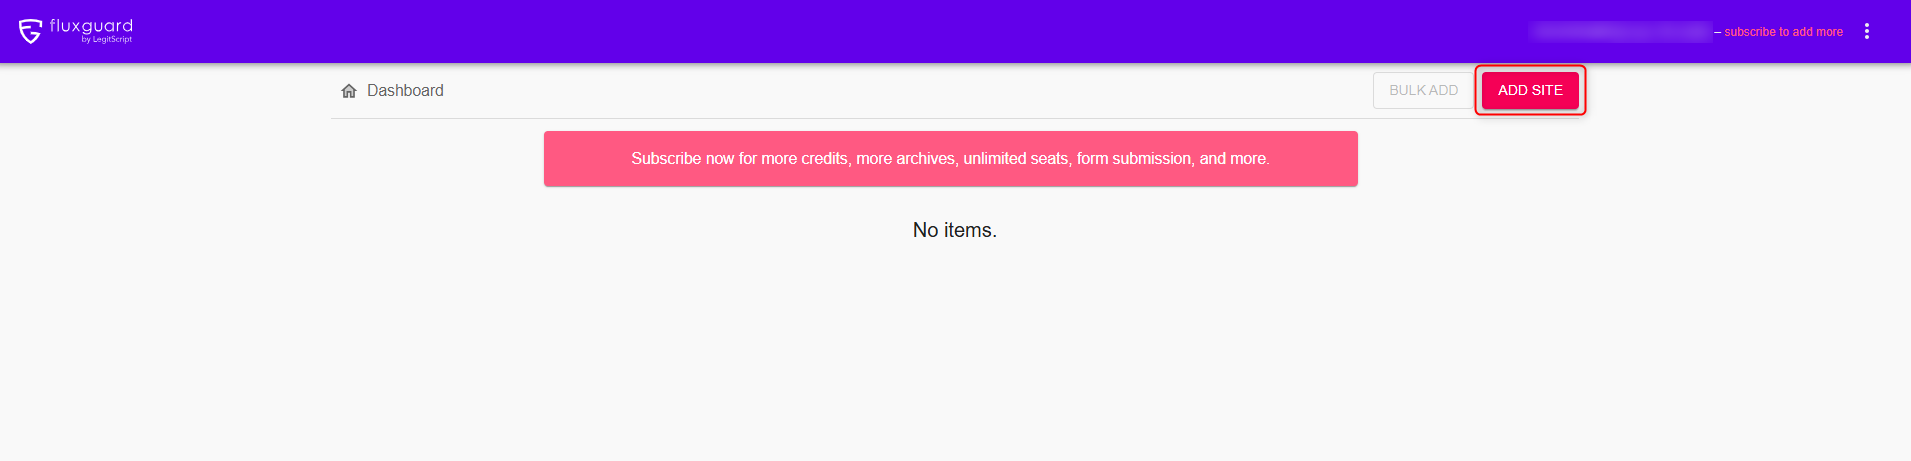
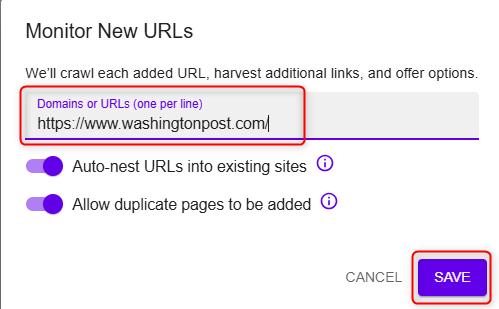
Inside the dashboard click **ADD SITE**, enter the **URL** you want to track, and press **SAVE**.
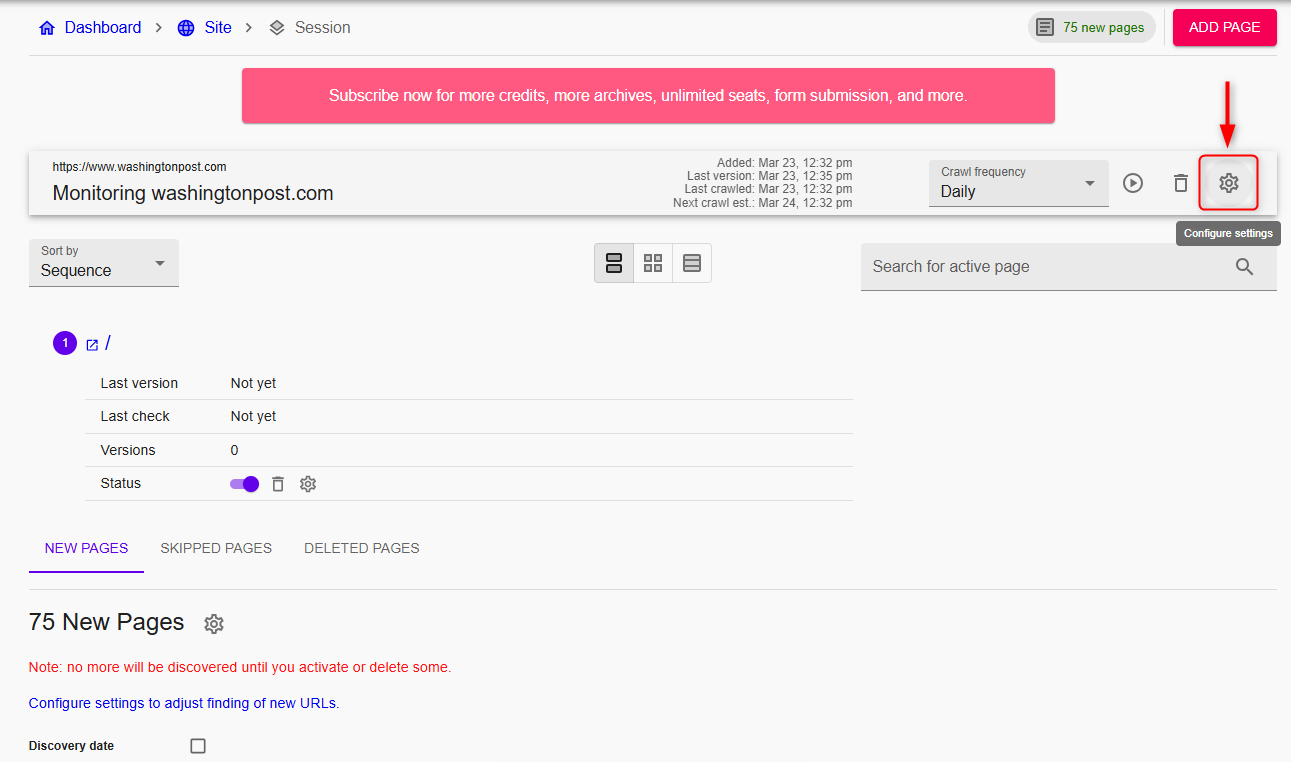
 Once the Session page opens, navigate to **Session settings**.
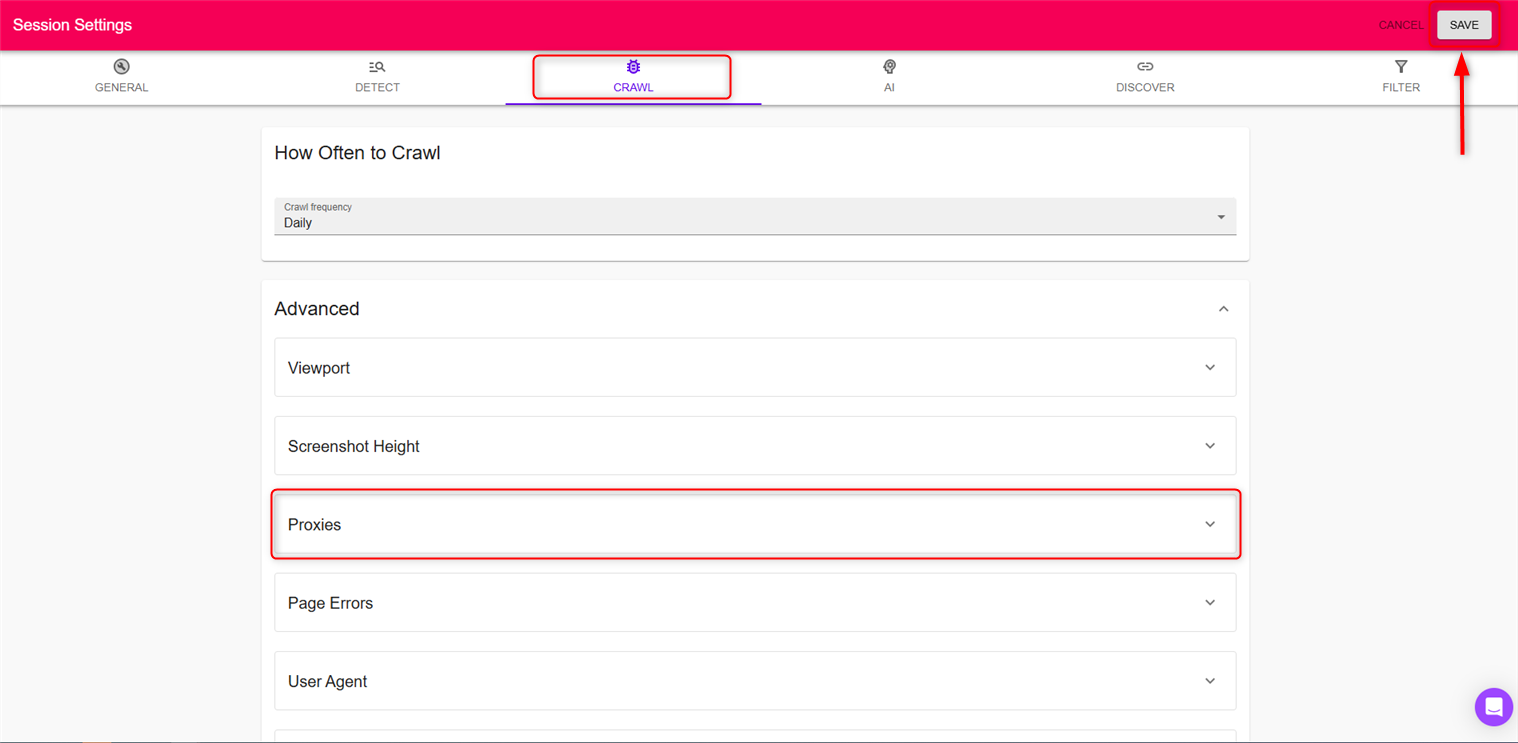
 Inside **Session settings**, go to the **CRAWL** tab and open the **Proxies** sub-tab.
 Fill in the required proxy information using one of the two available methods:
* Quick insert: username:password\@host:port
* Or separately: `Host`, `Port`, `Username`, `Password`.
Hit **Save** and return to your [dashboard](https://app.fluxguard.com/) for monitoring.
Fill in the required proxy information using one of the two available methods:
* Quick insert: username:password\@host:port
* Or separately: `Host`, `Port`, `Username`, `Password`.
Hit **Save** and return to your [dashboard](https://app.fluxguard.com/) for monitoring.