> ## Documentation Index
> Fetch the complete documentation index at: https://docs.toolip.io/llms.txt
> Use this file to discover all available pages before exploring further.
# How to Configure Proxy Settings in Firefox
> Take charge of your online experience! Setting up a proxy in Firefox gives you a secure shield for your browsing—ideal for boosting privacy, bypassing limits, or handling multiple accounts with ease. Follow this guide to set up proxies and unleash the full power of Firefox.
 ## How to Change Proxy Settings in Firefox
Prefer an enterprise-grade guide? Learn more about Oculus Proxies Firefox Proxy Setup.
Targeting search engines like Google, Bing, or Yandex requires a specialized proxy to ensure stable access and avoid blocks. **Toolip’s Search Engine ISP Proxies** are designed specifically for this, providing reliable performance where standard proxies may fail. If your proxy test isn't working on search engines, switching to **Search Engine ISP Proxies** can resolve the issue.
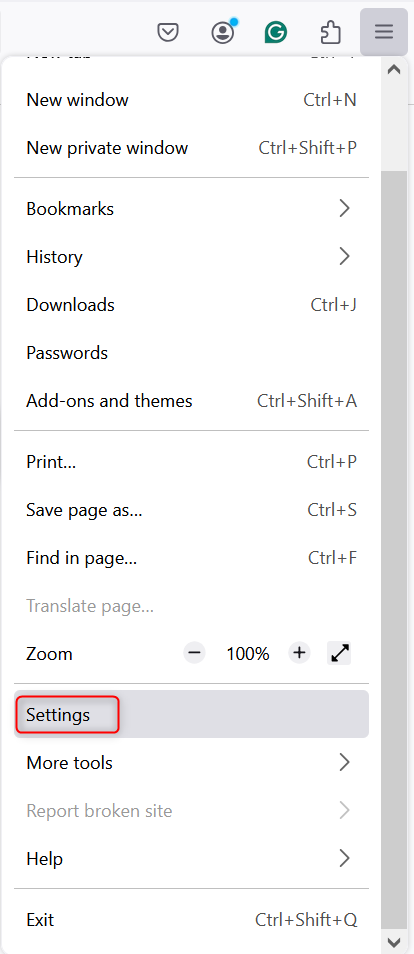
1\. Open **Firefox**.
2\. Click the **menu icon** (three horizontal lines) in the top-right corner.
3\. Select **Settings** from the dropdown.
## How to Change Proxy Settings in Firefox
Prefer an enterprise-grade guide? Learn more about Oculus Proxies Firefox Proxy Setup.
Targeting search engines like Google, Bing, or Yandex requires a specialized proxy to ensure stable access and avoid blocks. **Toolip’s Search Engine ISP Proxies** are designed specifically for this, providing reliable performance where standard proxies may fail. If your proxy test isn't working on search engines, switching to **Search Engine ISP Proxies** can resolve the issue.
1\. Open **Firefox**.
2\. Click the **menu icon** (three horizontal lines) in the top-right corner.
3\. Select **Settings** from the dropdown.
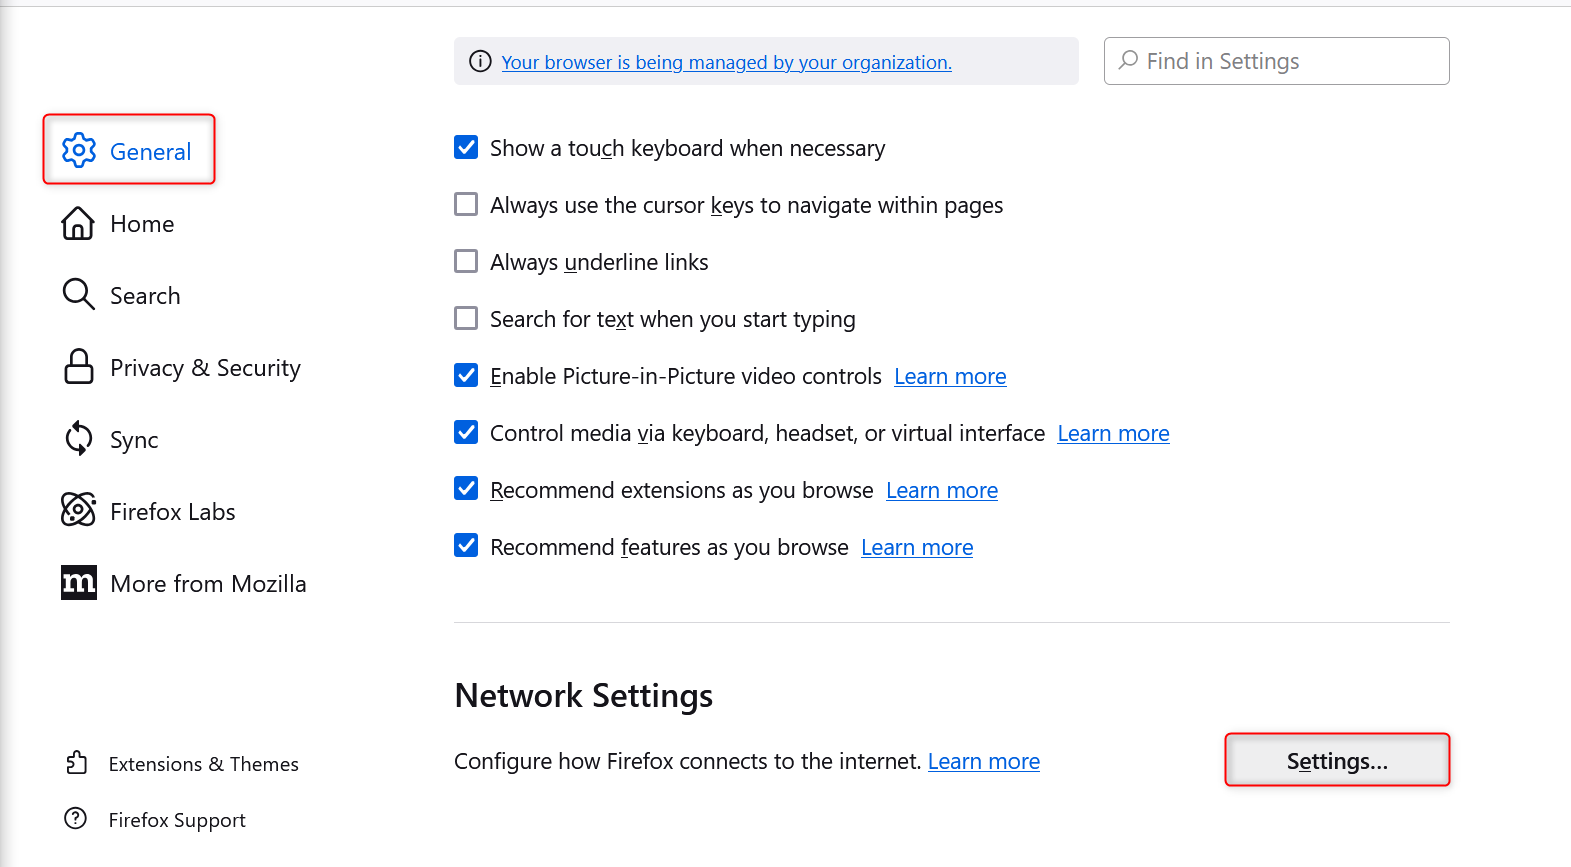
 1\. Scroll down in the **Settings** menu.
2\. Locate the **Network Settings** section.
3\. Click **Settings** to open the proxy configuration panel.
1\. Scroll down in the **Settings** menu.
2\. Locate the **Network Settings** section.
3\. Click **Settings** to open the proxy configuration panel.
 1\. In the **Network Settings** window, select **Manual proxy configuration**.
2\. Enter your **Toolip proxy details**:
* **HTTP Proxy**: `proxy.toolip.io`
* **Port**: Use the port number from your [Toolip dashboard](https://toolip.io/dashboard).
3\. (Optional) Check **Use this proxy server for all protocols** if you want to apply the same settings for HTTPS, FTP, and other connections.
4\. If using SOCKS proxies, select **SOCKS v5** and input the corresponding server details.
1\. In the **Network Settings** window, select **Manual proxy configuration**.
2\. Enter your **Toolip proxy details**:
* **HTTP Proxy**: `proxy.toolip.io`
* **Port**: Use the port number from your [Toolip dashboard](https://toolip.io/dashboard).
3\. (Optional) Check **Use this proxy server for all protocols** if you want to apply the same settings for HTTPS, FTP, and other connections.
4\. If using SOCKS proxies, select **SOCKS v5** and input the corresponding server details.
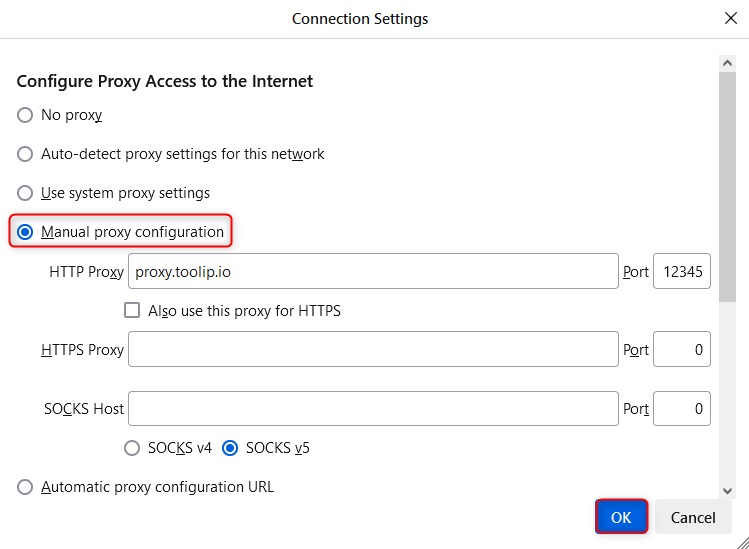 1\. Click **OK** to save your changes.
2\. When prompted while browsing, enter your **Toolip username** and **password** to authenticate the proxy connection.
That’s it! **Firefox** is now configured to use **Toolip**. Whether you’re managing multiple accounts, securing your connection, or accessing geo-restricted content, you’re ready for a seamless and private browsing experience. 🚀
1\. Click **OK** to save your changes.
2\. When prompted while browsing, enter your **Toolip username** and **password** to authenticate the proxy connection.
That’s it! **Firefox** is now configured to use **Toolip**. Whether you’re managing multiple accounts, securing your connection, or accessing geo-restricted content, you’re ready for a seamless and private browsing experience. 🚀