> ## Documentation Index
> Fetch the complete documentation index at: https://docs.toolip.io/llms.txt
> Use this file to discover all available pages before exploring further.
# How to Integrate Toolip With DICloak
> Enhance your efficiency and streamline multi-account management with Toolip in DICloak Browser. This guide will walk you through setting up secure and reliable proxy connections for seamless browsing, enhanced privacy, and maximum anonymity.
## What is DICloak?
**DICloak** is an anti-detect browser designed for secure browsing. It features dynamic fingerprinting, profile management, and robust proxy support, making it essential for professionals prioritizing privacy and data security. Whether managing multiple accounts or automating bulk operations, DICloak offers a user-friendly interface with automatic login and multi-account management. Integrating **Toolip** further enhances privacy, secure proxy connections, and efficiency.
Prefer an enterprise-grade guide? Learn more about Oculus Proxies Dicloak Integration Guide.
Targeting search engines like Google, Bing, or Yandex requires a specialized proxy to ensure stable access and avoid blocks. **Toolip’s Search Engine ISP Proxies** are designed specifically for this, providing reliable performance where standard proxies may fail. If your proxy test isn't working on search engines, switching to **Search Engine ISP Proxies** can resolve the issue.
## How to Integrate Toolip With DICloak
Visit the DICloak website and [download the browser](https://dicloak.com/download).
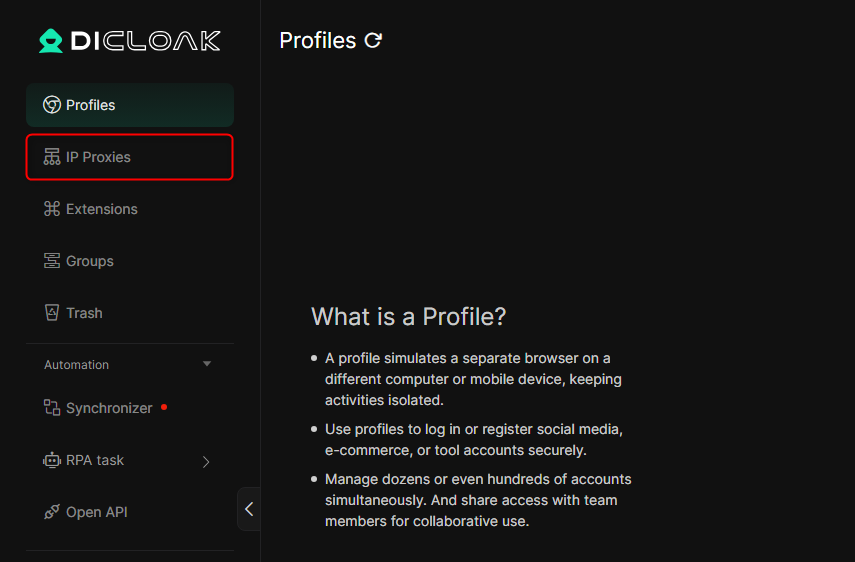
Launch the browser and navigate to **IP Proxies** on the left menu.
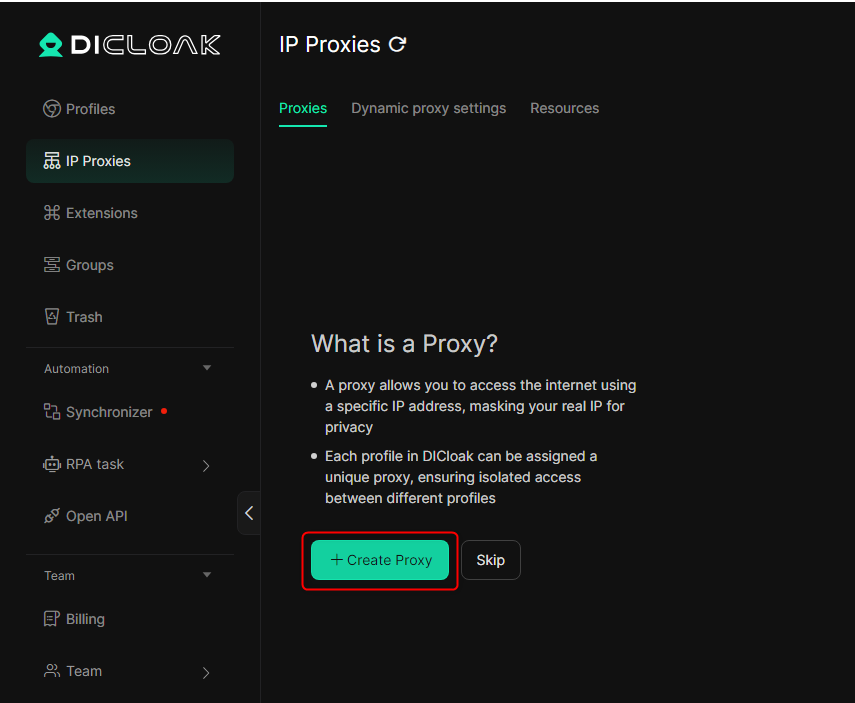
 Click **Create Proxy** to add a new proxy configuration.
 In the pop-up window, provide the following details: `Proxy type`, `Host`, `Port`, `Username (Account)`, and `Password`.
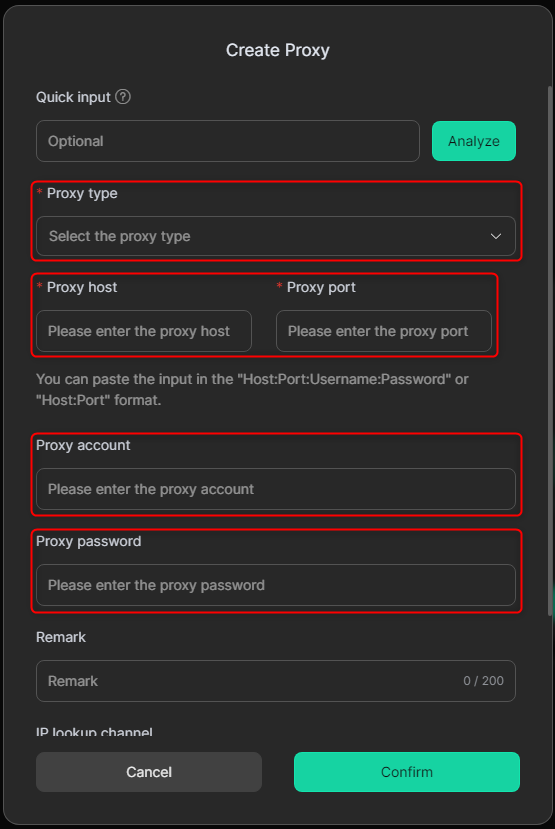 Scroll down and click **Checking Proxy** to test the connection. If everything is correct, click **Confirm**.
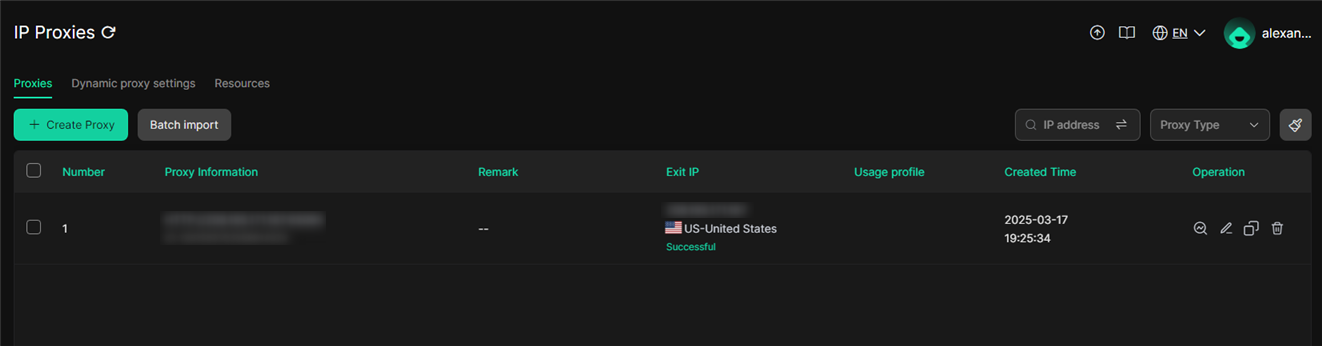
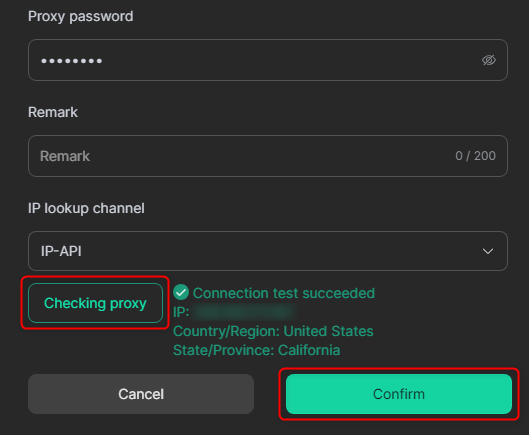 Your newly added proxy will now appear in the **IP Proxies** table, ready for use.