> ## Documentation Index
> Fetch the complete documentation index at: https://docs.toolip.io/llms.txt
> Use this file to discover all available pages before exploring further.
# How to Integrate Toolip With Datadog
> Keep an eye on cloud applications and infrastructure efficiently with Datadog Agent and Toolip. By integrating Toolip, you can monitor system performance, analyze real-time data, and ensure secure and private cloud monitoring.
## What is Datadog?
**Datadog** provides comprehensive monitoring solutions to help engineering teams manage cloud and hybrid environments efficiently. By integrating **Toolip**, you can enhance security, maintain privacy, and monitor systems seamlessly across various environments. Its services include infrastructure monitoring, network performance tracking, serverless monitoring, and cloud cost management, ensuring optimal performance, reliability, and cost-effectiveness.
Prefer an enterprise-grade guide? Learn more about Oculus Proxies Datadog Integration Guide.
Targeting search engines like Google, Bing, or Yandex requires a specialized proxy to ensure stable access and avoid blocks. **Toolip’s Search Engine ISP Proxies** are designed specifically for this, providing reliable performance where standard proxies may fail. If your proxy test isn't working on search engines, switching to **Search Engine ISP Proxies** can resolve the issue.
## How to Integrate Toolip With Datadog Agent
Visit the [Datadog website](https://app.datadoghq.eu/account/login?next=%2Fnetwork%2Fintro%3FredirectFrom%3Danalytics), create an account, and launch the Agent Manager.
After installation, open the **Agent Manager** and navigate to **Settings**.
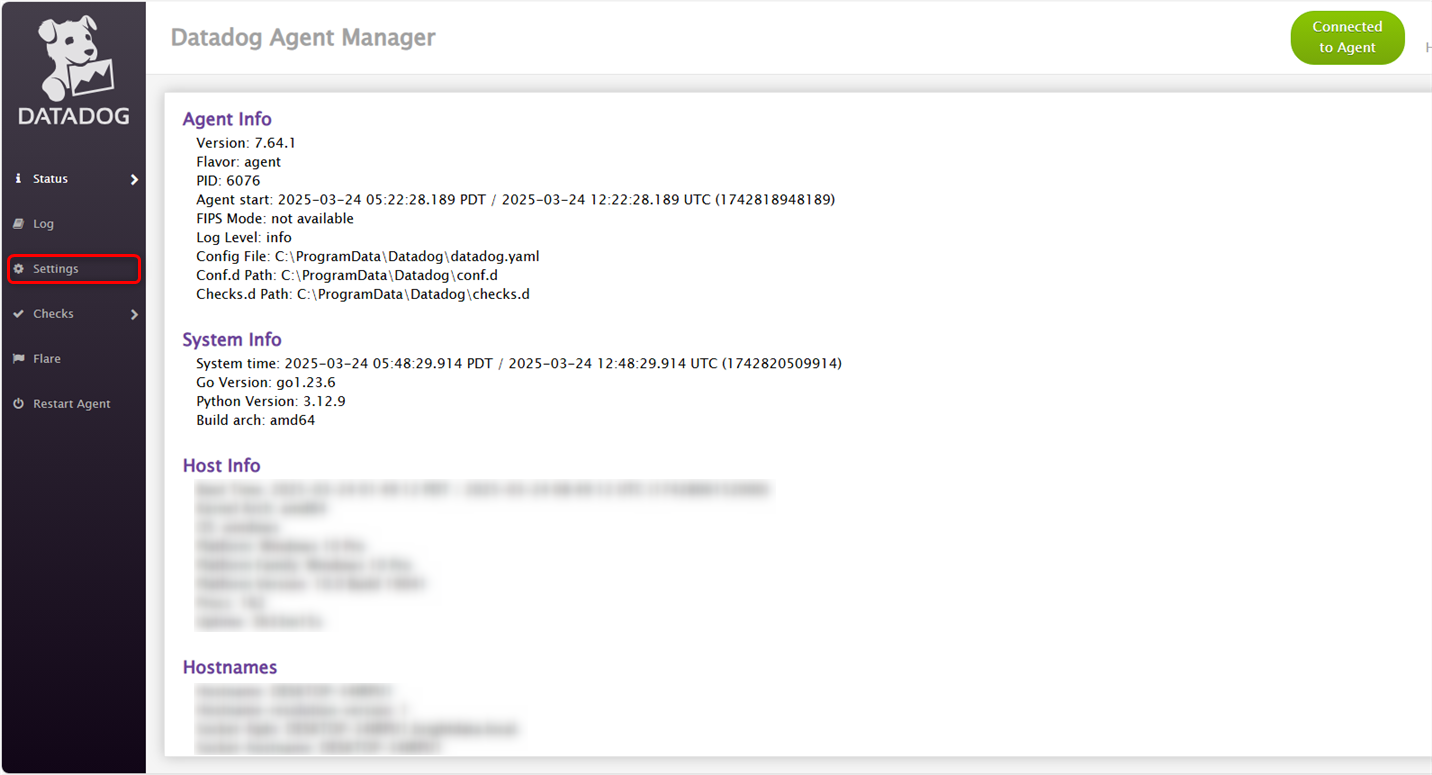 In the `datadog.yaml` configuration file, locate the **proxy** section.
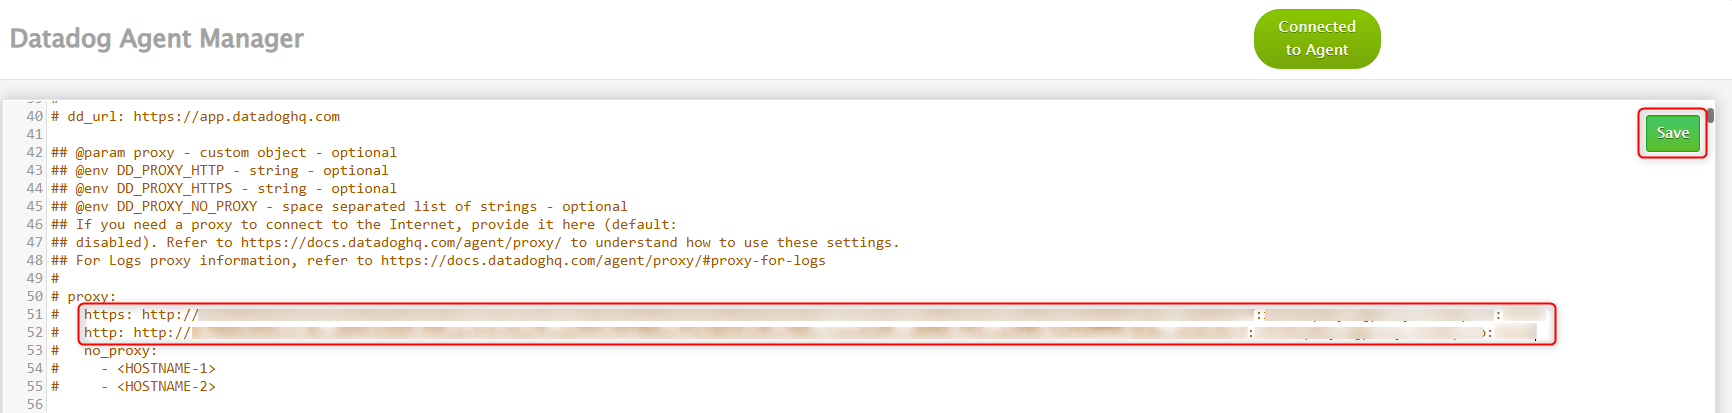
 The Agent uses `https` to send data to Datadog, but integrations might use `http` to gather metrics.
Replace ``, ``, ``, and `` with your proxy details, then click **Save**.
The Agent uses `https` to send data to Datadog, but integrations might use `http` to gather metrics.
Replace ``, ``, ``, and `` with your proxy details, then click **Save**.
 Click **Restart Agent** from the left menu to apply the new proxy settings.
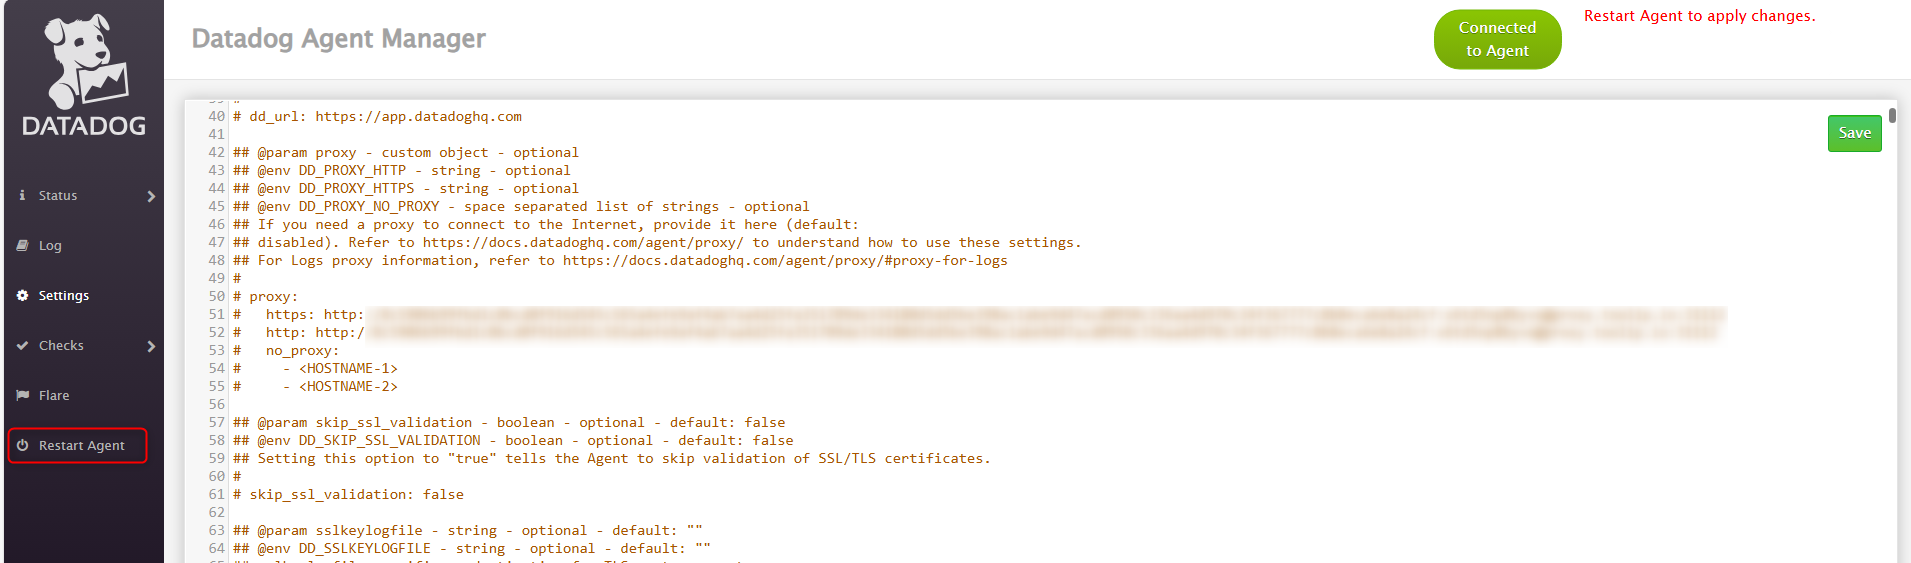 Now you're all set up in terms of Proxy Configurations and ready to work with your agent.