> ## Documentation Index
> Fetch the complete documentation index at: https://docs.toolip.io/llms.txt
> Use this file to discover all available pages before exploring further.
# How to Set Up Toolip With Che Browser
> Protect your privacy and optimize your workflow with Toolip and Che Browser. This step-by-step guide will show you how to integrate Toolip into Che Browser for secure, consistent, and effective multi-account browsing.
## What is Che Browser?
**Che** Browser is a specialized anti-detect browser that replaces both browser and hardware fingerprints on your Windows machine. It allows you to operate several browser profiles at the same time, with each one appearing as a unique device to the websites you visit. By integrating **Toolip**, you can further enhance anonymity, manage proxies with ease, and ensure stable, geo-targeted connections across all your profiles.
Prefer an enterprise-grade guide? Learn more about Oculus Proxies Che Browser Integration Guide.
Targeting search engines like Google, Bing, or Yandex requires a specialized proxy to ensure stable access and avoid blocks. **Toolip’s Search Engine ISP Proxies** are designed specifically for this, providing reliable performance where standard proxies may fail. If your proxy test isn’t working on search engines, switching to **Search Engine ISP Proxies** can resolve the issue.
Che Browser supports only SOCKS5 protocol, use only port 31115
## How to Integrate Toolip With Che Browser
[Download and install](https://chebrowser.site/) the latest version of Che Browser on your device.
Navigate to the **Profiles tab** and select the profile you want to configure.
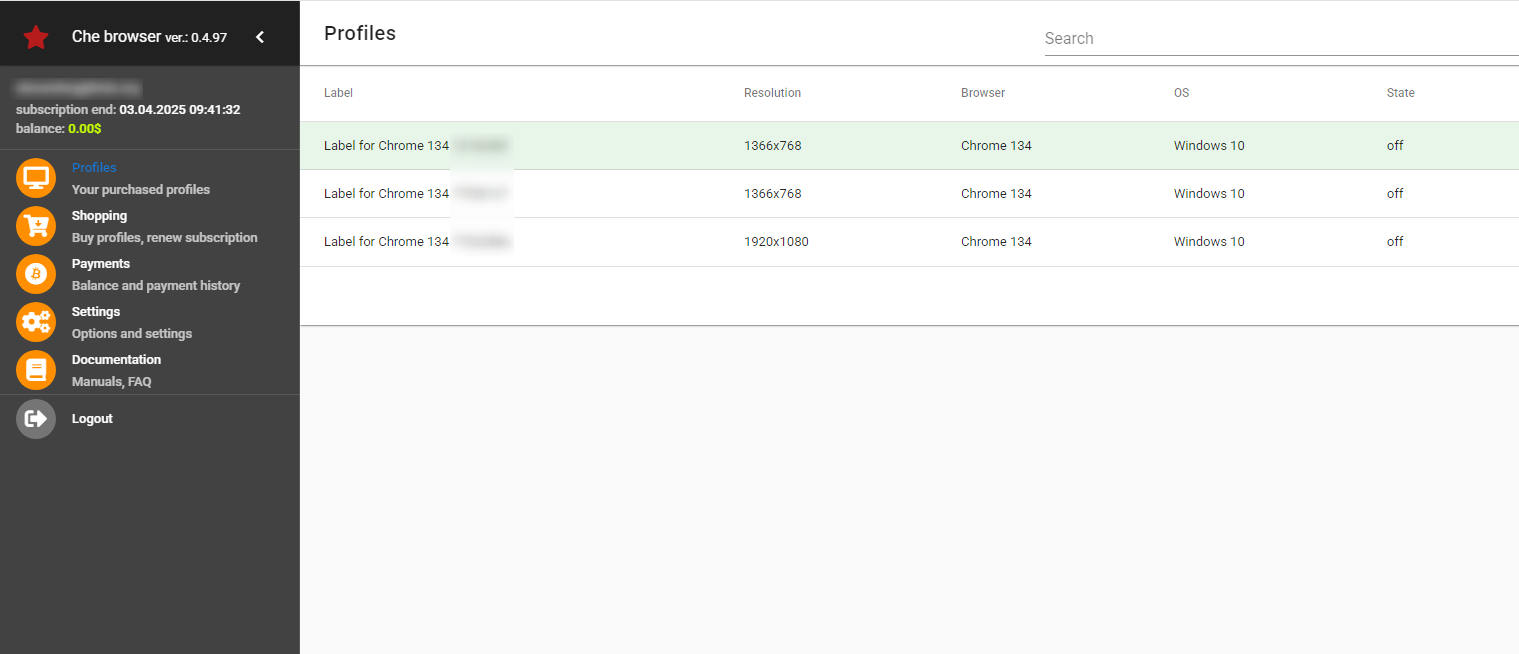 Inside the profile settings, turn on **Connection:direct**.
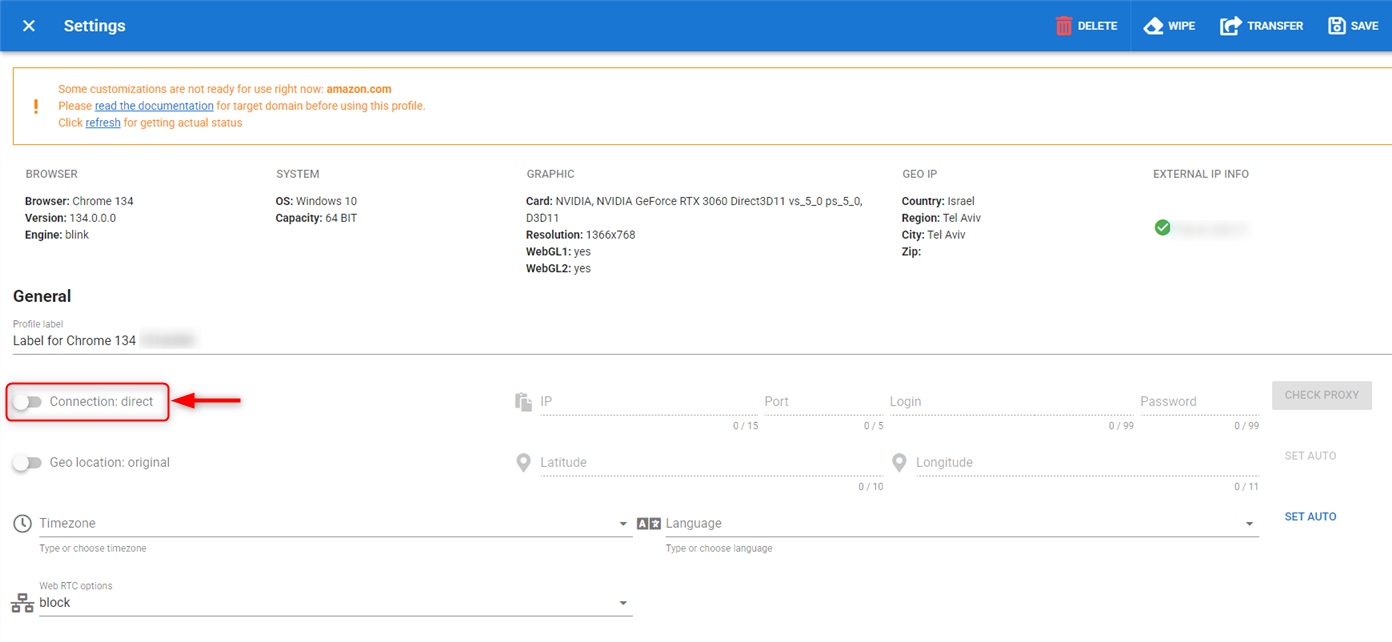 Che Browser supports **only the SOCKS5** protocol, so be sure to use port **31115**. Input your `Host`, `Port`, `Username` and `Password`.
 Click **CHECK PROXY** and verify that the location displayed above has changed.
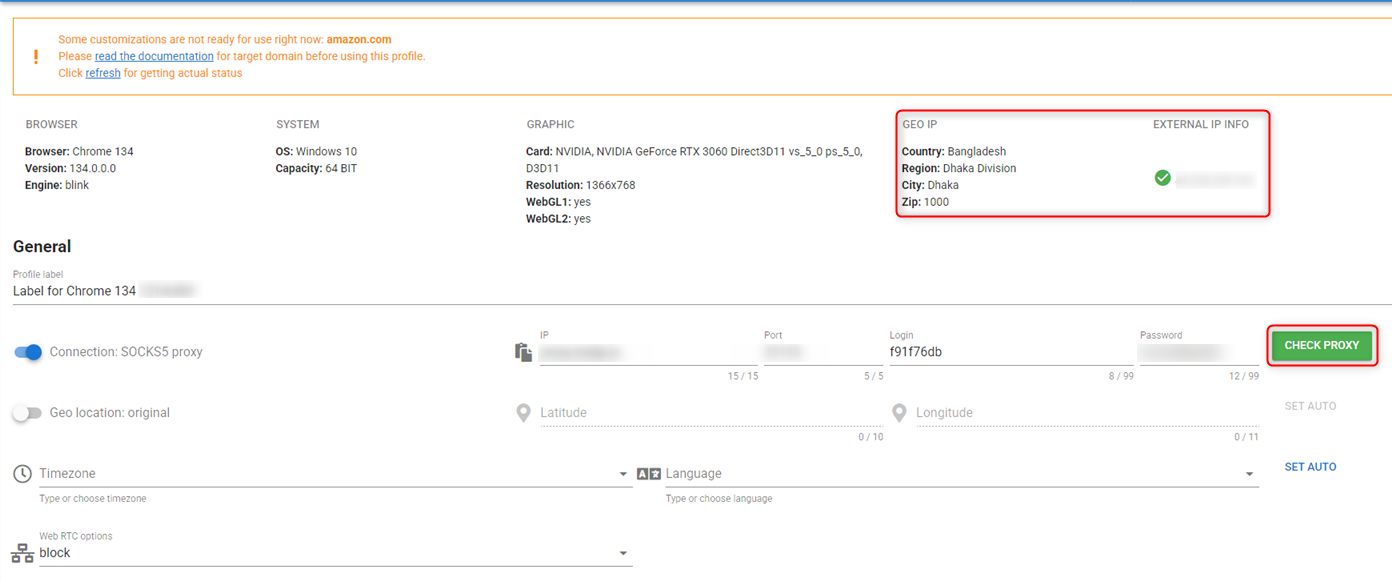 Once the proxy test is successful, save the profile settings and launch the browser profile to begin secure and private browsing.