> ## Documentation Index
> Fetch the complete documentation index at: https://docs.toolip.io/llms.txt
> Use this file to discover all available pages before exploring further.
# How to Use Toolip with BitBrowser
> Streamline your multi-profile browsing with Toolip and BitBrowser. This guide walks you through integrating Toolip proxies into BitBrowser to ensure secure, private, and efficient browsing across all your profiles.
 ## What is BitBrowser?
BitBrowser is a multi-profile browser designed for managing multiple online identities securely and efficiently. Each profile operates in an isolated environment, allowing you to run multiple accounts while minimizing detection risks. By integrating **Toolip**, you enhance anonymity and ensure smooth, uninterrupted connections.
Prefer an enterprise-grade guide? Learn more about Oculus Proxies Bitbrowser Integration Guide.
If you're using **Toolip** to access search engines like **Google, Bing, or Yandex** and facing connection issues, the proxy type could be the issue. **Toolip’s Search Engine ISP Proxies** are optimized for search engines, ensuring stable and unrestricted connections. Switching to **Search Engine ISP Proxies** can resolve access problems.
## How to Use Toolip with BitBrowser
1\. Visit the official [BitBrowser website](https://www.bitbrowser.net/) and download the application.
2\. Follow the installation instructions.
3\. Launch BitBrowser and log in to your account.
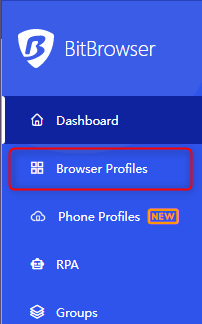
1\. After logging in, navigate to the **Browser Profiles** section in the menu or dashboard.
## What is BitBrowser?
BitBrowser is a multi-profile browser designed for managing multiple online identities securely and efficiently. Each profile operates in an isolated environment, allowing you to run multiple accounts while minimizing detection risks. By integrating **Toolip**, you enhance anonymity and ensure smooth, uninterrupted connections.
Prefer an enterprise-grade guide? Learn more about Oculus Proxies Bitbrowser Integration Guide.
If you're using **Toolip** to access search engines like **Google, Bing, or Yandex** and facing connection issues, the proxy type could be the issue. **Toolip’s Search Engine ISP Proxies** are optimized for search engines, ensuring stable and unrestricted connections. Switching to **Search Engine ISP Proxies** can resolve access problems.
## How to Use Toolip with BitBrowser
1\. Visit the official [BitBrowser website](https://www.bitbrowser.net/) and download the application.
2\. Follow the installation instructions.
3\. Launch BitBrowser and log in to your account.
1\. After logging in, navigate to the **Browser Profiles** section in the menu or dashboard.
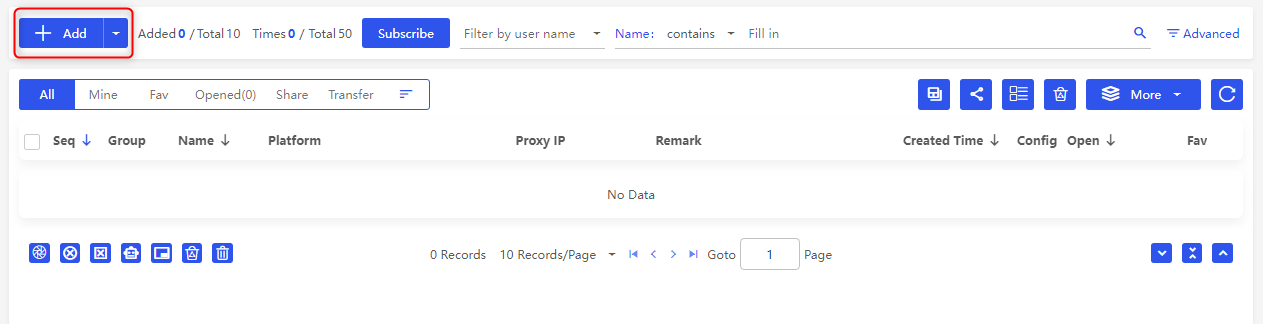
 1\. Click the **+Add** button to create a new profile.
2\. Assign a **descriptive name** to your profile for easy identification.
1\. Click the **+Add** button to create a new profile.
2\. Assign a **descriptive name** to your profile for easy identification.
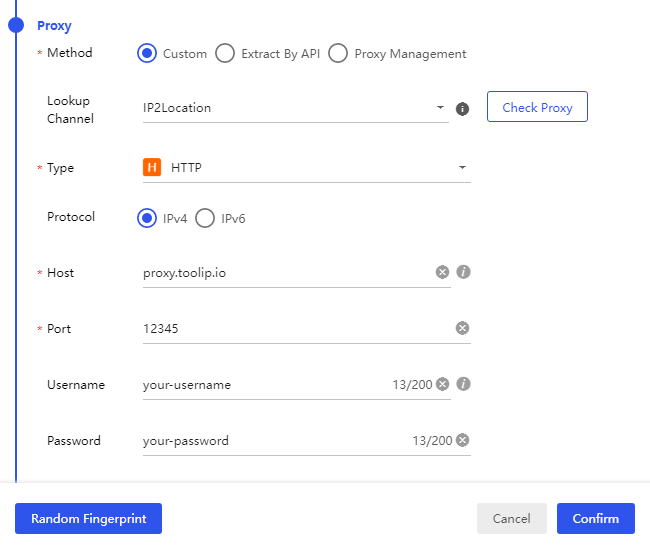
 1\. Scroll to the **Proxy** section of the profile settings.
2\. Fill in your **Toolip proxy details**:
* **Type**: Select `HTTP`, `HTTPS`, or `SOCKS5` based on your Toolip proxy.
* **Host**: `proxy.toolip.io`
* **Port**: Enter the port number from your [Toolip dashboard](https://toolip.io/dashboard).
* **Username**: Your Toolip username. If using a geo-specific proxy, format it like `your-username-country-US`.
* **Password**: Your Toolip password.
3\. Double-check all entries for accuracy.
1\. Scroll to the **Proxy** section of the profile settings.
2\. Fill in your **Toolip proxy details**:
* **Type**: Select `HTTP`, `HTTPS`, or `SOCKS5` based on your Toolip proxy.
* **Host**: `proxy.toolip.io`
* **Port**: Enter the port number from your [Toolip dashboard](https://toolip.io/dashboard).
* **Username**: Your Toolip username. If using a geo-specific proxy, format it like `your-username-country-US`.
* **Password**: Your Toolip password.
3\. Double-check all entries for accuracy.
 1\. Click **Check Proxy** to verify the connection.
2\. If the test is successful, click **Confirm** to save the profile settings.
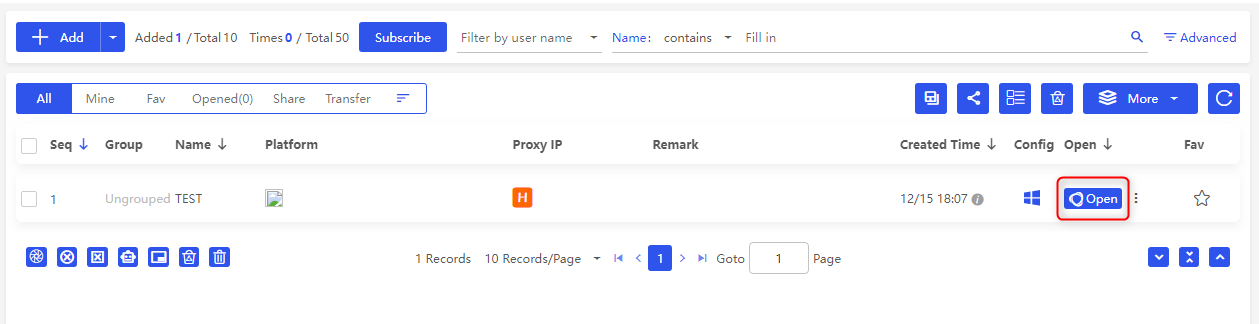
1\. Go to the **Browser Profiles** dashboard.
2\. Locate your newly created profile and click **Open**.
3\. Once the browser launches, navigate to [httpbin.org/ip](http://httpbin.org/ip) to confirm that the displayed IP matches your Toolip proxy.
4\. If the IP matches, your proxy is successfully integrated!
1\. Click **Check Proxy** to verify the connection.
2\. If the test is successful, click **Confirm** to save the profile settings.
1\. Go to the **Browser Profiles** dashboard.
2\. Locate your newly created profile and click **Open**.
3\. Once the browser launches, navigate to [httpbin.org/ip](http://httpbin.org/ip) to confirm that the displayed IP matches your Toolip proxy.
4\. If the IP matches, your proxy is successfully integrated!
 By integrating **Toolip** proxies with **BitBrowser**, you gain a **secure, efficient, and anonymous browsing experience**. Whether you're managing multiple social media accounts, running e-commerce operations, or conducting research, Toolip provides reliable, geo-flexible browsing. Get started today for a seamless workflow! 🚀